In my shop, I’ve seen more than a few engines stranded by a tiny component most folks don’t even know exists—the crankshaft position sensor (CKP). It’s not flashy, but when it fails, the engine often won’t start at all. Over the years, I’ve learned that understanding this sensor’s role, how it behaves when failing, and how to diagnose it properly saves time and prevents misdiagnosed engines. Let’s walk through what it does, how to test it, and when to replace it.
What the Crankshaft Position Sensor Actually Does
The CKP sensor is the ECU’s primary source for engine speed (RPM) and piston position. Without this signal, the ECU can’t determine when to fire spark plugs or inject fuel. On most modern engines, a missing or erratic CKP signal results in a no-start condition—even if the engine cranks normally.
It works by reading a reluctor ring (toothed wheel) attached to the crankshaft. As each tooth passes the sensor, it generates a signal the ECU uses to map crankshaft rotation in real time. This data is critical for fuel injection, ignition timing, misfire detection, and variable valve timing.
How to Diagnose a Failing CKP Sensor
Don’t replace the sensor based on a code alone. Many mechanics jump to replacement when they see P0335 or similar, but wiring issues and mechanical faults are common culprits. Follow a systematic approach.
Step 1: Check for Symptoms and Scan Tool Data
Common signs of CKP failure include:
- No-start condition with normal cranking
- Intermittent stalling, especially when hot
- Rough idle or misfires
- Check Engine Light with CKP-related codes (P0335–P0339)
Use a scan tool to check live RPM data during cranking. If RPM reads 0 or jumps erratically, the ECU isn’t receiving a valid signal. This is your first clue.
Step 2: Visual Inspection
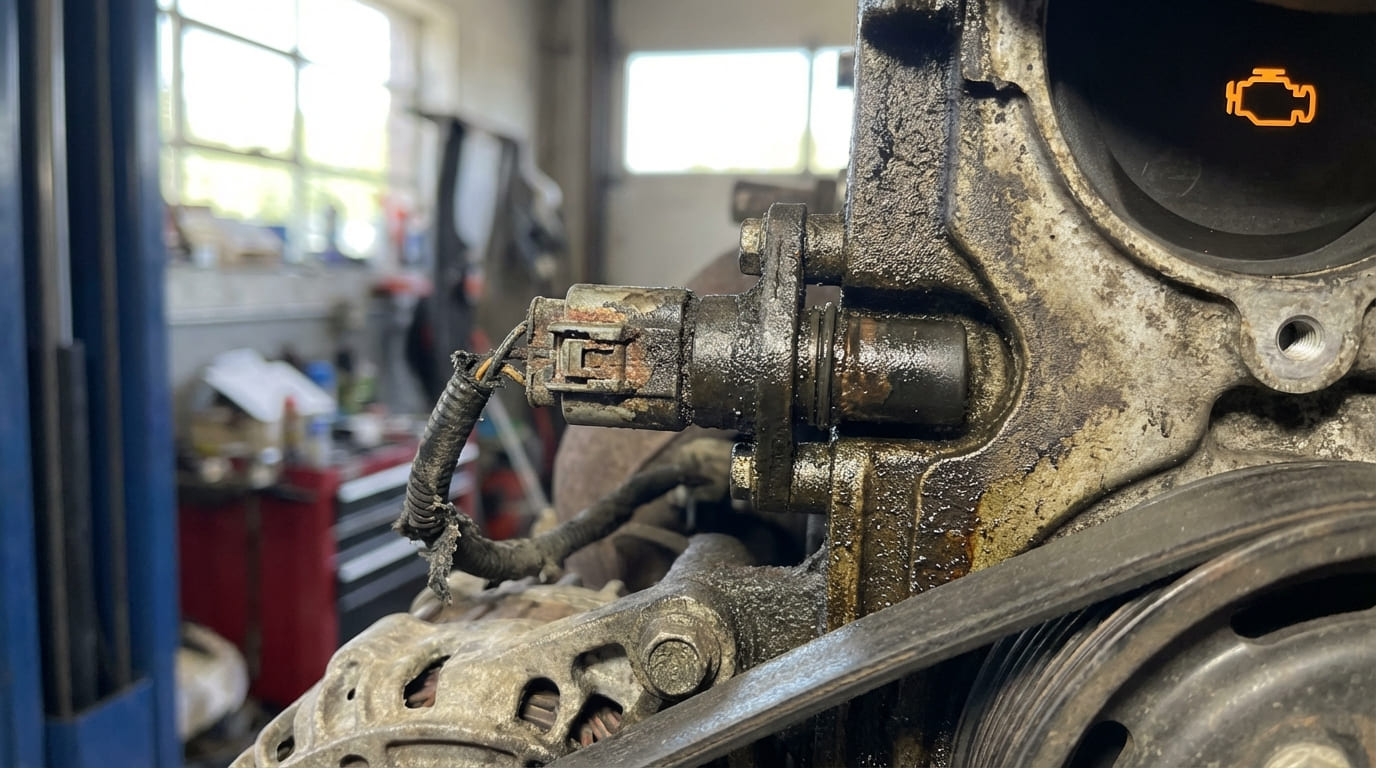
Inspect the wiring harness and connector. Look for:
- Rubbing against exhaust or moving parts
- Oil contamination in the connector (common on rear-mounted sensors)
- Corrosion or bent pins
- Damage from road debris or rodents
If the sensor mounts near the flexplate or crank pulley, check for physical damage to the reluctor ring. Missing or bent teeth will disrupt the signal pattern.
In my shop, we always unplug the CKP sensor and inspect the connector with a flashlight. I’ve found more issues from oil-soaked connectors than from bad sensors themselves.
Step 3: Electrical Testing
Testing depends on sensor type. Identify whether your vehicle uses a reluctance (inductive) or Hall Effect sensor—check the service manual.
For Reluctance Sensors:
- Measure resistance across the sensor terminals. Typical range: 200–2000 ohms (varies by model).
- Check AC voltage while cranking. Aim for at least 0.5V AC. Below 0.3V is often too weak for the ECU to recognize.
For Hall Effect Sensors:
- Verify 5V or 12V reference voltage at the connector (depends on vehicle).
- Confirm a solid ground.
- Monitor the signal wire with a multimeter or scope—it should toggle cleanly between high and low.
Never skip power and ground checks on Hall Effect sensors. I’ve seen dozens of “bad sensor” replacements fail because the real issue was a corroded ground at the transmission housing.
Step 4: Use an Oscilloscope (Best Practice)
An oscilloscope is the gold standard for CKP diagnosis. You’ll see the actual signal waveform:
- Reluctance sensors produce a sine wave. Look for consistent amplitude and frequency.
- Hall Effect sensors produce a square wave. Edges should be sharp, not rounded.
Dropouts, flat spots, or inconsistent spacing indicate a problem—either sensor, wiring, or reluctor ring.
Repair vs. Replace: Cost and Viability
CKP sensors are not repairable. If testing confirms failure, replacement is the only option.
| Component | Average Cost | Labor Difficulty |
|---|---|---|
| OEM Sensor | $60–$150 | Moderate (varies by location) |
| Quality Aftermarket | $30–$80 | Moderate |
| Diagnostic Time (Shop Rate) | $80–$150/hour | 1–2 hours typical |
Given the labor involved, I recommend using OEM or OE-equivalent sensors. Cheap units may save $20 now but cause repeat visits later due to signal incompatibility or premature failure.
Replacement Tips You Won’t Find in Manuals
- ✅ Clean the sensor mounting hole with a thread chaser or tap. Built-up debris can prevent proper seating and alter the air gap.
- ✅ Check the air gap with a non-metallic feeler gauge. Even 0.5 mm too far can weaken the signal—especially on reluctance sensors.
- ✅ Torque the mounting bolt to spec (usually 8–12 Nm). Over-tightening can crack the sensor housing.
- ✅ Replace the O-ring or gasket. Reusing old seals risks oil intrusion into the connector.
- ⚠️ Never assume a new sensor is good. I’ve bench-tested brand-new units that had open circuits.
Common Failure Scenarios and What to Check First
| Symptom | Most Likely Cause | Less Common But Possible | Diagnostic Priority |
|---|---|---|---|
| No-start, 0 RPM on scan tool | Failed CKP sensor or open circuit | Broken reluctor ring, ECU power issue | High – Check signal and power first |
| Intermittent stalling when hot | Heat-sensitive CKP failure | Wiring short to ground, ECU fault | Medium – Monitor live data when hot |
| Rough idle, misfire codes | Weak CKP signal or dirty tip | Timing chain stretch, CMP sensor fault | Medium – Check waveform for dropouts |
| P0335 with normal operation | Intermittent wiring fault | ECU signal processing glitch | Low – Inspect harness movement |
Real-World Lessons from the Shop
Situation: 2010 Honda Accord no-start. P0335 stored. Tech replaced sensor—no fix.
Root Cause: No ground at connector. Corroded ground point near transmission mount.
Master Tip: Always test power and ground before condemning the sensor—especially on Hall Effect types.
Situation: Ford F-150 hard start in cold weather. No codes. Improved after battery replacement.
Root Cause: Weak cranking voltage. Reluctance sensor output dropped below 0.3V AC—ECU couldn’t detect it.
Master Tip: Test signal strength at real cranking speed. A weak battery can mimic a bad CKP.
Situation: VW Passat stalls after 20 minutes. P0336. New sensor didn’t fix it.
Root Cause: Hairline crack in sensor housing. Expanded when hot, killing the signal.
Master Tip: Heat-related failures won’t show up cold. Scope the signal after a full operating cycle.
Final Advice
The CKP sensor may be small, but its signal affects nearly every engine function. Don’t rush to replace it. Diagnose properly with a scan tool, multimeter, and ideally an oscilloscope. Verify power, ground, wiring, and reluctor ring condition first.
When replacing, use quality parts, clean the mounting area, set the correct air gap, and torque the bolt properly. Then road test and monitor cam-crank correlation if your vehicle has VVT.
In 20 years, I’ve learned this: the fastest way to fix a CKP issue isn’t always a new sensor. It’s a methodical diagnosis. Five minutes with a scope can save you an hour of unnecessary labor.