In my two decades in the shop, I’ve torn down more engines than I can count, and few failures generate as much debate—or confusion—as a blown head gasket. It’s tempting to blame the gasket itself, but more often than not, it’s a symptom of a deeper issue. The gasket isn’t failing on its own; it’s being asked to perform under conditions it was never designed for. Let’s walk through the real-world causes, how to approach diagnosis logically, and what to watch for when putting things back together.
Thermal Overload and Overheating
Heat is the number one enemy of a head gasket. When an engine overheats, the aluminum head expands faster than the cast iron block, distorting the mating surface and breaking the seal. Even brief episodes of overheating can compromise the gasket’s integrity, especially in engines with tight tolerances.
Mechanical stress from thermal expansion breaks down gasket material over time. Localized hot spots—often near exhaust valves or in poorly cooled cylinders—can create micro-warping, while differential expansion between head and block places uneven stress on the gasket.
Common causes of overheating include cooling system inefficiencies such as low coolant from leaks, stuck thermostats, clogged radiators (internally from scale or externally from debris), failing water pumps, electric fan motor failure, viscous fan clutch slippage, or a collapsed lower radiator hose under suction. Combustion issues like pre-ignition, detonation, lean fuel mixtures, or advanced ignition timing also increase cylinder temperatures beyond design limits.
How to check for overheating-related failure:
- Use an infrared thermometer to scan surface temps across the head. In my experience, a variance exceeding 10°C between cylinders often indicates flow or combustion issues.
- Perform a cooling system pressure test. Most OEMs require the system to hold 13–18 psi for 15 minutes. A drop suggests a leak, possibly past the gasket.
- Use a chemical block tester (“Block Check”) to detect combustion gases in the coolant. A color change from blue to yellow indicates exhaust intrusion.
- Scan for live ECT (engine coolant temperature) data. If the sensor reads normal but the engine is overheating, suspect a failed thermostat or air pocket.
In my shop, we always pressure-test the cooling system before and after any head gasket job. If it can’t hold pressure cold, it won’t survive thermal cycling.
Excessive Cylinder Pressure
Modern gaskets are engineered for specific pressure ranges. When combustion pressure exceeds those limits—especially in turbocharged engines—the fire ring can collapse or the gasket may blow between cylinders or into a coolant passage.
Overpressure leads to gasket crush, deformation of sealing beads, and eventual blow-by. This is particularly common with boost spikes or uncontrolled detonation.
Root causes include severe detonation or pre-ignition due to low-octane fuel, carbon buildup, or faulty knock sensors; overboost from a malfunctioning wastegate, boost control solenoid, or ECU error; engine modifications that increase compression without proper tuning; and hydro-lock, where coolant or fuel enters the cylinder and resists compression, transferring massive stress to the head and gasket.
How to check for pressure-related failure:
- Perform a cylinder compression test. On most engines, all cylinders should fall within 10% of the highest reading. Low or inconsistent readings suggest leakage.
- A leak-down test is more revealing. If air escapes into the coolant recovery tank, that’s a red flag for a combustion-to-coolant breach.
- Review ECU data logs for abnormal boost pressure, ignition retard, erratic fuel trims, or logged knock sensor activity—chronic detonation often hides in the data.
I once diagnosed a repeat head gasket failure on a turbocharged VW only to find the boost solenoid was stuck open. The owner thought he had a weak gasket—really, he was running 20 psi over spec.
Improper Installation or Component Defects
I’ve seen perfectly good gaskets fail within 1,000 miles because someone skipped a step during reassembly. This category accounts for a surprising number of repeat failures, especially on common engines like the GM LS or Ford Modular.
Uneven bolt torque or incorrect sequence leads to warped clamping force. TTY (torque-to-yield) bolts stretched beyond yield lose their ability to maintain proper load, and surface imperfections prevent full contact across the gasket.
Common mistakes include incorrect torque sequence or values, reusing TTY head bolts (designed to stretch once), warped, pitted, or scratched head or block decks, using the wrong gasket type (wrong thickness alters compression ratio; wrong bore size blocks coolant passages), and rare manufacturing defects like improperly bonded fire rings.
How to verify installation integrity:
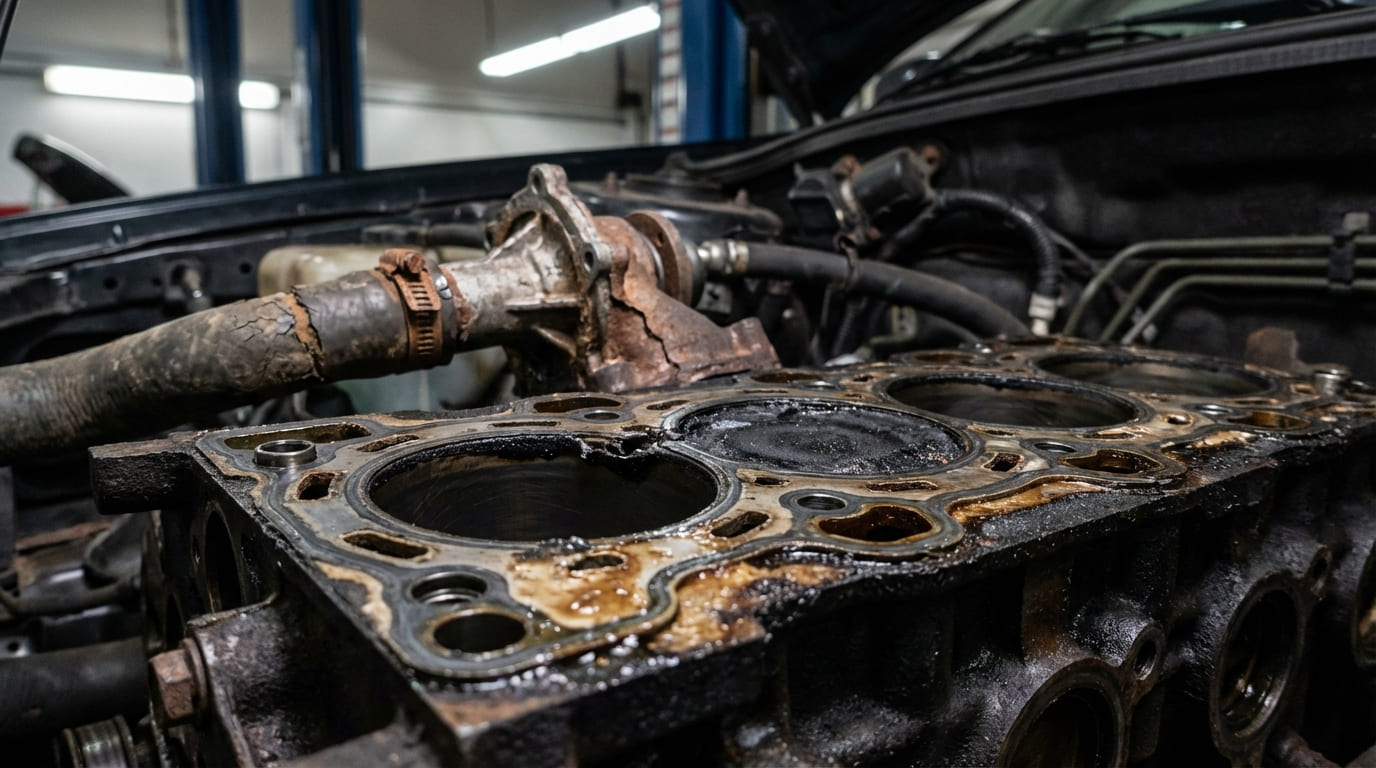
- Inspect the removed gasket. Look for crushing, erosion, or fire ring collapse. Note the location—between cylinders? Near coolant ports? That tells you where the stress was.
- Check head flatness with a precision straight edge and feeler gauge. Cast iron blocks typically allow 0.002″–0.003″ deviation; aluminum heads may only allow 0.0015″. Always consult the factory manual.
- Verify bolt stretch on TTY fasteners with a micrometer if reuse is being considered. Any bolt outside spec must be replaced.
In my shop, we never reuse TTY bolts. The cost difference is negligible—$5 per bolt versus $1,500 for a second teardown.
Corrosion and Chemical Degradation
Coolant chemistry plays a bigger role than many realize. I’ve pulled apart engines with perfect head surfaces and correct torque specs—only to find the gasket material eaten away from acidic coolant.
Improper coolant mixtures or depleted inhibitors allow electrolytic corrosion and acid formation. This attacks both the gasket’s sealing layers and metal components, weakening the entire joint over time.
Root causes include mixing incompatible coolants (e.g., OAT with IAT), extending service intervals too far (even long-life coolants lose buffering capacity after 150,000 miles), and contamination from oil, exhaust gases, or tap water minerals.
How to check for chemical degradation:
- Test coolant pH and inhibitor levels with test strips or a refractometer. Most OEMs specify pH between 8.5 and 10.5. Low pH (<8.0) indicates acid buildup.
- Visually inspect coolant: Rust particles, oil sheen, or sludge suggest contamination.
- Check for electrolysis with a digital multimeter. Place one probe in the coolant and the other on a known good ground. More than 0.1V AC indicates stray current eating at metals and gaskets.
Tap water + coolant = sludge. I tell every DIYer: use distilled water only. Minerals in tap water kill coolant life and corrode gaskets.
Cylinder Head or Block Casting Porosity/Cracks
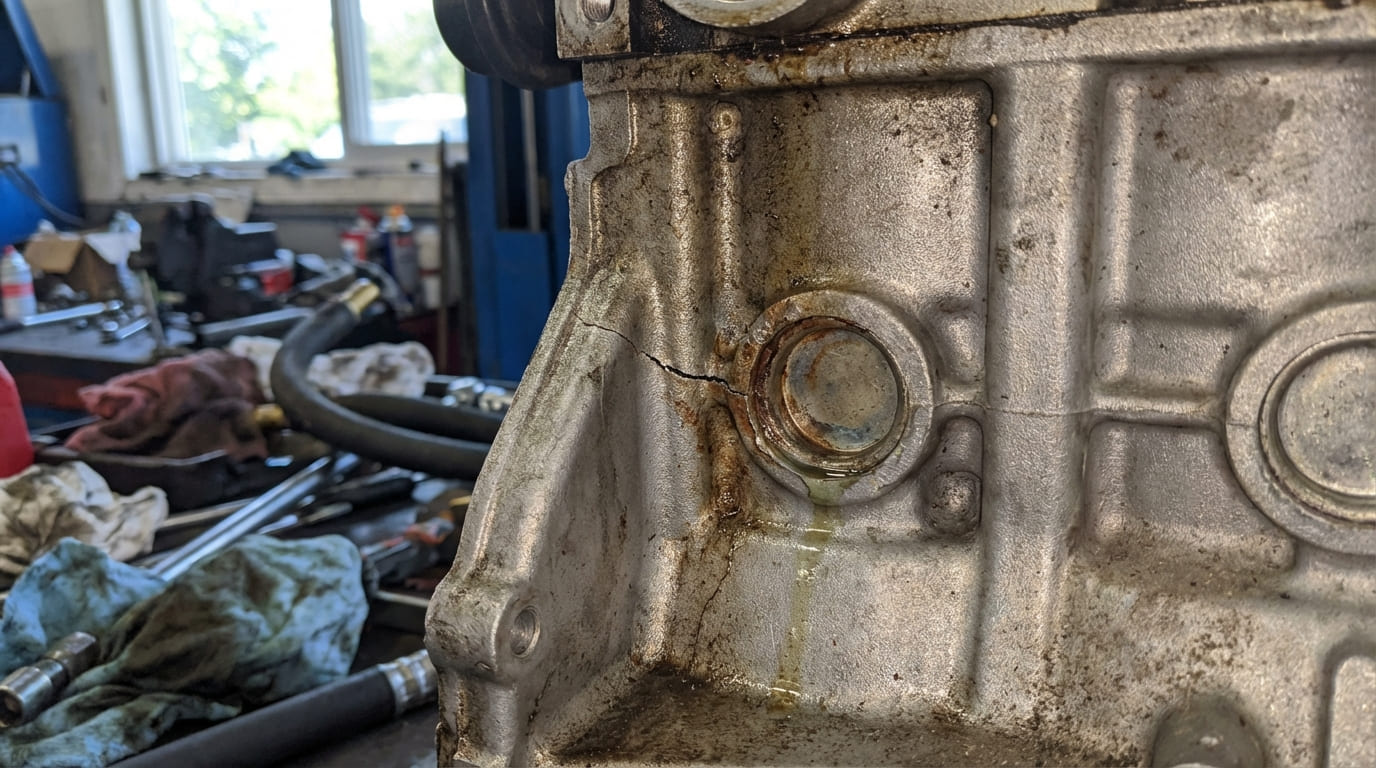
These aren’t gasket failures per se, but they mimic them perfectly. I’ve seen techs replace head gaskets twice before realizing the block had a hairline crack between cylinders.
Porosity or cracks in the casting allow combustion gases, coolant, or oil to migrate where they shouldn’t—often showing up as coolant loss, white smoke, or oil contamination.
Root causes include manufacturing defects (rare but possible, especially in remanufactured blocks), thermal shock (pouring cold water into a red-hot engine), and fatigue from prolonged high load or vibration, particularly in towing or high-RPM applications.
How to check for casting flaws:
- Dye penetrant testing works for surface cracks but requires a clean, dry surface.
- Magnetic particle inspection (MPI) is better for ferrous components but needs specialized equipment.
- Pressure test the head or block with a dedicated fixture. I’ve seen blocks hold vacuum but fail under positive pressure—method matters.
- Inspect for external weeping or internal fluid mixing: milky oil, bubbling in the overflow tank, or coolant in the oil pan.
If you’re replacing a head gasket on an older engine with high mileage, assume the head is warped or cracked until proven otherwise. It’s cheaper to test than to guess.
Head Gasket Material Considerations
The type of gasket used affects failure modes and installation requirements. You can’t treat all gaskets the same.
Multi-Layer Steel (MLS) Gaskets
Common on modern engines, MLS gaskets rely on spring tension between layers. They need smooth surface finishes (typically under 30 RA) and precise torque procedures. If the head surface is too rough, the coating wears through quickly. Cost: $80–$150. Not reusable.
Composite Gaskets
Older design, but still used on some applications. They compress more than MLS and are more forgiving of minor surface imperfections—but degrade faster under heat and chemical exposure. Cost: $40–$90. Best replaced every time.
Copper Gaskets
Used in performance builds. Require O-rings or sealant for coolant and oil passages. Need high clamping force and are sensitive to surface flatness. Cost: $120–$200. Reusable if undamaged, but inspect fire rings carefully.
On any performance build, I go with copper. But I always use a torque plate during honing and recheck flatness after final assembly.
Diagnostic Decision Table
| Symptom | Most Likely Causes | Less Common But Possible | Verification Steps |
|---|---|---|---|
| White smoke + coolant loss | Head gasket leak (combustion to coolant) | Cracked head, intake manifold leak (aluminum V8s), EGR cooler failure | Block test, pressure test cooling system, inspect for bubbles in overflow |
| Overheating + misfire | Head warpage, gasket failure between cylinders | Stuck EGR, clogged catalytic converter, ignition fault | Leak-down test, IR temp scan, check for cross-contamination |
| Oil in coolant | Gasket failure (oil to coolant passage) | Oil cooler leak, transmission cooler in radiator | Inspect oil cooler lines, drain and inspect oil pan |
| Compression loss in adjacent cylinders | Gasket blow-by between bores | Cracked head, warped deck, incorrect torque sequence | Leak-down with cylinder isolation, check head flatness |
| No external symptoms, but coolant contamination | Micro-leak, early-stage failure | Porosity in casting, degraded gasket material | Block test, coolant analysis, possibly pressure test head |
Recommended Practices: Do and Don’t
- ✅ Do: Clean head bolt threads with a bottoming tap and blow out with compressed air. Dry threads can cause false torque readings.
- ✅ Do: Apply lubricant to bolt threads and under heads as specified—usually engine oil for most TTY bolts, but some require moly paste.
- ✅ Do: Follow the OEM torque sequence and values exactly. Even on familiar engines, pull the manual.
- ✅ Do: Inspect head and block surfaces with a precision straight edge and feeler gauge. Clean with a non-abrasive scraper and solvent.
- ⚠️ Avoid: Reusing torque-to-yield (TTY) head bolts unless the factory explicitly allows it. They lose clamping force after first use.
- ⚠️ Avoid: Using sealant on gaskets unless specified. Most modern gaskets are “dry install” and seal via compression.
- ⚠️ Avoid: Overtightening in hopes of “making it seal better.” This often warps the head or damages threads.
Real-World Case Studies
Situation: 2012 Ford F-150 with 4.6L V8 came in with white smoke and coolant loss. First shop replaced the head gasket, but it failed again at 3,000 miles.
Discovery: When I pulled it, the head wasn’t warped, and the gasket looked evenly torqued. But the cooling system had a collapsed lower hose and a weak electric fan clutch. The engine had been running hot under load, especially towing.
Nuanced Lesson Learned: Even if the gasket is the failure point, the root cause was sustained thermal cycling. Fix the cooling system, not just the gasket.
Situation: A modified LS3 with forged internals kept blowing head gaskets between cylinders 5 and 6.
Discovery: Compression and leak-down tests were good—until I checked ignition timing. The tune had 38 degrees of total advance under load, causing chronic detonation. The fire rings were collapsing from pressure spikes.
Nuanced Lesson Learned: High-performance engines demand precise tuning. The gasket wasn’t inadequate—it was being abused by combustion events it couldn’t survive.
Situation: A 1998 Toyota Camry with a blown gasket. Owner used tap water and added coolant occasionally instead of a 50/50 mix.
Discovery: The gasket material was eroded, and the coolant was sludgy with a pH of 6.2. The head wasn’t cracked, but the surface was pitted from corrosion.
Nuanced Lesson Learned: Coolant chemistry matters. Even in a low-stress engine, poor maintenance can destroy a gasket over time—silently and progressively.
Head gasket failure is rarely about the gasket alone. It’s about the system it’s part of—cooling, combustion, assembly, and maintenance. I’ve learned to look beyond the obvious, especially when a repair fails quickly. The answer is often in the details: the torque pattern, the coolant mix, the tuning file, or the surface finish. Always verify, never assume, and consult the service manual for your specific engine—because what works on one block might not apply to the next.