In my shop, this question comes up more than you’d think—especially with higher-mileage vehicles creeping into the 150,000-mile range. The short answer is yes, a single fuel injector can typically be replaced on most modern engines. But the real answer depends on proper diagnosis, vehicle age, fuel system health, and labor considerations. Replace just one without checking the rest, and you might be back under the hood in three months. Let’s break down exactly when it’s safe, when it’s a mistake, and how to do it right.
When Single Injector Replacement Makes Sense
Replacing one injector is technically possible on most port fuel injected (PFI) and many gasoline direct injection (GDI) engines—if the failure is isolated and the rest of the system is clean and functional. The key is confirming it’s truly a single-point failure. Jumping straight to replacement based on a misfire code (like P030X) is a common mistake. Always verify before you replace.
How to Confirm a Single Injector Is Faulty
Start with live data from an OBD2 scanner. If Cylinder 3 shows consistent misfires while others are clean, that’s a clue—but not proof. Rule out mechanical and ignition issues first.
Perform a relative compression test using your scan tool. If all cylinders are within 10% of each other, mechanical integrity is likely intact. Then check the ignition system: inspect the coil and spark plug, and use a scope to verify the spark waveform is strong and consistent. If ignition is good, move to the injector.
Electrical Testing: Don’t Skip the Meter and Scope
Test the suspect injector with a digital multimeter. For high-impedance injectors (most common), expect 12–16 ohms. A reading outside ±10% of spec suggests an open or shorted coil. But some injectors pass resistance tests and still fail under load—so go further.
Use a noid light to confirm the ECU is sending a pulse. If it flashes during cranking, the signal is present. For deeper insight, connect a current clamp and oscilloscope. Watch the current ramp: a slow rise indicates a weak driver or internal resistance; a flat line means no operation. I’ve seen injectors that tested fine electrically but showed erratic current flow—only visible on a scope.
Mechanical Testing: Is It Leaking, Clogged, or Stuck?
Even if electrical tests pass, the injector could be mechanically faulty. Perform a fuel pressure leak-down test: shut off the fuel pump, monitor rail pressure, and watch for a rapid drop. A loss of more than 10 psi in 5 minutes may indicate a leaking injector.
Use a mechanic’s stethoscope on a running engine. A healthy injector clicks rhythmically. A missing or irregular sound compared to others means it’s not cycling. For over-fueling, remove the spark plug and inspect with a borescope. A clean, washed piston crown while others are carboned up points to excessive fuel delivery from that injector.
Should You Replace One or All Injectors?
This decision hinges on mileage, fuel history, and labor cost. Replacing just one saves money upfront—but on high-mileage engines, the others may fail soon. Here’s how to decide:
| Factor | Single Replacement Likely OK | Full Set Replacement Advised |
|---|---|---|
| Vehicle Mileage | <80,000 miles | >120,000 miles |
| Fuel Quality History | No known contamination | History of bad fuel, rusty tank, clogged filter |
| Injector Flow Test | All injectors within 10% of spec | Multiple injectors outside 15% range |
| Cost Consideration | Single injector is <30% of full set cost | Labor access requires major disassembly (e.g., intake manifold removal) |
| Engine Type | PFI with easy access | GDI with high replacement labor and coding requirements |
Situation: A 2016 F-150 with 98,000 miles had a P0305 code and rough idle. Previous shop replaced the coil—no fix.
What I Found: Injector resistance was high (22 ohms), but flow test showed it was fine. The real issue? A cracked intake manifold runner causing a vacuum leak.
Master Tip: High resistance doesn’t always mean a bad injector. Always cross-check with flow and mechanical tests—air leaks can mimic fuel problems.
Situation: A 2012 BMW 328i with GDI developed misfires after a fuel pump job. Tech replaced all injectors assuming contamination.
What I Found: Only one injector was clogged. The others were fine. The real culprit? The new pump was under-pressurizing the system.
Master Tip: Systemic symptoms don’t equal systemic failure. Always test root causes—don’t replace parts on suspicion.
Situation: A 2008 Camry with 142,000 miles had a dead Cylinder 2. Replaced one injector—fixed it. Two weeks later, Cylinder 4 failed. Then Cylinder 1.
Lesson: On high-mileage engines, wear is cumulative. If you don’t test the rest, you’re gambling on time.
Risks of Replacing Just One Injector
A new injector flows more efficiently than aged ones. This can cause fuel trim imbalances—long-term trims creeping to +10% or higher on that cylinder. The ECU adapts, but it may affect fuel economy and emissions.
If debris caused the failure, it could still be in the fuel rail. Always flush the rail and replace the fuel filter—even if it looks clean. Reusing old O-rings or connectors risks leaks and intermittent faults. And on modern GDI or diesel engines, skipping ECU coding can lead to rough idle or recurring DTCs.
Best Practices: Do This, Avoid That
- ✅ Clean the injector bore and fuel rail with lint-free cloth and approved solvent. Debris is a top cause of new injector failure.
- ✅ Lubricate new O-rings with clean engine oil. Dry seals tear easily, causing leaks.
- ✅ Use OEM or OEM-equivalent injectors. Aftermarket units can vary in flow rate and electrical specs.
- ⚠️ Don’t reuse old electrical connectors. Heat and vibration degrade them—intermittent signals mimic injector faults.
- ⚠️ Don’t skip post-repair fuel trim monitoring. Let the engine idle 5–10 minutes and watch STFT and LTFT stabilize.
- ⚠️ Don’t assume coding isn’t needed. If the vehicle uses adaptive fuel strategies, check service info—especially on VW, GM, and BMW GDI engines.
Step-by-Step Replacement Process
Start by relieving fuel pressure. Pull the fuel pump fuse and crank the engine until it stalls, or use the Schrader valve on the fuel rail if equipped. Disconnect the negative battery terminal.
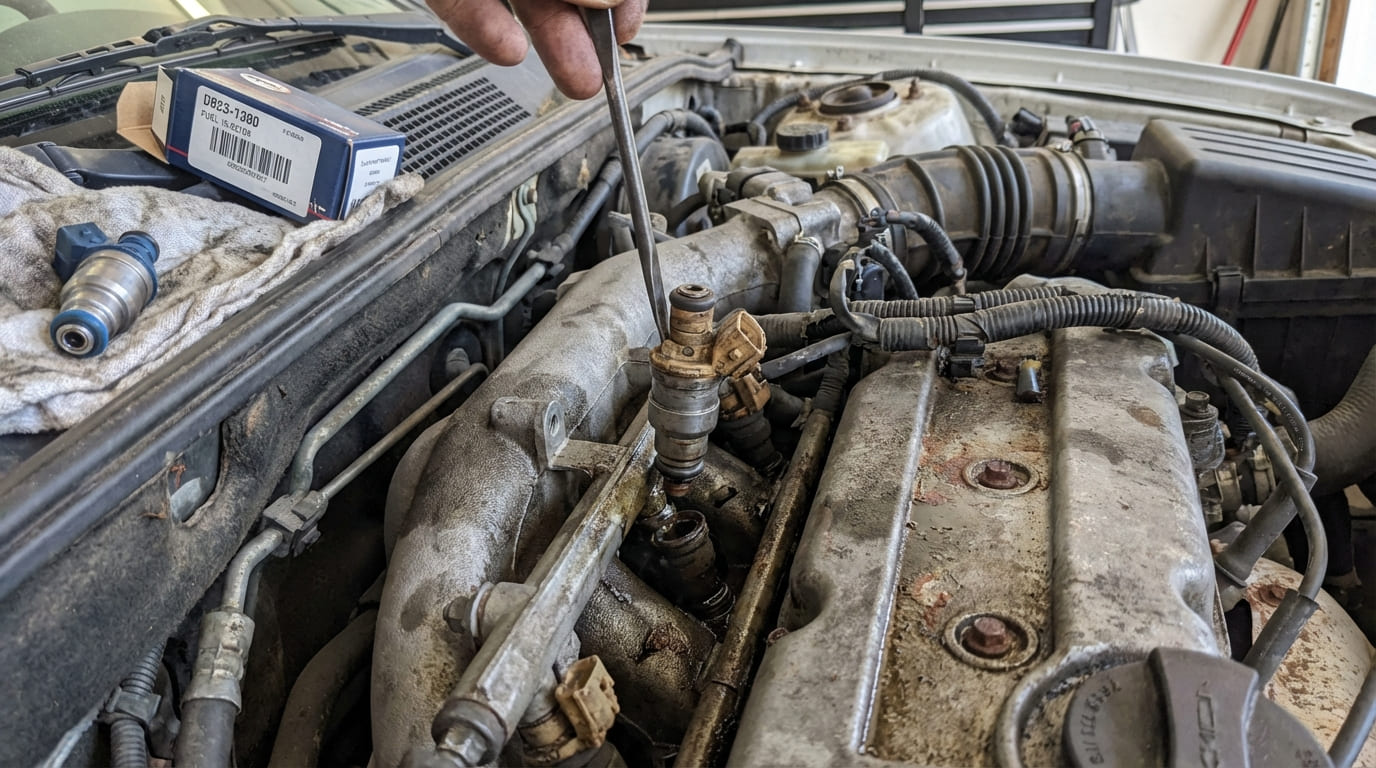
Remove the intake plenum or fuel rail cover. Disconnect the electrical connector, then release fuel line tension. On PFI systems, gently twist and pull the injector from the bore. On GDI, follow OEM procedures—some require special tools to protect high-pressure seals.
Verify the new injector part number matches exactly. Lightly coat O-rings with oil, seat the injector straight, and install the hold-down bolt. Torque to spec—many Toyotas require only 6–8 ft-lbs. Over-torquing cracks the fuel rail.
Post-Replacement Checks
Reconnect the battery. Cycle the key to ON (without starting) three times to prime the fuel system. Then start the engine.
First, check for fuel leaks—visually and by smell. Next, monitor fuel trims. If STFT is fluctuating more than ±8%, investigate further. Clear codes and recheck misfire counters—zero activity is the goal.
If the system requires coding (common on GDI and diesel), use a factory-level scan tool. Enter the new injector’s IMA or C2I calibration code so the ECU can adapt properly. Skipping this may seem fine at idle—but under load, hesitation or DTCs will return.
In my experience, single injector replacement works when the rest of the system is healthy and you’ve confirmed the fault. But on high-mileage engines with hard-to-reach injectors, replacing the full set often makes more financial and reliability sense. Always consult the service manual for torque specs, coding requirements, and adaptation procedures—what works on a Honda won’t necessarily work on a Ford.