As a master mechanic with over 20 years in the bay, I’ve seen coolant neglect destroy otherwise solid engines. The right replacement interval isn’t guesswork—it’s based on coolant chemistry, vehicle specs, and real-world conditions. This guide cuts through the noise and gives you exactly what you need to know to protect your engine.
How Often Should You Replace Coolant?
The answer depends on three key factors: coolant type, manufacturer specs, and how you drive. Ignore any “one-size-fits-all” advice. Here’s what actually matters.
Coolant Chemistry Type (The Real Decider)
The chemical formula in your coolant determines its lifespan. Modern coolants last longer—but only if you use the correct type and maintain the system properly.
| Coolant Type | Typical Interval | Common Applications |
|---|---|---|
| Inorganic Acid Technology (IAT) | 2 years or 30,000 miles | Pre-1996 domestic and Asian vehicles |
| Organic Acid Technology (OAT) | 5 years or 100,000–150,000 miles | GM Dex-Cool, some European models |
| Hybrid Organic Acid Technology (HOAT) | 5 years or 100,000–150,000 miles | Ford, Chrysler, BMW, Mercedes-Benz |
| Phosphated Organic Acid Technology (P-OAT) | 5 years or 100,000–150,000 miles | Toyota, Honda, Hyundai, Kia |
| Silicated Organic Acid Technology (SOAT) | 5 years or 100,000–150,000 miles | Volkswagen, Audi, Porsche |
In my shop, we never assume coolant type by color. I’ve seen green HOAT, orange IAT, and blue OAT. Always verify chemistry—never trust the dye.
How to Identify Your Coolant Type
Getting the right interval starts with knowing what’s in your system. Here’s how to find out—accurately.
Check the Owner’s Manual or OEM Spec
This is your #1 source. Look for terms like “Dex-Cool,” “G-12+,” “Type A,” or “LL-04.” If you don’t have the manual, use a repair database like ALLDATA or Mitchell1. Using the wrong coolant can void warranties and cause premature failure.
Inspect the Coolant Reservoir
Many modern vehicles label the coolant spec right on the reservoir cap or side. Look for phrases like “OAT only” or “G-05 approved.” If labeled, follow that spec—not aftermarket advice.
Visual Inspection (Use With Caution)
Color alone is unreliable, but condition matters. Look for:
- Clarity: Should be bright and clear
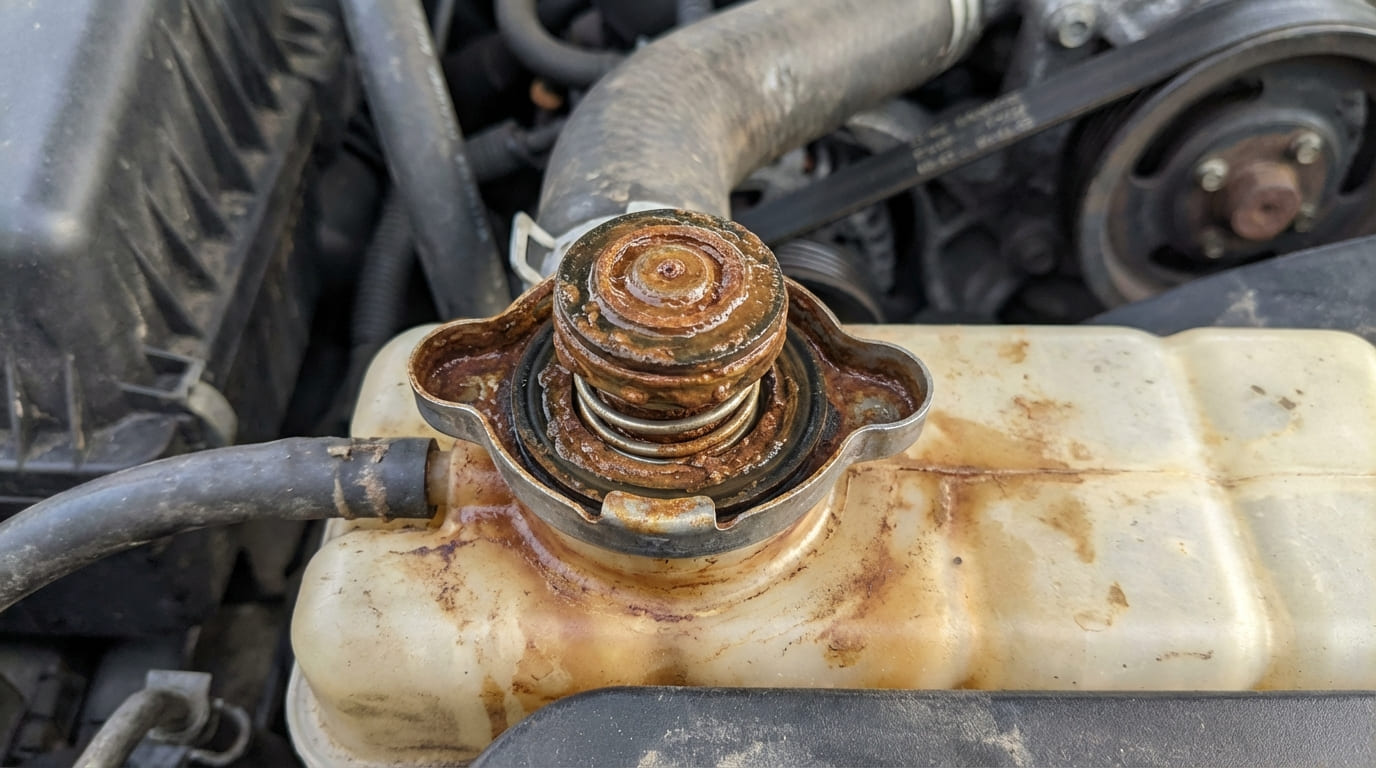
- Debris: Rust flakes or sludge mean trouble
- Oil sheen: Milky film suggests head gasket or transmission cooler leak
Even if it looks good, old coolant can be corrosive. Always test further.
Test the Coolant Condition
Looks aren’t enough. Use these tests to know what’s really going on.
pH Test (Critical for Longevity)
Use a coolant-specific pH strip. Safe range: 7.5 to 11.0. Below 7.0? The coolant is acidic and actively corroding aluminum parts. Replace immediately—even if it looks fine.
Refractometer Test (Freeze/Boil Protection)
Measures glycol concentration. A 50/50 mix gives ~-34°F freeze and ~265°F boil protection. Always use distilled water when topping off. Tap water introduces minerals that form scale and reduce heat transfer.
In my shop, I test every cooling system with a refractometer and pH strip—even on “fresh” coolant. I’ve caught brand-new OAT with pH 6.5 due to prior contamination. Don’t skip this step.
Electrolysis Test (For Unexplained Corrosion)
If you’re seeing rapid water pump or heater core failure, test for stray voltage. Set your multimeter to DC volts. Place the positive probe in the coolant (radiator or reservoir), negative on battery ground. Over 300mV indicates electrical current in the coolant—this accelerates corrosion. Check engine grounds and alternator.
When to Replace Coolant Early
Even if you’re within the mileage interval, replace coolant if you see:
- pH below 7.0
- Sludge, rust, or gel formation
- Oil contamination
- Overheating with no obvious cause
- Recent cooling system repair (water pump, radiator, etc.)
After any repair, flush and refill with the correct coolant. Residual old fluid can react and form damaging gels.
What Happens If You Wait Too Long?
Old coolant doesn’t just “wear out”—it turns harmful.
- Inhibitor depletion: Metal components lose protection, leading to pitting and erosion.
- Acidic shift: Corrodes aluminum heads, heater cores, and radiators.
- Scale buildup: Reduces flow and heat transfer, causing overheating.
- Hose/seal damage: Additives that keep rubber soft degrade—leading to cracks and leaks.
- Electrolysis: High conductivity accelerates galvanic corrosion.
A 2012 Honda came in with a clogged heater core. Coolant was green and looked clean. pH test? 6.8. Owner used generic IAT instead of P-OAT. Wrong chemistry caused silent corrosion. Lesson: Always match the spec, not the color.
Costs and Repair vs. Replace Logic
Preventive coolant service is cheap compared to repairs.
| Service/Repair | Typical Cost (DIY vs. Shop) |
|---|---|
| Coolant flush and refill (DIY) | $30–$60 (coolant + distilled water) |
| Shop coolant service | $100–$200 |
| Water pump replacement | $400–$900 |
| Radiator replacement | $500–$1,200 |
| Heater core replacement | $700–$1,500+ |
Bottom line: Spend $50 now or risk $1,000+ later. The choice is clear.
Best Practices for Coolant Maintenance
- ✅ Use OEM-specified coolant. Aftermarket “equivalents” may not meet exact inhibitor requirements.
- ✅ Flush thoroughly when changing types. Residual coolant can react and form sludge.
- ✅ Always use distilled or deionized water. Tap water causes scale and corrosion.
- ⚠️ Never mix coolant types. Even small amounts can trigger gel formation—especially OAT + IAT.
- ⚠️ Don’t rely on color. Dyes vary—chemistry doesn’t.
- ✅ Inspect radiator cap. A weak seal reduces boiling point and accelerates coolant breakdown.
A 2008 Chevy Impala had sludge in the radiator at 100k miles—despite “Dex-Cool” label. Turned out the last shop topped off with green IAT after a water pump job. Mixing caused gel. Lesson: One wrong top-off can ruin a system. Always use the correct fluid.
A 2015 BMW had water pump failures every 40k miles. Coolant was correct, but owner used tap water to top off. Scale built up, overheated the seal. Lesson: Even with the right coolant, bad habits kill components.
Final Recommendation
Follow this sequence:
- Check owner’s manual for coolant spec and interval.
- Verify current coolant type (don’t guess by color).
- Test pH and concentration with strips and refractometer.
- Flush and refill with correct coolant and distilled water every interval—or sooner if tests fail.
Coolant is not just antifreeze. It’s a precision fluid that protects your engine. Treat it right, and it’ll protect you for years.