In my shop, I’ve seen spark plugs blamed for everything from rough idles to transmission shudders. But after two decades turning wrenches and diagnosing engines, I’ve learned that spark plugs are more like messengers than culprits. They don’t cause most problems—but they sure can tell you when something’s wrong. Let’s break down what they actually do, how to diagnose issues, and what their condition reveals about your engine’s health.
Core Function: Igniting the Air-Fuel Mixture
Spark plugs ignite the compressed air-fuel mixture in the combustion chamber. When the ignition coil sends high voltage—typically 15,000 to 45,000 volts—to the plug, it jumps the gap between the center and ground electrodes, creating a spark hot enough to start combustion. This happens just before top dead center on the compression stroke, timed precisely by the Engine Control Module (ECM).
If the spark is weak, mistimed, or absent, the engine misfires, loses power, or runs rough. But here’s the key: the plug rarely causes the failure. It’s usually a symptom of a deeper issue in the ignition or fuel system.
In my shop, we never replace spark plugs based on symptoms alone. We test the entire ignition system first. More than half the time, the real problem is a failing coil, worn wire, or sensor fault—not the plug.
How Spark Plug Condition Diagnoses Engine Problems
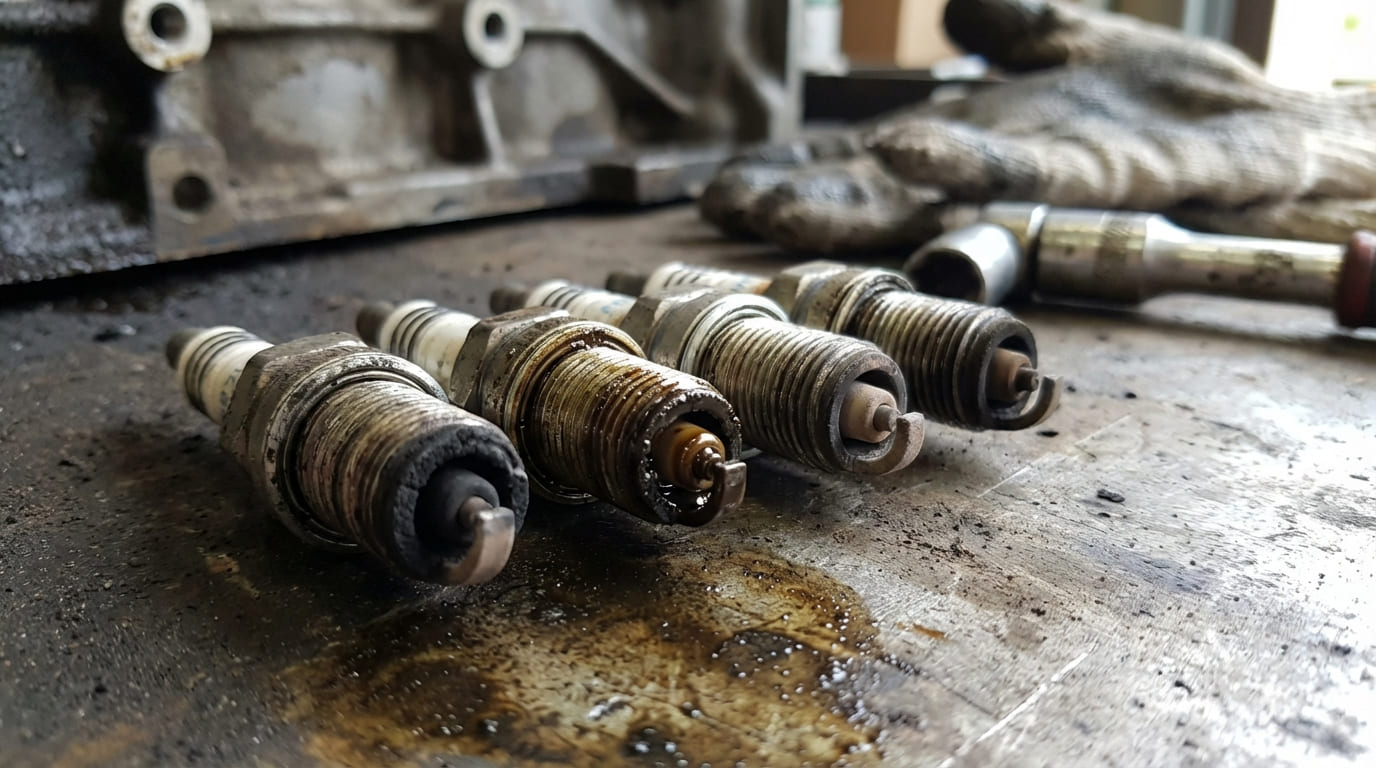
A removed spark plug can act like a diagnostic window into the combustion chamber. Its appearance often points to mechanical issues elsewhere.
Common Plug Conditions and What They Mean
| Condition | Most Likely Cause | Action Required |
|---|---|---|
| Black, fluffy carbon deposits | Fouling from rich mixture, weak spark, or short trips | Check ignition coils, fuel injectors, PCV system |
| Wet, black with oil residue | Oil entering combustion chamber | Inspect valve seals, guides, or piston rings |
| White or melted electrode | Pre-ignition or overheating | Check cooling system, knock sensor, and heat range |
| Gap significantly widened | Normal wear or detonation | Replace plugs; check for lean condition or incorrect timing |
| Cracked insulator | Thermal shock or improper installation | Replace immediately; check for over-torquing or incompatible plug |
How to Check Spark Plugs: A Step-by-Step Diagnostic Approach
- Remove all spark plugs using a 6-point socket and ratchet. Label each by cylinder to track individual conditions.
- Inspect each plug visually. Compare to the table above.
- Measure the gap using a wire-type feeler gauge. Record each measurement.
- Check resistance on resistor-type plugs with a multimeter. Compare to spec (typically under 10k ohms).
- Perform a compression test if multiple plugs show abnormal wear or fouling.
- Scan for fuel trims. Long-term fuel trim above +10% suggests a lean condition; below -10% indicates rich.
Always pull all plugs, not just the one from a misfiring cylinder. Comparing them side-by-side reveals patterns. One fouled plug among clean ones suggests an isolated issue—like a clogged injector. All fouled? Likely a system-wide problem like a faulty MAF sensor.
Spark Plug Specifications That Matter
Using the correct plug isn’t just about fit—it affects performance, efficiency, and reliability. These three specs are critical.
Heat Range
The heat range determines how well the plug resists fouling and pre-ignition. A “hot” plug burns off deposits better in city driving. A “cold” plug handles high temperatures in performance engines.
Using a plug that’s too cold in a daily driver leads to carbon buildup. Too hot, and it can glow, causing pre-ignition under load.
I once diagnosed a persistent knock issue on a turbocharged engine. The owner had installed colder plugs “to be safe.” But the shorter insulator wasn’t retaining enough heat at idle, leading to carbon buildup. That carbon eventually started glowing and triggering knock. We switched back to OEM heat range—problem solved.
Thread Reach and Seat Type
Thread reach must match the cylinder head depth. Too long, and the electrode can hit the piston. Too short, and combustion gases leak, causing hot spots.
Seat types—tapered or gasket—require different torque procedures. Tapered seats rely on metal-to-metal contact; gasket types use a crush washer. Mixing them or using the wrong torque can cause leaks or thread damage.
On aluminum heads, always torque to spec with a calibrated wrench. Typical range: 13–20 ft-lbs, depending on plug size.
Gap
The gap directly impacts ignition voltage demand. Too wide, and the coil may not fire it—especially under boost or high load. Too narrow, and the spark may not ignite the mixture effectively.
OEM gaps range from 0.028″ to 0.044″, but always verify in the service manual. Pre-gapped plugs are often off by 0.005″ or more.
Use a wire-type feeler gauge, not a flat blade. The blade can compress fine-wire iridium electrodes, giving a false reading. And never bend the center electrode—it can crack the insulator.
Repair vs. Replace: Cost and Viability
Spark plugs are cheap relative to the problems they can mask. Replacing them at recommended intervals is always cost-effective.
| Plug Type | Cost (Each) | Expected Life | Best Use Case |
|---|---|---|---|
| Copper | $2–$5 | 30,000 miles | Older vehicles, budget repairs |
| Platinum | $8–$15 | 60,000–100,000 miles | Modern daily drivers |
| Iridium | $10–$20 | 100,000–120,000+ miles | Direct-injection, high-compression engines |
Labor to replace plugs: $100–$300, depending on engine design. Boxer engines (Subaru) or V6s with coils under intake manifolds take longer. If you’re doing it yourself, allow 1–3 hours.
On engines with coil-on-plug setups, replace spark plug tubes and valve cover gaskets if they’re leaking oil. A $20 fix now prevents $200 in fouled plugs later.
Maintenance and Replacement Best Practices
Follow these steps to avoid common mistakes and ensure long-term reliability.
- Clean the plug well with compressed air before removal. Prevents debris from falling into the cylinder.
- Always check gap—even on pre-gapped plugs. Adjust with a proper gap tool, not pliers.
- Use a torque wrench. Aluminum heads strip easily. Typical torque: 13–15 ft-lbs for 14mm plugs.
- Apply anti-seize sparingly—only on the threads, not near the seat. It can affect torque and heat transfer.
- Never reuse torque-to-yield spark plugs. Most modern engines use them, and they stretch during installation.
- Stick to OEM-specified plugs or high-quality equivalents. Some cheap brands use inferior alloys that wear fast.
The factory service manual is your bible. Heat range, torque specs, gap, and thread reach vary by model and year. I’ve seen technicians use the “right” plug number—only to find it was for a different engine variant. Always double-check.