Worn pistons can lead to poor engine performance, oil consumption, and eventual engine failure. Diagnosing them requires more than just one symptom or test—it demands a layered approach combining sound, testing, and inspection. This guide walks you through the real-world process I use in the shop to confirm piston wear and avoid costly misdiagnoses.
Start with the Symptoms: What You Can Hear and See
Before grabbing tools, listen and observe. These initial clues help determine whether deeper diagnostics are worth the effort.
Audible and Visual Warning Signs
A rhythmic knocking from the lower engine, especially on cold start, may point to piston slap. This noise typically fades as the engine warms and correlates with RPM. It’s most common in aluminum or hypereutectic pistons with tight cold clearances. If the knock persists when hot, suspect rod bearings instead.
Excessive blow-by—heard as hissing from the oil filler cap or PCV valve under load—means combustion gases are escaping past the rings. While this often stems from ring or cylinder wear, it can also mimic piston skirt issues.
Blue exhaust smoke during acceleration or deceleration suggests oil burning. When paired with high oil consumption, it may indicate worn piston rings or skirt damage. But don’t jump to conclusions: valve guide seals and turbocharger leaks cause identical symptoms.
Oil-fouled spark plugs with wet, shiny deposits confirm oil is entering combustion. However, this doesn’t isolate the source—always cross-check with other tests.
Non-Invasive Diagnostic Tests You Can Perform
These tests require minimal disassembly and help confirm whether piston wear is likely. Always perform them in sequence to build a complete picture.
Compression and Leak-Down Testing
Begin with a dry compression test. Disable fuel and ignition, remove all spark plugs, and crank each cylinder for 4–5 compression strokes. Record the readings.
A healthy engine typically shows 130–160 PSI with no more than 10–15% variation between cylinders. Readings below 100 PSI or a wide spread signal trouble.
Follow up with a wet compression test: add one teaspoon of engine oil into the suspect cylinder and retest. If compression increases significantly, the issue is likely worn piston rings or cylinder walls. No change suggests valve or head gasket problems.
For greater accuracy, perform a leak-down test. This applies regulated air (100 PSI) to a cylinder at TDC on the compression stroke. A loss over 10–15% is excessive.
Listen for where the air escapes:
- Hissing from the oil filler cap → Piston rings or cylinder wall leakage
- Sound from intake manifold → Intake valve leak
- Noise from exhaust → Exhaust valve issue
- Bubbles in coolant → Possible head gasket or cracked cylinder head
Consistent crankcase leakage across multiple cylinders often points to generalized wear—including piston skirts and rings—common in high-mileage engines.
Used Oil Analysis (UOA): The Hidden Clue
Send a sample of your engine oil to a lab for spectroscopic analysis. Elevated aluminum (Al) levels strongly suggest piston wear, especially from skirt scuffing or ring land damage. Iron (Fe) spikes indicate cylinder or ring wear, while chromium (Cr) often means ring degradation.
Silicon (Si) points to dirt ingestion—possibly from a faulty air filter—causing abrasive wear. But remember: UOA shows wear is occurring, not exactly where. Use it to support other findings, not as a standalone diagnosis.
In my shop, we always run a UOA before teardown. I’ve saved customers thousands by discovering that high aluminum was from break-in wear, not ongoing failure. Always compare results over time—trends matter more than single data points.
Borescope Inspection: See Inside Without Disassembly
Using an articulating borescope through the spark plug hole, inspect the piston crown and upper cylinder walls while rotating the crankshaft manually.
Look for:
- Pitting or erosion on the crown → Detonation damage
- Oil pooling or heavy carbon → Poor ring sealing
- Vertical scoring on cylinder walls → Piston skirt contact or debris
You won’t see the full skirt, but scuff marks near thrust faces can indicate excessive clearance. I’ve diagnosed early piston slap this way when compression numbers were borderline.
| Symptom / Test | Most Likely Cause(s) | Less Common but Possible Causes | Diagnostic Confidence Level |
|---|---|---|---|
| Blue smoke + oil consumption | Worn rings, piston skirt damage | Valve guide seals, turbocharger seal leak | Moderate – requires corroboration |
| Piston slap (cold only) | Excessive piston-to-wall clearance | Loose rod bearing (rare at cold start) | High – if sound pattern matches |
| Wet compression increase | Piston ring wear | Cylinder glaze, temporary oil seal | High – but not definitive |
| Leak-down >15% + crankcase hiss | Ring/cylinder wear | Blown lower compression seal (rare) | Very High – strong indicator |
| High aluminum in UOA | Piston wear (skirt or ring lands) | Manufacturing debris, new engine break-in | Moderate – trend over time matters |
When Disassembly Is Necessary: What to Check
If non-invasive tests confirm significant wear, disassembly is the only way to verify piston condition. This step is costly—typically $1,500–$4,000 in labor—so ensure all other possibilities are ruled out first.
Piston Removal and Visual Inspection
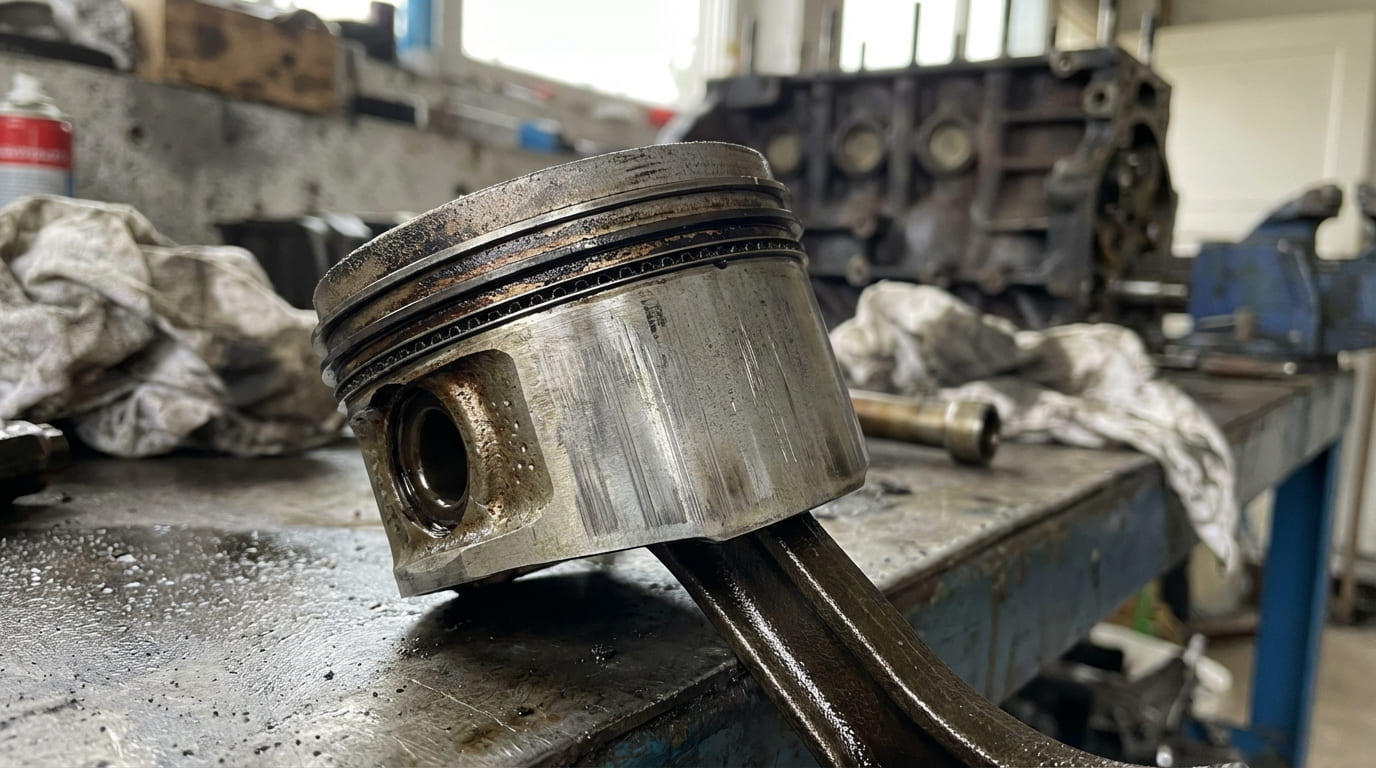
After removing the oil pan and connecting rod caps, carefully extract each piston and rod assembly. Clean with solvent and a soft brush—never use a wire wheel, as it can erase critical wear patterns.
Label each piston and rod to maintain orientation. Thrust-side wear differs from anti-thrust, and matching components to their original bores helps identify abnormal wear.
Inspect the following areas:
Piston Skirt
A healthy skirt has even, light contact marks. Worn skirts show vertical scoring, galling, or material transfer—especially on the major thrust side (opposite the rod throw during the power stroke). Causes include poor lubrication, overheating, or incorrect initial clearance.
Piston Crown
Detonation creates a sandblasted or pitted appearance. Pre-ignition can melt edges or even burn a hole through the center. I once traced a melted piston to a clogged fuel injector causing a lean condition—not inherent wear.
Piston Ring Lands and Grooves
If the top ring rocks when wiggled, side clearance is excessive. Carbon buildup can stick rings in place, mimicking wear. Always clean grooves with a ring groove cleaning tool before measuring.
Broken ring lands often stem from detonation or incorrect end gap. Never assume ring failure means piston replacement—sometimes only the rings are at fault.
Piston Pin Bore
Check for elongation or scoring. A bore that’s oval or loose in the pin suggests fatigue or lubrication failure. Measure with a bore gauge in two planes—parallel and perpendicular to the pin axis—because wear is rarely uniform.
Dimensional Measurements: Precision Matters
Use precise tools and factory specs. Generic “acceptable” numbers from forums are unreliable.
Measure piston skirt diameter with a micrometer at the location specified in the service manual—usually 90 degrees to the pin and a set distance from the crown. Wear beyond 0.002″–0.004″ (varies by OEM) typically requires replacement.
For ring groove clearance, insert a new ring and use a feeler gauge. Typical limits: 0.0015″–0.004″ for compression rings. Exceeding this means poor ring sealing, even with new rings.
Check piston pin bore diameter with a telescoping gauge and micrometer. Ovality over 0.001″ often means replacement is needed—aluminum pistons can deform under load if compromised.
Inspect Related Components Before Blaming the Piston
Always check the cylinder bore for taper and out-of-roundness using a bore gauge at top, middle, and bottom. Also measure ring end gap in the bore—excessive gap suggests cylinder wear, not just ring wear.
Inspect connecting rods for bends or stretched bolts, which can misalign the piston and accelerate skirt wear. Use Plastigauge on rod bearings—excessive clearance there can mimic piston noise.
Situation: A 2010 V6 came in with blue smoke and 40% leak-down on cylinder #3. Owner assumed bad rings. Discovery: After teardown, the piston looked fine—no skirt scoring, minimal ring wear. But the cylinder bore had a diagonal gouge. A loose freeze plug had flaked off and entered the bore. Nuanced Lesson Learned: Physical damage can mimic wear symptoms. Always rule out foreign debris before concluding material degradation.
Situation: Cold piston slap in a rebuilt 5.3L LS. Sound faded after warm-up, but customer was concerned. Discovery: Micrometer measurements showed skirt clearance at the upper end of spec—but within GM’s allowable range. The pistons were hypereutectic, known for tighter cold clearances. Nuanced Lesson Learned: Not all piston noise is failure. Some clearance characteristics are by design—consult factory data before condemning components.
Situation: High aluminum in UOA, but compression and leak-down were normal. No smoke or noise. Discovery: The engine had been recently rebuilt. Elevated aluminum was from initial break-in wear, not ongoing failure. Follow-up samples showed levels stabilizing. Nuanced Lesson Learned: Context matters. Wear metal trends over time are more meaningful than a single oil analysis result.
Common Causes of Piston Wear
Lubrication failure is the top cause—low oil level, clogged pickup screens, or wrong viscosity oil starve the lower ring lands and skirt. I’ve seen engines with perfect oil change intervals but worn pistons due to “high-mileage” oils with excessive additives that increase deposits.
Overheating breaks down oil films and causes aluminum to expand beyond design clearances. Detonation and pre-ignition generate extreme heat and shockwaves—both destroy pistons over time.
Dirt ingestion—even small amounts—shows up as silicon in oil analysis and causes abrasive wear. Always inspect the air filter and intake path.
Improper break-in is a silent killer. Idling too long or skipping load cycles prevents rings from seating. I follow OEM break-in procedures exactly—varies by engine, but usually involves controlled RPM and load for the first 500–1,000 miles.
Risks of Driving with Worn Pistons
Ignoring piston wear risks more than power loss. Increased blow-by raises crankcase pressure, which can rupture seals. Oil consumption fouls catalytic converters and O2 sensors—replacing a cat costs $1,000+.
In severe cases, a broken skirt can jam in the cylinder, leading to connecting rod failure or engine block damage. At that point, repair often exceeds the vehicle’s value.
Best Practices: What to Do and What to Avoid
- ✅ Recommended: Clean piston grooves with a ring groove cleaning tool before measuring side clearance—residue skews results.
- ✅ Recommended: Measure skirt diameter at the OEM-specified location and orientation—skirt profiles are often tapered or cam-ground.
- ✅ Recommended: Compare wear across all pistons—uniform wear suggests system-wide issues; isolated wear points to localized problems.
- ⚠️ Avoid: Using generic wear limits from forums—always consult the specific service manual for acceptable tolerances.
- ⚠️ Avoid: Reassembling without checking cylinder bore condition—worn bores will destroy new pistons.
- ⚠️ Avoid: Assuming ring wear equals piston wear—rings can fail independently due to carbon buildup or incorrect gap.
Diagnosing worn pistons isn’t about one red flag—it’s about stacking consistent evidence. I’ve torn down engines with failed oil analysis but nearly new pistons, and others that ran smoothly with 0.005″ skirt wear. The key is context, not thresholds.
Always refer to the manufacturer’s service manual for specifications and procedures. What’s acceptable on one engine may be catastrophic on another.