In my two decades in the shop, fuel injector clogging has been one of the most common—and often misdiagnosed—issues I see. It’s tempting to blame the injectors when a car runs rough or misfires, but clogging is rarely the root cause. It’s the symptom. Real-world clogging stems from fuel quality, contamination, heat exposure, and poor maintenance. This guide cuts through the noise, focusing on what actually causes injectors to fail, how to diagnose it properly, and what you can do—both as a DIYer and a smart owner—to prevent unnecessary repairs.
Primary Causes of Fuel Injector Clogging
Fuel injector clogging doesn’t happen overnight. It’s the result of long-term exposure to contaminants, poor fuel quality, or system failures. Below are the main culprits, backed by real-world shop experience.
Particulate Contamination
Physical debris is one of the most direct causes of injector blockage. These particles bypass the fuel filter and lodge in critical areas like the filter basket or nozzle orifices.
Common sources:
- Rust flakes from corroded steel fuel tanks (common in older vehicles)
- Sand or dirt from a loose fuel cap or contaminated gas can
- Plastic fragments from degraded in-tank fuel pump modules
Even high-quality fuel filters can’t catch all fine particles, especially if they break apart over time. Once inside the injector, these particles restrict fuel flow and distort spray patterns.
In my shop, we always inspect the old fuel filter when diagnosing clogging. If it’s packed with rust or grit, the tank may need cleaning—otherwise, new injectors will just clog again.
Fuel Deposits (Gums and Varnishes)
Fuel breaks down over time, especially when exposed to heat and oxygen. This leads to sticky residues that coat internal injector components.
Key contributors:
- Long-term fuel storage (e.g., vehicles driven infrequently)
- Heat soak in direct-injection engines (injectors sit in hot combustion chambers)
- Short-trip driving (engine never reaches full operating temperature)
- Low-detergent gasoline (non-Top Tier fuels)
These deposits build up on the pintle, seat, and injector tip, causing poor sealing, inconsistent spray, and even internal sticking.
I’ve seen direct-injection engines with injectors clogged by carbon in under 60,000 miles—especially in city-driven vehicles. The fix isn’t just cleaning injectors; it’s changing driving habits and fuel quality.
Microbial Growth (Diesel and Stored Gasoline)
Water in the fuel tank—caused by condensation or poor refueling—creates a breeding ground for microbes. These organisms produce sludge and acidic byproducts that clog filters and corrode injectors.
This is more common in diesel, but gasoline vehicles stored for months (e.g., seasonal cars) are also at risk.
How to check: Drain a small amount of fuel from the tank. If it’s cloudy, smells sour, or has gel-like strands, microbial contamination is likely.
Biocides don’t always work. I’ve seen cases where the wrong biocide made sludge worse by killing microbes but leaving biomass behind. Physical tank cleaning is often required.
Low Lubricity Fuel (Diesel Only)
Ultra-Low Sulfur Diesel (ULSD) lacks natural lubricity. Without proper additives, it accelerates wear in high-pressure injectors.
Wear generates microscopic metal particles that circulate through the system, contributing to clogging and eventual injector failure.
How to check: If injectors show scoring or wear despite low hours, suspect poor fuel quality. Use only reputable diesel stations and consider a lubricity additive if operating in rural areas.
Injector-Specific Failure Points
Not all clogs are the same. Knowing where and how blockages occur helps target diagnosis and repair.
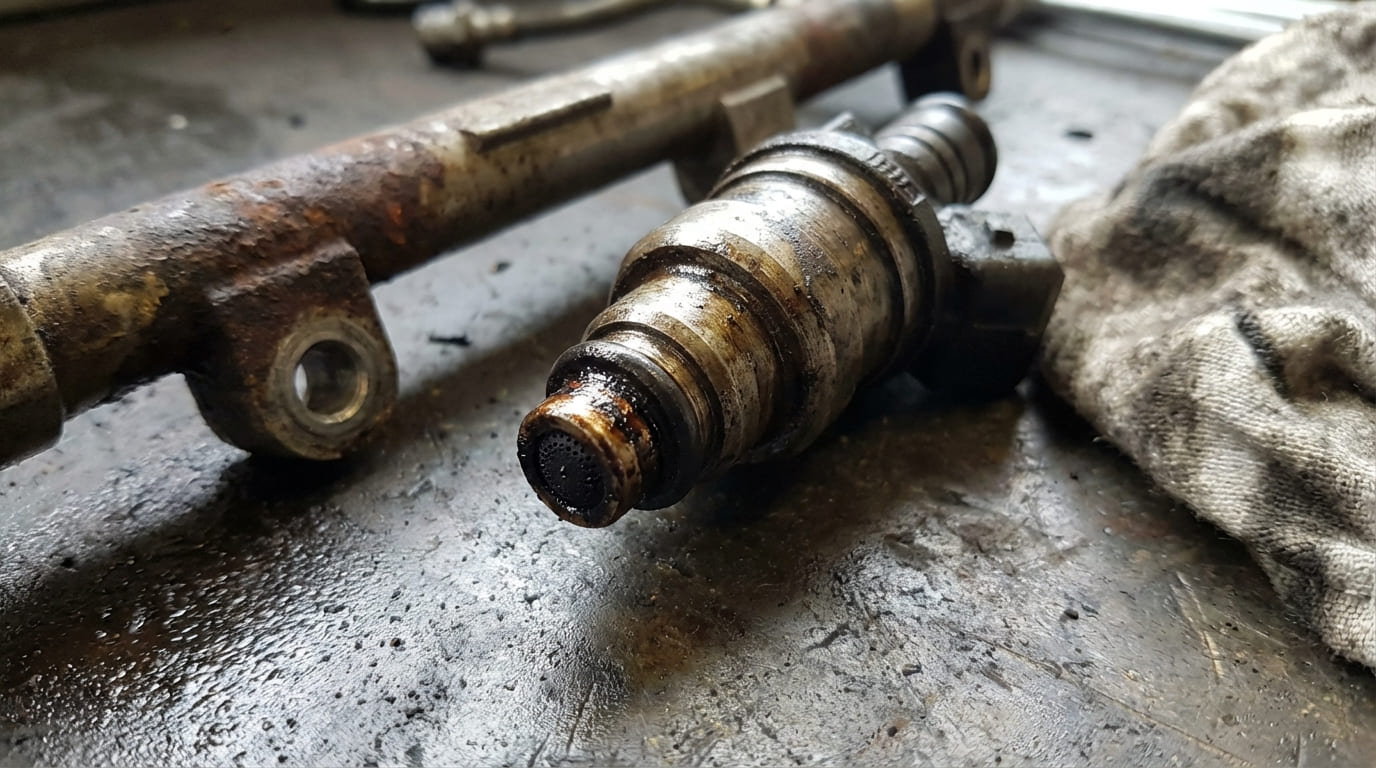
Filter Basket (Inlet Screen)
This small screen is the injector’s first defense. When clogged, fuel flow drops across all operating conditions.
How to check: Remove the injector and inspect the inlet. A dark, restricted screen indicates contamination. Note: these screens aren’t serviceable—cleaning rarely restores full flow.
I’ve tested injectors that passed electrical checks but flowed 30% below spec due to a clogged basket. Always combine electrical and flow testing.
Nozzle Orifices and Pintle Seat
These are the most sensitive areas. Deposits here distort the spray pattern—critical for efficient combustion.
How to check: Spray pattern analysis on a flow bench is the gold standard. A healthy injector produces a fine, even cone. Dribbling or streamers indicate clogging.
Direct-injection engines are especially prone to carbon buildup on the backside of the pintle due to heat exposure.
Solenoid and Internal Components
Carbon or varnish can restrict the movement of the pintle or needle, causing delayed response or incomplete seating.
How to check: Use an oscilloscope to view the current ramp during opening and closing. A distorted waveform suggests mechanical resistance.
Some “dead” injectors aren’t faulty—they’re just sticky. Ultrasonic cleaning can often restore function.
How to Diagnose Injector Clogging (Step-by-Step)
Never replace injectors based on symptoms alone. Many issues mimic clogging. Follow this proven diagnostic sequence.
1. Check Fuel Pressure and Decay
Use a fuel pressure gauge on the rail.
- Verify pressure meets OEM specs at idle and under load.
- After shutdown, monitor pressure drop. A rapid bleed-down suggests a leaking injector (stuck open), not necessarily clogging.
Pitfall: A bad fuel pump check valve or regulator can cause the same symptom.
2. Analyze Fuel Trims
Scan for long-term fuel trims (LTFT).
- LTFT +10% or higher on one bank suggests a lean condition—possible clogging.
- If all banks are lean, suspect a vacuum leak or dirty MAF.
Warning: Exhaust leaks before the O2 sensor can fool the ECM into thinking the engine is lean.
3. Perform an Injector Balance Test
Use a scan tool or timing light to disable injectors one at a time.
- Healthy cylinders show a noticeable RPM drop.
- A weak or clogged injector results in minimal drop.
Caution: Low compression or ignition issues can mimic a clogged injector. Confirm with compression or spark tests.
4. Flow Bench Testing (Definitive Check)
Remove injectors and test on a professional flow bench.
- Compare flow rates to OEM specs (typically ±5% tolerance).
- Check spray pattern: clean, conical mist only.
Flow testing reveals whether cleaning is viable or replacement is needed.
In my shop, we clean injectors that are within 15% of spec and have decent spray patterns. If flow is down 20% or more, or the spray is broken, we recommend replacement.
Prevention and Maintenance
Preventing clogging is cheaper and more effective than fixing it.
| Action | Effectiveness | Cost (DIY) | Frequency |
|---|---|---|---|
| Use Top Tier gasoline | High | $0.10–$0.20/gal premium | Every fill-up |
| Replace fuel filter | High | $20–$60 (part only) | Every 30k–60k miles |
| Use PEA-based cleaner | Moderate | $10–$15 per treatment | Every 3k–5k miles (short trips) |
| Ultrasonic injector cleaning | Low–Moderate (preventive) | $100–$200 (shop) | Every 60k–100k miles |
PEA cleaners work, but only if used consistently. One bottle won’t fix years of buildup. Think of it as maintenance, not a cure.
What to Avoid
- ⚠️ Reusing old injector O-rings—they can leak or bind.
- ⚠️ Assuming electrical functionality means mechanical health.
- ⚠️ Using off-brand additives with unknown solvents—some damage seals.
- ⚠️ Ignoring fuel pressure—low supply pressure mimics clogged injectors.
When to Repair vs. Replace
Not every clogged injector needs replacement. Here’s the logic I use in the shop:
| Condition | Repair Option | Replace If… |
|---|---|---|
| Flow within 15% of spec, good spray | Ultrasonic cleaning + flow test | Cost of cleaning >50% of new part |
| Severe carbon, distorted spray | Not recommended | Always replace |
| Electrical failure (coil, solenoid) | No | Replace |
| Physical damage (cracked body, bent nozzle) | No | Replace immediately |
I’ve saved customers hundreds by cleaning injectors instead of replacing them. But I’ve also seen DIYers waste money cleaning injectors that were already beyond repair. Test first.
Real-World Diagnostic Scenarios
Situation: 2014 F-150, 90k miles, misfire on cylinder 3. Owner replaced coil and plug. Scan shows high fuel trims on bank 1.
Diagnosis Path: We checked for vacuum leaks—found a cracked PCV hose feeding that bank.
Outcome: Replaced hose, fuel trims normalized, misfire gone. Injector was fine.
Lesson: Don’t skip air intake checks. Not every lean code means a bad injector.
Situation: Diesel pickup sat 8 months. No start, sludge in fuel filter.
Diagnosis Path: Drained fuel, replaced filter, added biocide. Problem returned in 3 weeks.
Outcome: Lab test showed resistant microbial strain. Tank had to be physically cleaned.
Lesson: Biocides aren’t universal. Persistent sludge means tank contamination.
Situation: Direct-injection VW, poor idle, hesitation. Flow test showed 10–15% low on all injectors.
Diagnosis Path: Cleaned injectors—partial improvement. Then tested fuel pressure under load: below spec.
Outcome: Weak fuel pump was starving injectors. Replaced pump, performance restored.
Lesson: Injector performance depends on supply. Always test the whole system.
Fuel injector clogging is preventable and often misdiagnosed. Focus on fuel quality, consistent maintenance, and systematic testing. Replace only when necessary—and always verify with flow data, not just symptoms.