Diagnosis of Fuel Injector Problems
Before cleaning, confirm the issue is actually dirty injectors. Many driveability problems mimic injector issues but stem from other causes. Rough idle, misfires, poor acceleration, and reduced fuel economy are common symptoms. A Check Engine Light with codes like P0201–P0208 (circuit faults) or P026x–P029x (cylinder contribution) can point to injectors, but don’t assume that’s the root cause. Always test the entire fuel system first.
How to Check: Step-by-Step Diagnosis
Follow a logical process to isolate injector problems from other engine issues:
- Scan for trouble codes and monitor live data: Use an OBD2 scanner to check fuel trims. Long-term fuel trim (LTFT) above +10% suggests a lean condition. Cross-reference with misfire counters—consistent misfires on one cylinder may indicate a faulty injector.
- Test fuel pressure and volume: Connect a fuel pressure gauge. Check pressure at idle and under load—compare to factory specs. Then perform a volume test: run the pump for 30 seconds into a graduated container. Most systems should deliver at least 1 liter. Low volume with good pressure suggests restricted flow—possibly from clogged injectors or a failing pump.
- Perform an injector balance test: Disable ignition or fuel one cylinder at a time and monitor RPM drop. A healthy engine will show even contribution (within 5%). A weak cylinder points to poor fuel delivery. But verify spark and compression first—misdiagnosis is common.
- Conduct a leak-down test: Pressurize the fuel system, then shut off the pump. Watch pressure over 5–10 minutes. A steady drop or fuel dripping from the injector tip indicates leakage. Replace O-rings first—many “bad injectors” are just leaking seals.
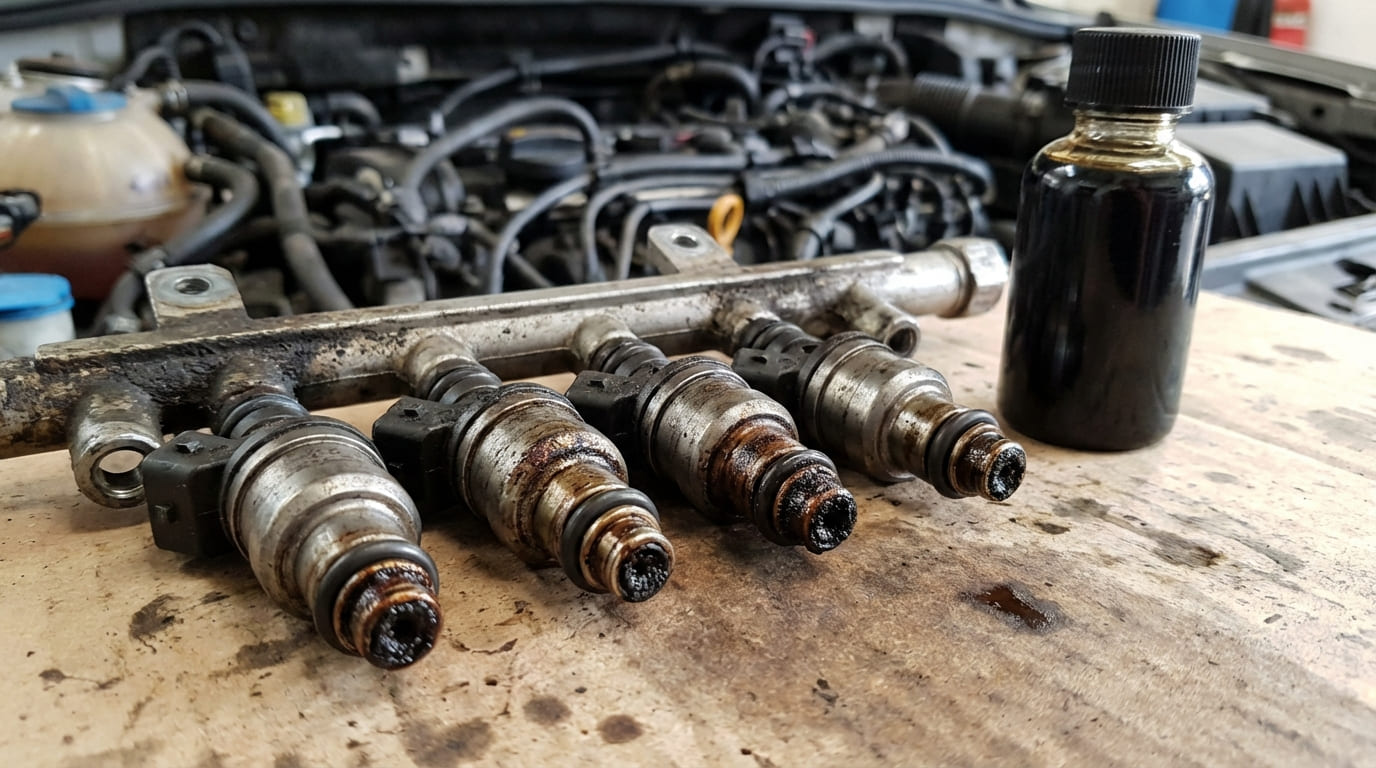
- Inspect spray pattern (off-vehicle): Only possible after removal. Use a flow bench to observe atomization. A clean injector sprays a uniform cone. Dribbling, streaking, or uneven spray means internal wear or deposits.
In my shop, we always rule out vacuum leaks and fuel pump issues before touching injectors. I’ve replaced dozens of pumps that were misdiagnosed as clogged injectors. Save time and money—test the whole system under load.
Fuel Injector Cleaning Methods
On-Vehicle Cleaning Options
Best for mild symptoms or preventative maintenance. These methods won’t fix severe clogs or mechanical wear.
- Pour-in-tank cleaners: Use products with polyetheramine (PEA), like Techron or Sea Foam. Add to a full tank for proper dilution. Effective for light deposits, but won’t fix performance issues. Cost: $10–$20. Not a repair—more like insurance.
- Pressurized rail cleaning: Disconnect the fuel pump and connect a pressurized canister of professional-grade cleaner to the fuel rail. Run the engine for 10–15 minutes. More effective than additives, especially on port injectors. Cost: $100–$200 at a shop, or $80–$150 for a DIY kit. Risk: Some solvents damage rubber seals or fuel pumps. Use only injector-safe formulas.
I only recommend rail cleaning when fuel trims are high and balance tests show minor imbalance. It’s a middle ground—cheaper than removal, but not a guarantee. Always replace the fuel filter afterward.
Off-Vehicle Cleaning: Ultrasonic and Flow Testing
For confirmed clogs, poor flow, or inconsistent spray patterns. This is the only method that guarantees results.
- Remove injectors safely: Depressurize the fuel system (pull fuel pump fuse, run engine until it stalls). Label each injector by cylinder. Use an O-ring pick to avoid damaging seals. Inspect for cracks, corrosion, or damaged connectors.
- Ultrasonic cleaning: Place injectors in a professional ultrasonic bath with injector-safe solution. Pulse them open and closed during cleaning to flush internal passages. Duration: 15–30 minutes. Avoid aggressive carb cleaners—they can damage internal coils and seals.
- Flow and spray testing: Use a flow bench to measure output at static and dynamic settings. Compare to OEM specs—most injectors should be within ±2%. Project spray pattern onto a backlit screen: look for even, conical mist. Dribbling or uneven spray means wear—cleaning won’t fix it.
- Rebuild and reinstall: Always use new O-rings, pintle caps, and filter baskets. Lubricate seals lightly with dielectric grease. Reinstall in original positions to maintain balance. Torque fuel rail bolts in sequence—usually crisscross—to spec. Reusing torque-to-yield (TTY) bolts risks leaks and rail warping.
In my shop, we never reinstall old O-rings. That $2 seal isn’t worth a fuel leak under the intake manifold. Also, clean the fuel rail and injector bores with a lint-free cloth—debris will recontaminate clean injectors.
Repair vs Replace: When Cleaning Won’t Work
Cleaning can’t fix mechanical damage. Replace injectors if you find:
- Cracked body or bent pintle
- Coil resistance outside spec (12–16 ohms for high-impedance types)
- Poor spray pattern after cleaning
- Leakage after new seals
- Flow variation over 5% after ultrasonic cleaning
Cost to replace: $15–$75 per injector (aftermarket), $50–$150 (OEM). Labor adds $200–$400 if done professionally. For high-mileage engines, consider replacing all injectors if one fails—others are likely near end-of-life.
| Symptom or Test Result | Most Likely Causes | Probability (Estimate) | Notes |
|---|---|---|---|
| High LTFT, lean misfires | Restricted injectors, vacuum leak, low fuel pressure | 40% injectors, 35% vacuum, 25% fuel system | Always rule out intake leaks first—common on older engines with dry gaskets. |
| Injector balance test >5% deviation | Clogged injector, weak coil, mechanical issue | 60% clogged, 25% coil, 15% other | Re-test after cleaning; some injectors respond well, others don’t. |
| Fuel leak at injector tip | Worn pintle seat, damaged O-ring, cracked body | 50% O-ring, 30% pintle, 20% body | Replace O-rings first; if leak persists, injector likely needs replacement. |
| Poor spray pattern after cleaning | Worn nozzle, internal debris, coil issue | 70% nozzle wear, 20% debris, 10% electrical | Nozzle erosion is irreversible; replacement is usually needed. |
Situation: A 2012 V6 sedan came in with rough idle and P0303 (cylinder 3 misfire). Fuel trims were +18%, and the balance test showed cylinder 3 dropping RPM 25% less than others.
Initial Assumption: I assumed a clogged injector, especially since the owner rarely used fuel additives.
Deep Dive/Discovery: After ultrasonic cleaning and flow testing, the injector passed all specs. Reinstalled, the misfire returned. I pulled the plug—found it soaked in fuel. Leak-down test revealed the injector was dripping after shutdown.
Nuanced Lesson Learned: Not all injector problems are due to restriction. This was a sealing issue at the pintle, not a flow problem. Cleaning didn’t fix the seat wear. Replacement was necessary—reminding me to always test for leakage, not just flow.
Situation: A high-mileage truck had poor acceleration and failed emissions. The owner had used multiple pour-in cleaners with no improvement.
Initial Assumption: I suspected heavily caked injectors from long-term low-quality fuel use.
Deep Dive/Discovery: After rail cleaning, performance improved slightly. But flow testing revealed one injector was flowing 12% below spec. Ultrasonic cleaning brought it to 6% low—still out of range. Upon teardown, the nozzle was eroded, not clogged.
Nuanced Lesson Learned: Wear can mimic clogging. Cleaning helps with deposits, but it can’t restore metal. Some injectors are beyond redemption—diagnosis must include wear assessment, not just cleanliness.
Situation: A modern turbocharged engine had intermittent misfires. P0171 (system too lean) was present. Balance test was inconsistent—sometimes normal, sometimes not.
Initial Assumption: I leaned toward a failing injector or coil.
Deep Dive/Discovery: After swapping coils and injectors with no change, I checked fuel pressure under load with a gauge. Pressure dropped significantly at wide-open throttle. The fuel pump was weak.
Nuanced Lesson Learned: Don’t fixate on injectors when fuel delivery issues can stem upstream. A weak pump can starve injectors under demand, mimicking restriction. Always test the entire system under real load.
Always consult your vehicle’s service manual for exact flow specs, torque values, and testing procedures. What works on one engine may damage another. Injector cleaning isn’t magic—it’s a precise repair that starts with accurate diagnosis and ends with verified performance.