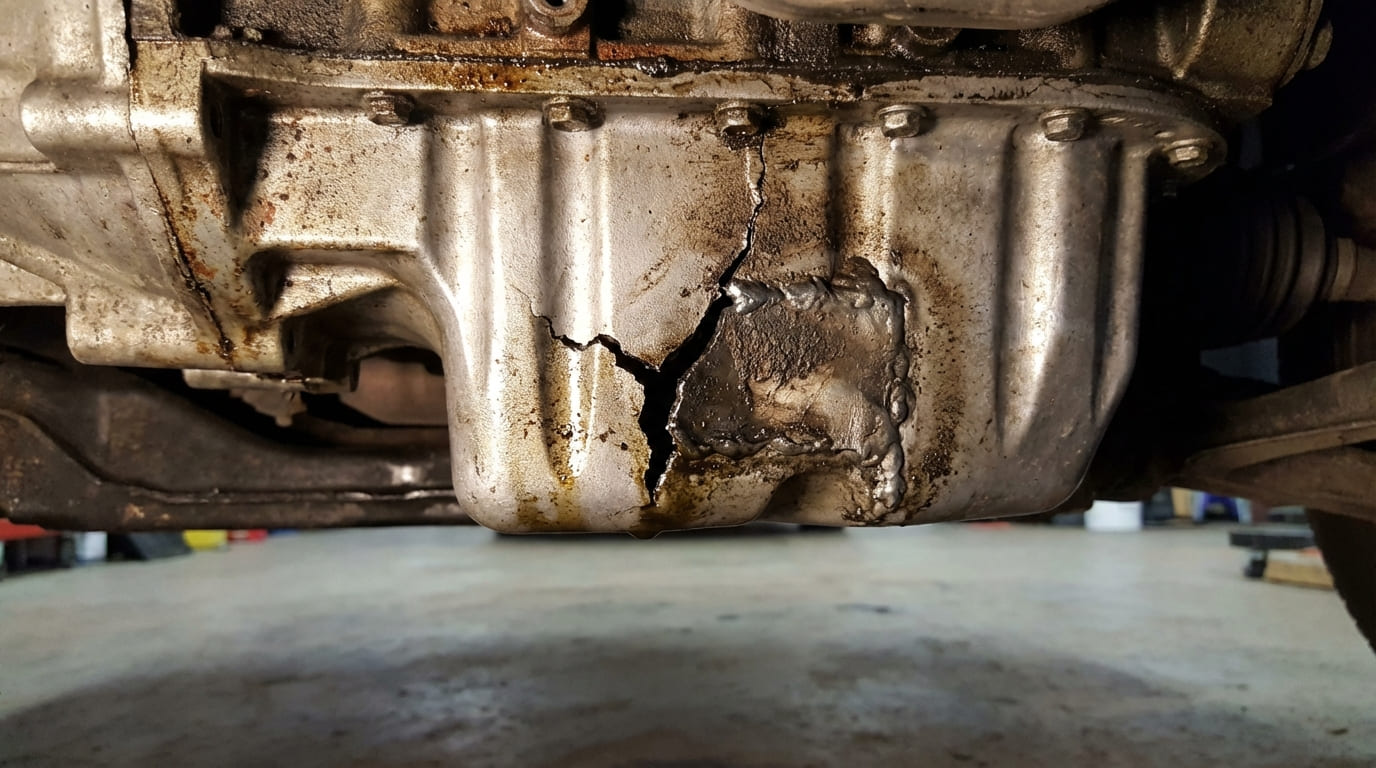
In my 20 years as a master mechanic and shop foreman, I’ve seen oil pan cracks from every cause—road debris, over-tightened drain plugs, and even engine flex on high-torque setups. The short answer: replacement is almost always better. But if you’re facing a cracked oil pan, here’s exactly how to assess it, what repairs might work, and when to walk away.
Feasibility of Repair: The Bottom Line
Most cracked oil pans should be replaced. Modern engines rely on consistent oil pressure and volume, and a compromised pan risks contamination, leaks, or total oil loss. Repairs are situational and temporary at best. Below is a quick-reference guide by material type.
| Pan Material | Repair Possible? | Longevity | Cost Comparison (Repair vs. Replace) |
|---|---|---|---|
| Stamped Steel | Limited | Months to 1 year (if well-executed) | Welding: $100–$200 labor. New pan: $80–$200 + labor. |
| Cast Aluminum | Rare | Unreliable; often fails in weeks | TIG weld: $200–$400. New pan: $250–$600. |
| Composite (Plastic) | No | Days to weeks | Repair fails. Replacement: $180–$400. |
In my shop, we never repair plastic oil pans. The material can’t withstand engine heat cycles and oil exposure long-term. I’ve pulled pans where epoxy repairs shattered and took the oil pickup screen with them.
Step-by-Step Diagnostic Protocol
Before assuming the pan is cracked, confirm the leak source. Many “pan leaks” originate elsewhere and track downward.
Vehicle Preparation and Leak Confirmation
Start with the car on a level lift or secure jack stands. Remove undertrays for clear access. Clean the entire oil pan and surrounding areas with a degreaser and stiff brush. Let dry completely.
Add UV dye to the engine oil (follow product ratio). Run the engine for 15–30 minutes to operating temperature. Shut off and inspect with a UV light. The dye will pinpoint the exact leak origin.
Crack Assessment: What to Look For
Use a magnifying glass and bright light. Check for:
- Crack length and depth: Cracks over 1 inch or with visible branching are high-risk.
- Location: Cracks near the drain plug boss, mounting ears, or oil pickup are structural zones—avoid repair.
- Material loss: If metal is thin or corroded, welding won’t hold.
- Deformation: Bent pan rails indicate impact damage—hidden cracks likely exist.
I once diagnosed a “cracked pan” that turned out to be a leaking front main seal. The oil ran down the block and dripped off the pan edge. UV dye saved a $500 repair. Always verify before removing the pan.
Repair Methods: When and How (If You Must)
Stamped Steel Pans: Welding and Epoxy Options
Only consider repair if the crack is short, straight, and away from high-stress areas.
Welding (Professional Only): Grind a 60-degree V-groove along the crack. Clean with acetone. Use MIG welding with ER70S-6 wire. Apply low-heat stitch welds to prevent warping. Grind smooth and prime before reinstalling.
Epoxy Patch (Temporary Fix): For DIYers, J-B Weld HighHeat can seal hairline cracks. Surface must be sanded to bare metal, cleaned, and dried. Apply per instructions and allow 15 hours to cure. This is not a permanent fix—expect failure under sustained heat.
Cast Aluminum Pans: High Risk, Low Reward
Welding aluminum requires AC TIG, proper pre-heat (150–200°C), and 4043 filler rod. Even then, older castings with high silicon content may crack further during repair.
If you attempt it, grind a clean V-groove and wire-brush with a dedicated stainless brush. Pre-heat evenly and avoid rapid cooling. Post-weld, pressure test the pan off the engine if possible.
A customer once brought in a BMW with a cracked aluminum pan. We pre-heated it, and the crack visibly grew before we even started welding. The casting was too brittle. We installed a used OEM pan instead—saved time and engine.
Composite (Plastic) Pans: No Repair Possible
Do not attempt epoxy, plastic welding, or tape fixes. These pans are molded for oil control and structural fit. Any repair will fail, often catastrophically. Replacement is the only safe option.
Oil Pan Replacement: Best Practice Procedure
Parts and Tools Needed
- New oil pan or reman unit (verify fit with VIN)
- OEM-specified RTV sealant or new gasket
- Torque wrench (calibrated)
- Socket set with extensions
- Oil drain pan
- UV flashlight and dye (for post-repair check)
Removal Steps
- Drain engine oil completely.
- Disconnect oil level or pressure sensors if integrated into the pan.
- Remove all bolts, noting different lengths (label with tape).
- Carefully separate the pan, avoiding damage to the block sealing surface.
Installation Steps
Scrape old gasket material with a plastic or wood scraper—never steel, which can gouge aluminum. Clean with brake cleaner and dry.
Apply RTV per the service manual: some engines require beads at corners, others a continuous bead. Do not over-apply. Install the pan and bolts, then tighten in a center-out spiral pattern in three stages (e.g., 5 Nm, 8 Nm, final spec).
Post-Installation Check
Refill oil to spec. Start the engine and let it reach operating temperature. Watch for leaks for 15–30 minutes. Recheck oil level and pressure. Perform a UV dye check after 50 miles to catch slow seepage.
Repair vs. Replace: The Real Cost of Failure
A failed repair can dump oil quickly. Even a partial blockage from epoxy or weld spatter can starve the oil pump. I’ve seen engines destroyed by debris from “successful” pan patches.
Resale value also drops with non-OEM repairs on critical components. And no warranty covers engine damage from a repaired oil pan.
A 2012 F-150 came in with a 1.5-inch crack on the rail. Surface looked repairable. After removal, I found micro-cracks and thin metal from corrosion. Welding would’ve failed in weeks. We replaced it and added a skid plate. The real fix isn’t just the pan—it’s preventing repeat damage.
Best Practices Summary
- ✅ Clean the sealing surface with non-metallic tools.
- ✅ Use a calibrated torque wrench and follow sequence.
- ✅ Apply RTV with consistent 3–5 mm bead; avoid gaps.
- ⚠️ Never reuse torque-to-yield bolts unless specified.
- ⚠️ Avoid universal gaskets—they often misalign oil passages.
- ⚠️ Never start the engine before RTV cure time (usually 30+ minutes).
Bottom line: If the pan is cracked, replacement is the only reliable fix. Repairs are gambles—ones you might win today but lose your engine tomorrow. Always consult the OEM service manual for torque specs, sealant type, and installation sequence. When in doubt, replace it.