Over two decades in the shop, I’ve seen oil pan damage from minor dents to full engine loss after off-road impacts. A punctured oil pan doesn’t just leak—it risks total engine failure. The severity depends on hole size, oil loss rate, driving behavior, and how fast you respond. This guide covers what happens, how to diagnose it, and whether your engine can be saved.
What Happens When the Oil Pan Is Punctured?
A punctured oil pan breaches the engine’s oil reservoir. As oil escapes, the oil pump pickup tube can draw air instead of oil. Without steady oil pressure, critical engine parts lose lubrication. Metal-on-metal contact begins quickly, generating heat and wear. Even brief operation with low oil can cause irreversible damage—especially under load or high RPM.
The engine may run normally at first, then develop ticking, knocking, or stall completely. Some engines fail within minutes; others survive short drives if shut down early. The key factor? How long the engine ran with insufficient oil.
How to Diagnose a Punctured Oil Pan
Step-by-Step Diagnosis
Follow these steps to confirm a punctured oil pan and assess engine health:
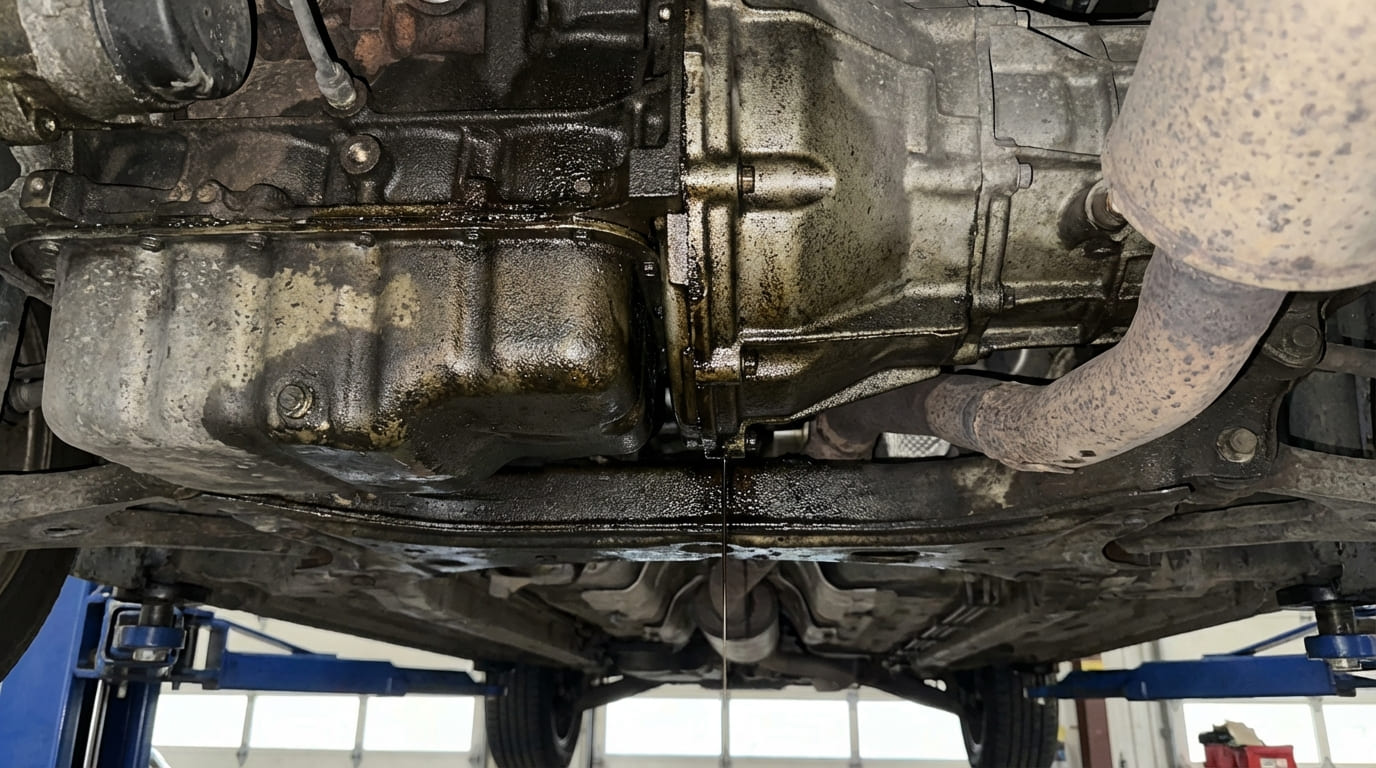
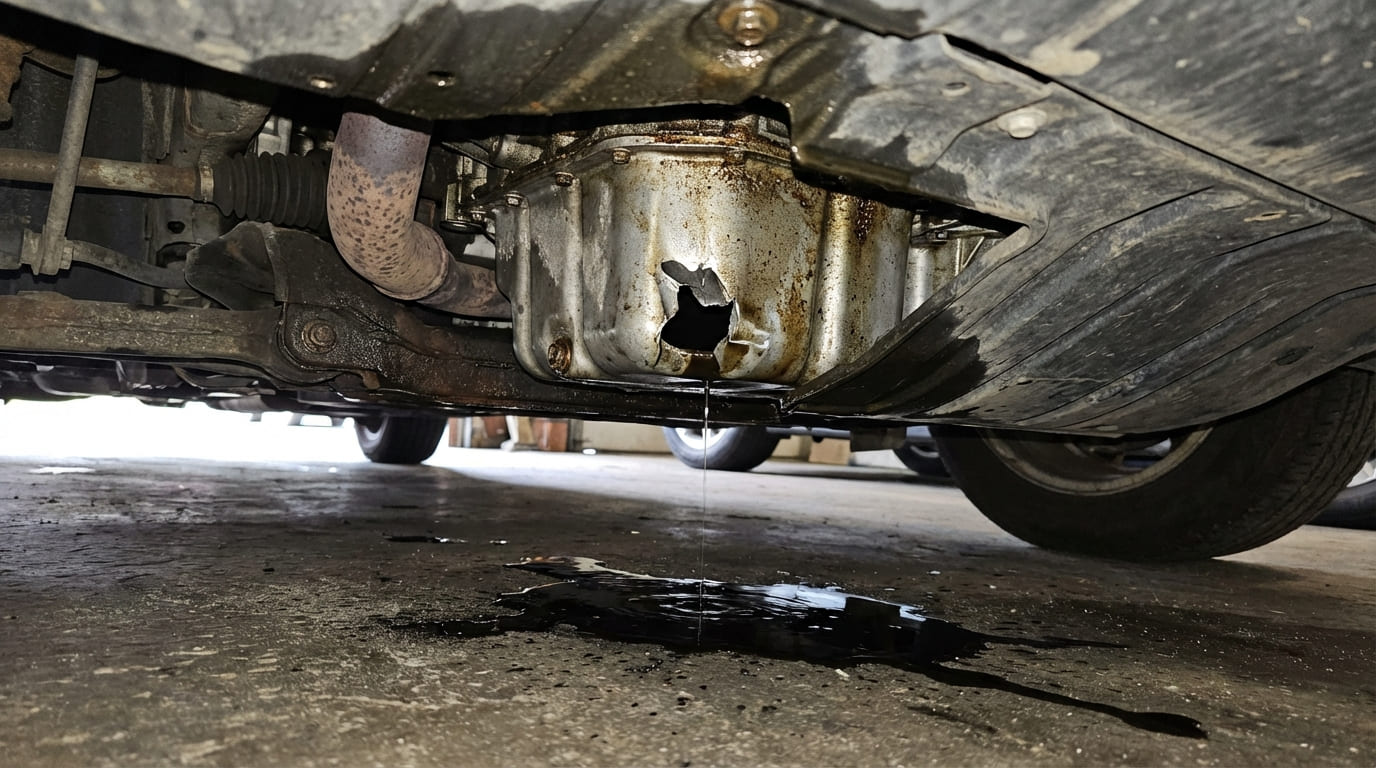
- Inspect under the vehicle: Look for fresh oil pooling beneath the engine’s center or rear. Trace the leak to the pan’s lowest point. A drip pattern spreading across the pan’s bottom suggests a puncture, not a gasket leak.
- Check the oil level: Use the dipstick when the engine is cold and level. If it reads below MIN—or drops between short drives—assume a leak. Top it off and recheck in 10 miles.
- Look for physical damage: Jack up the vehicle safely. Inspect the pan for dents, gouges, or holes. Shine a flashlight along seams and near the pickup tube—some punctures hide behind components.
- Monitor the oil pressure warning light: If it comes on and stays lit, oil pressure is critically low. Pull over immediately.
- Listen for abnormal noises: Ticking from the top end may indicate lifter or VVT issues. A deep knock from the lower engine often means main or rod bearing damage.
- Test oil pressure mechanically: Install a gauge at the oil pressure sender port. Compare readings to factory specs—typically 10–15 PSI at idle, 40–60 PSI at 2,000 RPM. Low pressure with fresh oil signals internal wear.
- Analyze oil for metal: Send a sample to a lab. High copper or lead means bearing wear; iron suggests crank or cylinder damage. Even a quiet engine can show catastrophic wear in oil analysis.
How Much Damage Has Been Done?
The engine’s viability depends on how long it ran with low oil. Use this table to assess risk:
| Scenario | Most Likely Cause | Less Common But Possible | Repair Viability |
|---|---|---|---|
| Oil light on, puddle under pan, engine runs normally | Small puncture, recent leak | Oil cooler line failure (mimics pan leak) | High – pan repair/replacement likely sufficient |
| Knocking noise, low oil, pressure light on | Bearing wear from oil starvation | Timing chain slap, piston slap (less common with oil issues) | Low – internal damage probable |
| Engine seized, oil completely drained | Catastrophic bearing or rod failure | Oil pump cavity collapse, crank seizure | Poor – rebuild or replacement needed |
| No noise, pressure good, minor leak | Slow seep from small hole or gasket | Overfilled crankcase forcing oil out | High – repair pan and monitor |
Temporary Fixes (For Emergency Only)
These are not permanent solutions. Use only to move the vehicle to a shop or tow point.
- Cold weld/epoxy patch: Use two-part steel-reinforced epoxy (e.g., JB Weld SteelStik). Clean and dry the area, roughen the surface, apply, and wait at least 15 minutes before starting. Risk: fails under heat and pressure. Only works for small holes.
- Rubber patch and clamps: Cut a piece of thick rubber (from an old fuel line or hose), place over the hole, and clamp tightly from both sides. Risk: rubber degrades fast; vibration loosens clamps.
- Refill and short drive: Add oil, start the engine, and drive less than a mile to a safe location. Monitor oil pressure constantly. Risk: even brief operation can cause delayed bearing failure.
In my shop, we never drive a car with a known oil leak. If the oil level is below MIN, we tow it. The cost of a tow is nothing compared to a $3,000 engine replacement.
Permanent Repair Options
Oil Pan Replacement
This is the most reliable fix for moderate to severe damage. Labor varies by vehicle—FWD models often require subframe removal.
- Tools needed: Socket set, torque wrench, oil drain pan, gasket scraper, RTV sealant (if required).
- Procedure: Drain oil, remove pan bolts, lower pan, clean mating surfaces on block and pan, install new gasket or RTV bead, reinstall pan, torque to spec.
- Cost: $200–$600 for parts and labor, depending on accessibility. Aluminum pans and integrated pickup tubes cost more.
- Verification: Refill with correct oil type and volume. Run engine, check for leaks, monitor pressure.
Welding the Oil Pan
Best for steel pans or thick aluminum units. Requires removal and professional work.
- Procedure: Remove pan, clean thoroughly with degreaser, purge oil residue, weld from inside if possible. TIG is preferred for aluminum.
- Cost: $100–$300 for welding, plus removal/installation. Cheaper than replacement if pan is rare or expensive.
- Verification: Pressure test with compressed air and soapy water, or submerge and check for bubbles.
- Limitations: Heat can warp the pan. Thin stamped pans may not hold a weld. Not all shops offer this service.
Install an Aftermarket Skid Plate
Prevents future damage, especially on trucks, SUVs, or off-road vehicles.
- Procedure: Mount steel or aluminum plate using existing or added bolts. Ensure clearance with oil filter and drain plug.
- Cost: $50–$150. Installation takes 30–60 minutes.
- Benefit: Can save the pan from rocks, curbs, or debris. Some designs double as heat shields.
Post-Repair Checks
After fixing the pan, verify the engine is still healthy:
- Check oil level: Wait 5–10 minutes after shutdown. Top off if needed, but avoid overfilling—it can cause foaming and low pressure.
- Inspect for leaks: Run the engine to operating temperature, then check the entire pan seam. Use UV dye if the leak is slow.
- Monitor oil pressure: Use a mechanical gauge for accuracy. Compare to factory specs. Low pressure means internal damage.
- Listen for noise: Use a mechanic’s stethoscope on the oil pan, main bearing saddles, and valve cover. New knocking or ticking means trouble.
Recommended and Avoid
- ✅ Recommended: Clean pan bolt threads with a bottoming tap. Prevents false torque readings and ensures proper clamping force.
- ✅ Recommended: Use OEM or high-quality aftermarket gaskets. Cheap rubber gaskets compress unevenly and leak.
- ✅ Recommended: Apply RTV sealant only where specified—overuse can break off and clog the oil pump pickup.
- ⚠️ Avoid: Reusing torque-to-yield (stretch) bolts unless the manual allows it. They lose clamping force after first use.
- ⚠️ Avoid: Tightening pan bolts in a circular pattern. Follow the factory sequence—usually center outward.
- ⚠️ Avoid: Driving with a known leak. Even slow loss can cause intermittent oil starvation on inclines.
Situation: A customer brought in a 2012 F-150 with a nail in the oil pan. No warning lights, no noise. He’d been driving it for a week with a slow drip.
Discovery: We replaced the pan, but after refill, the oil pressure was low at idle. A bore scope showed minor scoring on the rod bearings. Oil analysis revealed elevated copper levels.
Nuanced Lesson Learned: Even a slow leak can cause cumulative damage if the oil level drops below the pickup intermittently—especially on inclines. Don’t assume no noise means no harm.
Situation: A Subaru Forester came in after hitting a rock. The pan was cracked near the front mount. Owner added stop-leak and kept driving.
Discovery: The engine developed a knock. Tear-down revealed a spun rear main bearing. The crack had allowed air ingestion into the pickup, starving the rear main first.
Nuanced Lesson Learned: Air ingestion can be just as damaging as oil loss. The location of the puncture relative to the pickup tube matters—front, rear, or center affects which bearings fail first.
Situation: A Honda Civic with a dented oil pan but no visible hole. Customer reported low oil every month.
Discovery: After pan removal, we found a hairline crack along a casting seam. It only leaked when hot and expanded. Cold epoxy patch failed in two days.
Nuanced Lesson Learned: Thermal cycling can open and close cracks. A repair must accommodate expansion—sometimes only welding or replacement holds up long-term.
Treat any oil leak as an emergency until proven otherwise. The difference between a $200 pan repair and a $3,000 engine replacement is often just a few miles of driving. Always consult the service manual for torque specs, oil type, and pressure limits—what works for one engine can destroy another.