Boost leaks rob power, trigger check engine lights, and mimic more serious mechanical failures. As a master technician, I’ve seen countless turbocharged vehicles misdiagnosed because the simplest culprit—a boost leak—was overlooked. This guide cuts through the noise with a field-tested, step-by-step method to find and confirm leaks quickly, safely, and accurately. Whether you’re a DIYer or a seasoned wrench, this process will save time, money, and frustration.
Symptoms of a Boost Leak
Before grabbing tools, use symptoms to confirm a boost leak is likely. These signs point to pressurized air escaping between the turbo compressor outlet and intake manifold.
Key Indicators and How to Check
Use these symptoms as diagnostic clues—but never rely on one alone. Always verify with physical testing.
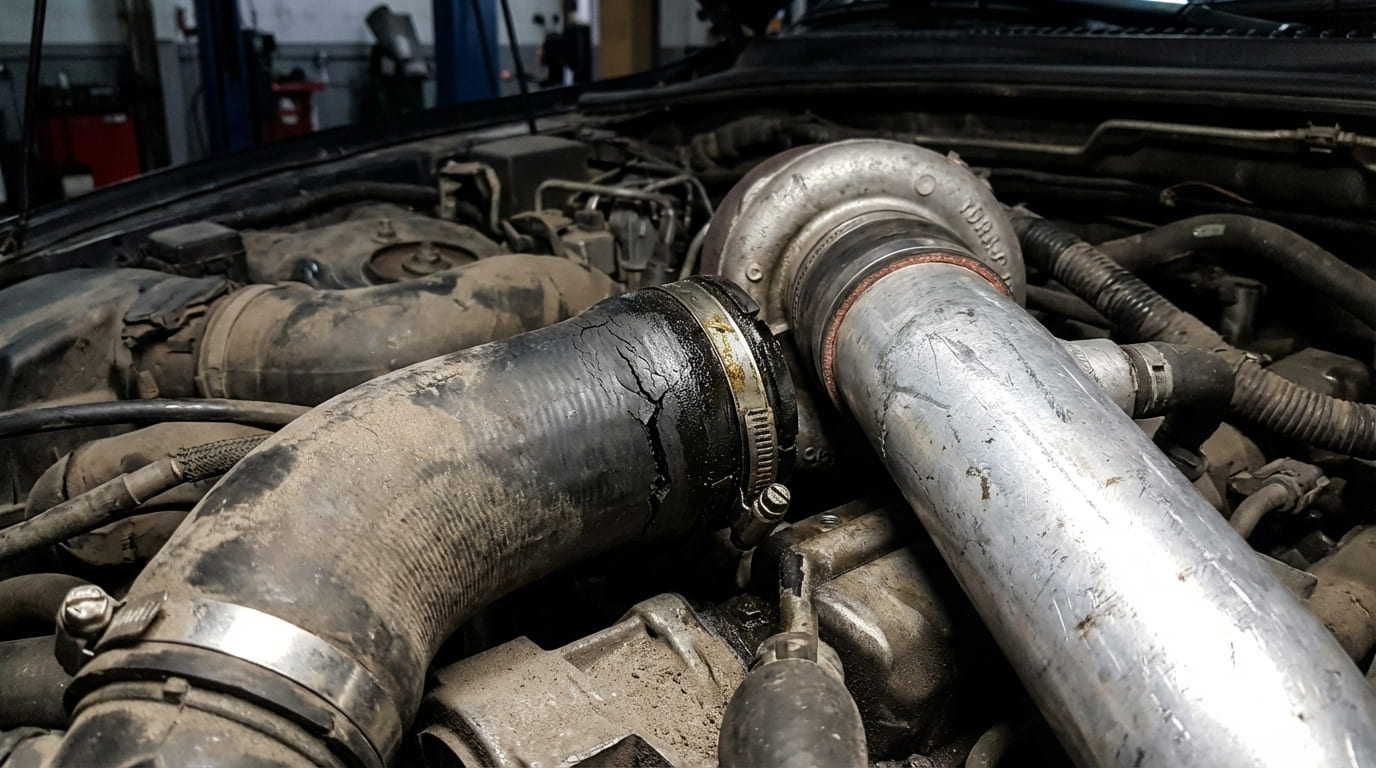
- Hissing or whistling under acceleration: Start the engine and apply light throttle in neutral. Listen near the turbo, intercooler, and charge pipes. A high-pitched whistle often means a split coupler or leaking blow-off valve (BOV).
- Reduced power and turbo lag: If the car feels sluggish despite normal turbo spool (confirmed via boost gauge or OBD2), pressurized air may be escaping before the throttle body.
- Check Engine Light with P0299, P0171, or P0174: P0299 means “underboost.” P0171/P0174 indicate a lean condition. Cross-check with live fuel trims (see below).
- Positive long-term fuel trims (LTFT > +10%): Use an OBD2 scanner to read LTFT at idle and under load. If trims rise under load, unmetered air is likely entering post-MAF. Rule out a dirty MAF first—clean it with proper MAF cleaner.
- Rough idle or stalling: Only occurs if the leak is downstream of the throttle body (e.g., intake manifold gasket). Upstream leaks don’t affect idle vacuum.
In my shop, we never replace a turbo or MAF sensor without first ruling out a boost leak. I’ve saved customers thousands by finding a $5 cracked hose instead of a $1,200 turbo.
Preparation for Boost Leak Testing
Proper setup prevents false results and ensures safety. This test uses compressed air to simulate boost pressure—so precision matters.
Tools and Materials
Here’s what you need for the most effective DIY boost leak test:
- DIY boost leak tester (PVC cap, Schrader valve, 1/4″ air fitting, rubber coupler, hose clamp)
- Air compressor with regulator (0–30 PSI)
- Soapy water (1:4 water to Dawn) or leak detection spray (e.g., Berryman B-40)
- Flashlight or headlamp
- Safety glasses and hearing protection
- OBD2 scanner with live data (for pre- and post-test verification)
I build my tester once and reuse it on every job. Cost: under $20. Time saved: hours per diagnosis.
Vehicle Readiness
Follow these steps before pressurizing:
- Ensure the engine is cold to prevent warping or injury.
- Turn off the ignition—throttle body must be closed.
- For drive-by-wire systems, remove power or use a throttle lock tool if testing past the throttle body.
- Disconnect battery if removing sensors or actuators.
Boost Leak Test Procedure (Pressurized Air Method)
This is the most reliable method for DIYers. It pressurizes the entire intake path from turbo outlet to intake manifold.
System Isolation and Connection
Disconnect the intake hose at the turbo compressor inlet. Install your boost leak tester using a high-quality hose clamp—cheap clamps can blow off under pressure.
Plug open vacuum lines that lead downstream (e.g., brake booster, PCV valve, boost control solenoid lines). Use rubber stoppers or bolts with O-rings. Leaving them open causes false leaks.
Label every hose before disconnecting. One misconnected vacuum line can cause boost spikes or idle surges.
Applying Test Pressure
Connect your air supply and set regulator to 5 PSI. Observe the pressure gauge:
- If pressure drops immediately, you have a large leak.
- If stable, increase pressure in 5 PSI increments.
- Do not exceed 20 PSI unless duplicating max boost (check factory specs).
Many intercoolers have plastic end tanks that crack under excessive pressure. Stay within OEM limits.
Leak Detection and Verification
With system pressurized, spray soapy water at all joints and seams:
- Charge pipe couplers
- Intercooler end tanks and piping
- Blow-off valve and its connections
- Throttle body and intake manifold gaskets
- Vacuum tees, TMAP sensor ports, and boost lines
Bubbles form at the leak site. Size doesn’t always correlate with impact—a tiny leak near the throttle body can be worse than a large one near the intercooler.
After repair, retest. A healthy system holds at least 15 PSI with less than 1 PSI drop over 10 seconds. Slow drops may be due to air cooling—wait 30 seconds before judging.
System Boundaries
This test only covers the pressurized intake side: turbo compressor outlet to intake manifold. It does not detect:
- Internal engine leaks (e.g., head gasket, piston rings)
- Exhaust side issues (e.g., wastegate leaks)
- Fuel delivery problems
For those, use compression tests, exhaust gas analysis, or fuel pressure checks.
Alternative Boost Leak Test Methods
Smoke Machine Test
Best for small, elusive leaks—especially in plastic intake manifolds or PCV systems. Use inert smoke fluid and apply 10–12 PSI. Look for smoke escaping at seams, gaskets, or cracked hoses.
Never smoke test a hot engine. Avoid plastic components rated below test pressure.
Cost: $200–$500 for a quality DIY kit. Worth it for frequent turbo work.
Vacuum Gauge Test
Limited use for boost leaks. A vacuum gauge at idle can detect general intake leaks (normal: 17–21 inHg). Fluctuating or low vacuum suggests a leak upstream of the throttle body—but not necessarily a boost leak.
Use this to support findings, not as a primary test.
Common Boost Leak Locations
Based on real-world repairs, these are the most frequent failure points:
- Charge pipe couplers (especially silicone with worm-drive clamps)
- Intercooler end tanks (cracks from impact or fatigue)
- Blow-off valve seals or diaphragms
- Throttle body gasket
- Intake manifold gasket or casting porosity
- Vacuum/boost reference lines (dry out and crack)
- PCV system hoses and fittings
- Wastegate actuator diaphragm (if boost-referenced)
Diagnostic Decision Table
| Symptom | Most Likely Causes | Less Common But Possible | Recommended Next Step |
|---|---|---|---|
| P0299 + low boost reading | Charge pipe leak, intercooler crack, loose clamp | Turbo actuator failure, boost sensor fault | Perform pressurized leak test |
| P0171/P0174 + high LTFT | Boost leak downstream of MAF, vacuum leak | Dirty MAF, weak fuel pump, clogged injector | Check fuel trims at idle vs. load; smoke test |
| Whistling under boost | Coupler split, BOV seal leak | Compressor surge, bearing noise | Pressurize and listen/inspect |
| Rough idle + lean codes | Intake manifold gasket leak, throttle body seal | EVAP system leak, EGR valve stuck open | Test at idle vacuum; consider smoke test |
Best Practices: Recommended vs. Avoid
- ✅ Clean threads with a tap before installing boost sensors—debris causes slow leaks.
- ✅ Use double ear clamps on silicone couplers in high-vibration areas. Worm-drive clamps can loosen and cut hoses.
- ✅ Label and plug vacuum lines during disassembly—reversing them can cause boost spikes or limp mode.
- ⚠️ Never reuse torque-to-yield bolts on intake or throttle body—clamping force is lost after first use.
- ⚠️ Avoid zip ties or makeshift clamps on charge pipes—they fail under pressure.
- ⚠️ Don’t spray soapy water directly on electrical connectors—use a brush or mist nearby.
Real-World Case Studies
Situation: 2014 WRX with P0299 and 20% lower boost. Turbo replaced twice—no fix.
Discovery: Leak test revealed bubbles at the intercooler-to-throttle-body pipe. The coupler looked fine, but the inner liner was split from over-tightened clamp.
Lesson: Internal hose damage isn’t visible. Always pressurize—don’t trust sight alone.
Situation: 2012 GTI with P0171 and high LTFT. MAF and O2 sensors replaced—no improvement.
Discovery: Smoke test showed leak at PCV valve grommet. Rubber had hardened and cracked.
Lesson: PCV system leaks under boost and vacuum. Test the whole path—not just the turbo side.
Situation: BMW N54 with intermittent boost loss. Static test passed.
Discovery: Data logging showed boost spike then drop. Clamp on intercooler pipe was loose—shifted under load.
Lesson: Some leaks are dynamic. Combine static testing with live data under driving conditions.
Diagnosing boost leaks comes down to method, not magic. Skip the guesswork. Test the system under pressure, verify every repair, and consult the factory service manual for torque specs and pressure limits. A proper boost leak test costs little but prevents costly misdiagnoses. In my 20 years as a master tech, this process has never led me astray.