Diagnose Before You Clean
Never assume a dirty EGR valve is the culprit. Many DIYers jump to cleaning after seeing codes like P0400, P0401, or P0402, but these can stem from electrical faults, vacuum leaks, or blocked passages—not just carbon buildup. Misdiagnosis leads to wasted time and money.
How to Check: Confirm the Problem
Use these steps to verify if the EGR valve is truly at fault:
- Scan for DTCs: Note the exact code. P0401 (low flow) often points to blockage; P0402 (excessive flow) may mean the valve isn’t sealing.
- Monitor live data: With a scan tool, check commanded vs. actual EGR position. A deviation over ±7% under load suggests an issue. Watch for EGR opening at idle when it shouldn’t.
- Test vacuum operation (if applicable): Use a hand pump to apply 12 inHg. The pintle should open smoothly and hold vacuum for 30 seconds. A drop could mean a torn diaphragm—or carbon holding it open.
- Check electrical function (for electronic valves): Measure solenoid resistance with a DMM. Most read 8–14 ohms. If resistance is off, replace the valve. If normal, use bi-directional control to command movement and watch feedback.
In my shop, we always test the connector and wiring before replacing an EGR valve. I’ve seen backed-out pins, chafed wires, and corroded terminals mimic internal failure. Save yourself the hassle—verify the signal gets to the valve.
Clean or Replace? Making the Call
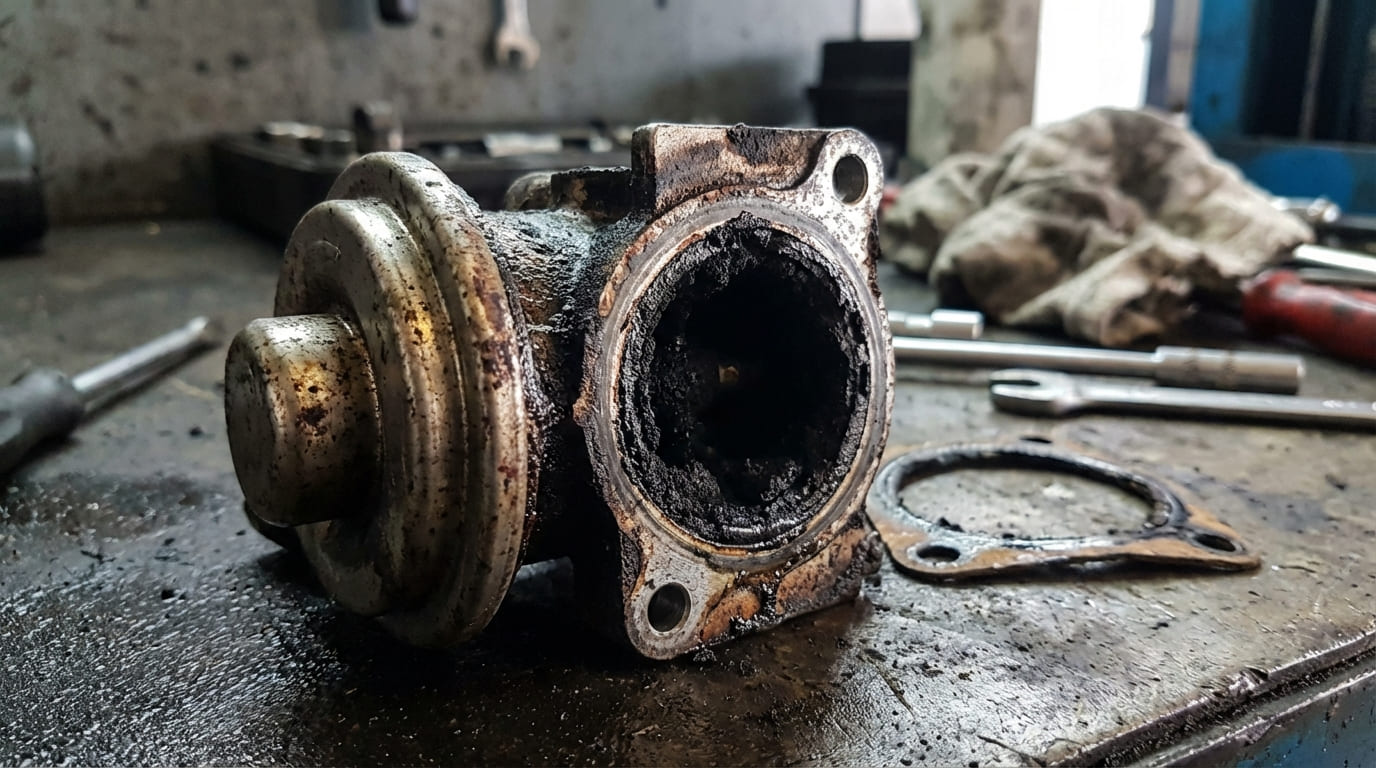
Cleaning only makes sense if the valve is mechanically sound but restricted by carbon. Electrical or diaphragm failures require replacement.
| Condition | Probable Cause | Recommended Action |
|---|---|---|
| Carbon restricts pintle movement, valve otherwise functional | Normal deposit accumulation due to combustion byproducts | Clean and reinstall; most cost-effective solution |
| Electrical open/short in solenoid or position sensor | Internal coil failure, wiring damage, or circuit overload | Replace valve; cleaning won’t resolve electrical faults |
| Diaphragm fails vacuum hold test | Rupture due to overheating or age; could also be debris | Replace unless design allows rebuild (rare) |
| Valve passes all tests but system still sets codes | Blocked EGR cooler, clogged intake passages, or faulty DPFE sensor | Do not replace valve—inspect downstream components first |
Replacement cost varies: $120–$400 for the part, plus $80–$150 labor if outsourced. Cleaning takes 1–2 hours and costs under $20 in cleaner—worth trying if diagnostics support it.
A 2010 Toyota Camry came in with P0401. Previous shop replaced the valve twice. I found a pin backed out in the harness. Lesson: Always check the signal path. A new valve won’t fix a broken wire.
A 2005 Ford F-150 had P0400. Owner cleaned the valve twice. I found the intake port 70% clogged. Cleaning the valve did nothing. Always inspect the entire passage—carbon loves to build up where you can’t see.
A 2013 Honda Accord had P0402. Valve wasn’t stuck open—it couldn’t seal due to a warped seat. Carbon wasn’t the issue; heat damage was. Sealing matters as much as movement.
How to Clean the EGR Valve: Step-by-Step
If diagnostics confirm a clogged but functional valve, proceed with cleaning.
Tools Needed: Socket set, gasket scraper, plastic-safe cleaner (non-chlorinated), brass brush, lint-free cloth, new gasket, torque wrench.
- Disconnect the battery and remove the EGR valve. Label vacuum lines if present.
- Inspect the valve: check for carbon on the pintle and seat. Move the pintle by hand—should slide smoothly.
- Spray cleaner into the pintle chamber. Let soak 10–15 minutes. Avoid submerging electrical components.
- Use a brass brush or plastic pick to remove stubborn deposits. Never use steel wire brushes—they score surfaces and prevent sealing.
- Clean the intake port and valve mounting surface. Carbon here will re-clog a clean valve.
- Rinse with clean cleaner and air-dry for 30 minutes. Moisture causes corrosion when mixed with exhaust gases.
- Reinstall with a new OEM-spec gasket. Torque bolts to spec—typically 10–12 ft-lbs. Over-tightening cracks aluminum housings.
In my shop, we never reuse EGR gaskets. Aftermarket rubberized ones degrade fast under heat. Stick with OEM-quality to avoid exhaust leaks.
Post-Cleaning Verification
Don’t just bolt it on and walk away.
- Reconnect the battery and start the engine with a scan tool connected.
- Check for exhaust leaks (hissing or ticking at the flange).
- Verify EGR position reads 0% at idle.
- Perform a gentle acceleration sweep—commanded and actual should track closely.
Clear codes only after confirming normal operation. Then drive for 10–15 minutes (idle, cruise, light load) to allow system relearn. Some Fords require a specific EGR learn procedure via scan tool—check your service manual.
Preventing Carbon Buildup
Regular maintenance reduces repeat clogs.
- Use Top Tier gasoline—it contains better detergents.
- Inspect the PCV system. A clogged PCV valve increases oil vapor, which burns and forms carbon.
- Avoid constant short trips. Low exhaust temps prevent self-cleaning. Take the car on the highway monthly to burn off deposits.
Inspect the EGR valve and intake ports every 60,000–80,000 miles, especially on turbocharged direct-injection engines. These are prone to carbon due to lack of fuel washing over the intake valves.
Always consult your vehicle’s service manual for torque specs, resistance values, and relearn procedures. What works on a Ford won’t necessarily apply to a Honda.