In my 20+ years turning wrenches in shops from small independents to performance builds, one thing’s held true: turbochargers aren’t magic, but they’re close. I’ve seen them transform a grocery-getter into a rocket, and I’ve pulled more than a few out in pieces after someone pushed too hard without understanding the system. Let me walk you through how they work—not just the textbook version, but how they behave in the real world, with oil varnish, heat soak, and questionable maintenance histories. More importantly, I’ll show you how to diagnose issues, avoid common mistakes, and keep your turbo alive.
How a Turbocharger Works: The Real-World Cycle
A turbocharger recovers wasted exhaust energy to force more air into the engine. More air means more fuel can be burned, which means more power—without increasing engine size. But it’s not just about power; it’s about efficiency and control. Here’s how it happens, step by step, and what to watch for at each stage.
- Engine exhaust exits into turbine housing
- Turbine wheel spins from exhaust force
- Common shaft rotates compressor wheel
Compressor draws in ambient air and pressurizes it
Hot compressed air goes to intercooler (if equipped)
Cooled, denser air enters intake manifold
That heat drop post-compression is where the intercooler earns its keep. I’ve seen intake temps over 180°F coming off the compressor—after the intercooler, they drop to around 100–120°F. That’s a big difference in air density and power potential.
How to Check: Confirming Turbo Operation
Before tearing into anything, verify the system is functioning:
- Use a scan tool to read boost pressure and compare to target values.
- Listen for unusual noises (whine, flutter, grinding) during acceleration and throttle lift.
- Inspect for oil leaks at compressor and turbine housings—especially after shutdown.
- Check for blue smoke at idle—indicates oil seal failure or crankcase issues.
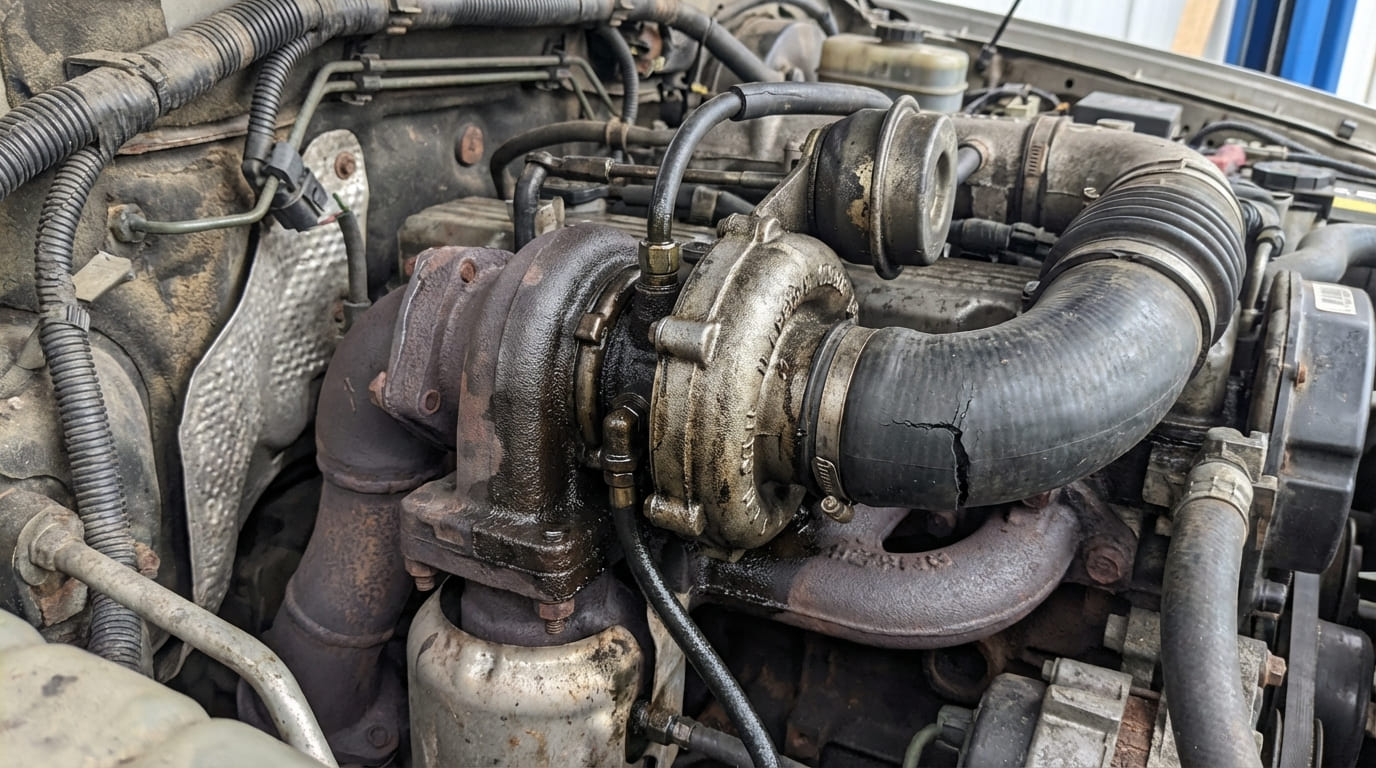
- Inspect intake and exhaust hoses for cracks, loose clamps, or collapses.
In my shop, we always start with a boost leak smoke test. It’s faster than guesswork and catches split boots, dry-rotted couplers, and cracked intercooler tanks. A $200 smoke machine saves hours of labor.
Key Components and How They Fail
Understanding the parts helps you diagnose faster and avoid unnecessary replacements. Here’s what matters—and what to inspect.
Turbine and Compressor Wheels
The turbine wheel is driven by exhaust; the compressor wheel pressurizes intake air. Both spin on the same shaft at speeds exceeding 100,000 RPM. Damage to either wheel can imbalance the system and lead to bearing failure.
How to Check:
- Remove inlet and exhaust hoses and inspect wheels for nicks, cracks, or rubbing marks.
- Check for axial (in-out) and radial (side-to-side) shaft play—any movement beyond 0.002″ indicates bearing wear.
Cost & Viability: Replacing just a wheel isn’t practical. Most rebuilds require a full CHRA (Center Housing Rotating Assembly). A remanufactured CHRA costs $300–$800; new OEM units can exceed $1,500. For high-mileage engines, consider a full turbo replacement.
I’ve seen more turbos ruined by dropped compressor wheels than heat. Always cover the intake and exhaust ports when the turbo is off the engine. A single bolt or stone inside the housing will destroy it on startup.
Center Housing Rotating Assembly (CHRA)
This is the core of the turbo—housing the shaft, bearings, and oil passages. It’s also the most common failure point.
How to Check:
- Spin the shaft by hand—it should rotate smoothly with no grinding.
- Inspect oil feed and drain ports for carbon buildup or sludge.
- Check for oil coking (baked-on varnish) inside the center housing—sign of frequent short trips or poor oil quality.
Bearing Types:
- Journal Bearings: Found in most OEM turbos. Rely on oil film. Fail if oil pressure drops or oil degrades.
- Ball Bearings: Faster spool, better heat tolerance. Common in newer and performance models. More expensive but more durable.
Oil Feed & Drain: The feed line runs under pressure (30–60 psi); the drain line returns by gravity. A kinked or clogged drain line causes oil to pool in the CHRA, leading to seal failure and compressor-side oil leaks.
In my shop, we always replace oil lines when installing a new turbo. Old lines can shed debris or collapse internally, starving the turbo. It’s a $30 fix that prevents a $1,000 failure.
Intercooler (Charge Air Cooler)
It cools compressed air, increasing density and reducing knock risk. A failing intercooler robs power and increases EGTs (exhaust gas temps).
How to Check:
- Inspect for cracks, dents, or oil residue inside the tank (sign of boost leaks).
- Perform a pressure test (15–20 psi) on the intake system—watch for drops.
- Compare intake air temps before and after the intercooler. More than a 50°F drop is normal; less indicates inefficiency.
Cost & Viability: Aluminum air-to-air intercoolers cost $200–$600. Plastic-end tank models crack over time—replace with silicone-over-billet if upgrading. Air-to-liquid systems are harder to service; coolant leaks can mimic intake leaks.
Wastegate and Boost Control
The wastegate limits boost by diverting exhaust around the turbine. It’s controlled by a spring, vacuum, or electronic actuator.
How to Check:
- Remove the actuator rod and manually move the wastegate arm—should move freely without binding.
- Apply vacuum or pressure to the actuator and watch for smooth movement. If it doesn’t hold pressure, replace it.
- Check for carbon buildup on the valve and seat—common in stop-and-go driving.
Internal vs. External: Internal wastegates are simpler but can stick. External units offer better control and are preferred for high-boost builds. If boost is erratic, test the actuator before replacing the turbo.
I’ve replaced dozens of “failed turbos” only to find the wastegate actuator was weak or the control solenoid was clogged. Always test the actuator with a vacuum pump before condemning the turbo.
Blow-Off Valve (BOV) / Diverter Valve (DV)
Prevents compressor surge when the throttle closes suddenly. A failed BOV/DV causes flutter, which can damage the compressor wheel over time.
How to Check:
- Listen for a fluttering sound during gear shifts—indicates BOV not opening.
- Check for boost leaks—use a smoke test or spray soapy water on connections.
- Verify the valve opens under vacuum/boost signal. If stuck, clean or replace.
Atmospheric BOV vs. Recirculating DV: Atmospheric vents to air (loud); DV recirculates air back into the intake. Aftermarket BOVs can disrupt MAF readings and trigger check engine lights. For street-driven cars, stick with OEM-style DVs.
Turbo Types and What They Mean for You
Not all turbos are the same. Knowing your type helps with diagnosis and upgrades.
| Type | Pros | Cons | Common Issues |
|---|---|---|---|
| Fixed Geometry | Simple, reliable, low cost | Compromise between spool and top-end | Wastegate sticking, oil coking |
| Variable Geometry (VGT/VNT) | Great low-end response, broad powerband | Expensive, sensitive to carbon | Vane sticking, actuator failure |
| Twin-Scroll | Better pulse separation, faster spool | Complex manifold, fragile seals | Cracked manifold, gasket leaks |
| Electric Assist | Zero lag, instant response | High cost, 48V system required | Motor failure, sensor errors |
On VNT turbos, I always check vane position with a scan tool before disassembly. If the vanes don’t move, it could be the actuator, linkage, or ECU—not necessarily the turbo. Carbon buildup is the enemy; use a diesel-specific intake cleaner every 15k miles in city-driven vehicles.
Common Failures and How to Diagnose Them
Use this table to narrow down issues quickly.
| Symptom | Most Likely Causes | Less Common but Possible |
|---|---|---|
| Loss of boost | Boost leak, wastegate stuck open, actuator failure | Compressor wheel damage, shaft seal failure, blocked inlet |
| Excessive oil consumption | Failed turbo oil seals, clogged drain line | PCV system fault, worn valve seals |
| Whining or grinding noise | Bearing wear, compressor/turbine rub | Accessories (belt, pulley), intake resonance |
| Black smoke under boost | Fueling issue (injectors, ECU), overfueling due to boost spike | Low compression, EGR fault |
| Blue smoke at idle after shutdown | Oil draining back through turbo seals | Valve guide seals, crankcase pressure |
Situation: A 2012 VW TDI came in with low power and a check engine light for boost pressure deviation. Initial scan showed erratic MAF readings and overboost.
Initial Assumption: We thought the turbo was over-boosting due to a failed wastegate actuator.
Deep Dive: After pulling the turbo, the actuator tested fine. The compressor wheel was clean, no shaft play. Then we checked the intake tract—found a split in the intercooler boot that was sucking in unmetered air.
Nuanced Lesson Learned: The ECU was actually commanding higher boost to compensate for the lean condition, not the other way around. Always rule out air leaks before condemning the turbo or actuator.
Situation: A Subaru WRX owner installed a larger turbo and reported oil in the intercooler pipe.
Initial Assumption: Blown turbo seals—common with big turbos and high boost.
Deep Dive: The turbo checked out fine on the bench. Oil was coming from the PCV system. The owner had removed the factory oil catch can, and crankcase vapors were condensing in the intercooler.
Nuanced Lesson Learned: Not all oil in the intake is from the turbo. High crankcase pressure can mimic seal failure, especially in modified engines.
Best Practices: Do and Avoid
- ✅ Recommended: Let the engine idle for 30–60 seconds after hard driving before shutdown. This allows oil to cool the CHRA and reduces coking risk.
- ✅ Recommended: Use high-quality, low-ash synthetic oil. It resists breakdown at high temps and reduces deposit formation.
- ✅ Recommended: Replace or clean the air filter regularly. A restricted intake can cause compressor surge and reduce efficiency.
- ✅ Recommended: Inspect oil feed and drain lines for kinks, collapse, or blockage during turbo replacement. A restricted drain line is a common cause of oil leaks.
- ✅ Recommended: Clean threads with a tap before installing bolts. Seized bolts on a hot turbo housing are a nightmare.
- ⚠️ Avoid: Reusing torque-to-yield (TTY) bolts unless specified. They’re designed to stretch once, and reusing them can lead to joint failure.
- ⚠️ Avoid: Over-tightening oil line fittings. Aluminum housings strip easily, and a small leak can become a fire hazard.
- ⚠️ Avoid: Installing a used turbo without verifying bearing play and compressor/turbine clearance. A little wobble now becomes catastrophic later.
- ⚠️ Avoid: Running the engine without verifying oil flow to the turbo on initial startup. Prime the system if possible.
One thing I’ve learned: no two turbo failures are exactly alike. The symptoms might look textbook, but the root cause often hides in the periphery—oil quality, installation practice, or seemingly unrelated engine systems. Always verify, don’t assume. And when in doubt, consult the factory service manual for torque specs, clearances, and flow diagrams—what’s true for one engine may not apply to another.