Diagnosing fuel injector problems without removal saves time and money—but only if done correctly. As a master technician, I’ve seen countless injectors replaced unnecessarily because basic system checks were skipped. This guide walks you through a complete, logical diagnostic process using tools most DIYers and shops already have. We’ll focus on real-world tests that isolate true injector faults from look-alike issues like vacuum leaks, spark problems, or sensor errors.
Step 1: Confirm Symptoms and Isolate the Cylinder
Never assume the check engine light or driveability issue points directly to a bad injector. Start with data.
OBD2 Scan Tool Diagnostics
Connect a capable scan tool to read DTCs and live data. These three data streams are non-negotiable:
- P030X Misfire Codes: Tells you which cylinder is misfiring (e.g., P0302 = cylinder 2). But remember: misfire doesn’t equal bad injector. Could be spark, compression, or vacuum leak.
- P020X Injector Circuit Codes: Such as P0203. Indicates electrical fault in the injector driver circuit. Still, the issue could be wiring, connector, or ECM—not necessarily the injector.
- Fuel Trim Values: Check both short-term (STFT) and long-term (LTFT). A LTFT of +15% or higher on one bank suggests a lean condition—possibly a clogged or leaking injector. If both banks are affected, look upstream: fuel pump, filter, MAF, or vacuum system.
In my shop, we never replace an injector without first checking fuel trims and misfire counters. More than half the time, the real culprit is a vacuum leak or failing sensor.
Live Data Monitoring
Use the scan tool to monitor in real time:
- Misfire Counters: Watch which cylinder accumulates misfires under load. If cylinder 4 spikes during acceleration, focus there.
- O2 Sensor Voltages: A sluggish or stuck upstream O2 sensor can mimic fuel delivery issues. Compare bank-to-bank response. If one O2 reads consistently rich, suspect a leaking injector on that bank.
- Fuel Pressure (if equipped with sensor): On returnless systems, pressure should remain stable under load. A drop suggests fuel pump or filter issues—not injector.
Visual and External Inspection
Before going electrical, inspect the obvious:
- Wiring Harness: Check for chafing, rodent damage, or loose connectors at each injector. Wiggle the harness while monitoring misfire counters—intermittent opens show up fast.
- Fuel Rail and Injector Seals: Look for wetness or fuel odor around injector bases. A leaking O-ring causes hard starts and evaporative codes, not misfires.
I’ve saved customers hundreds by finding a cracked connector retainer instead of replacing an injector. Always inspect the harness—especially near sharp edges or hot exhaust components.
Step 2: Electrical Testing (Engine Off)
Injector Coil Resistance Test
Use a digital multimeter (DMM) to check resistance. This test identifies open or shorted coils—but not performance under load.
Procedure:
- Turn ignition OFF.
- Disconnect the injector connector. Label each to avoid mix-ups.
- Set DMM to ohms (Ω).
- Probe the two terminals on the injector side.
Pass/Fail Criteria:
- High-impedance injectors (most PFI): 12–16 Ω
- Low-impedance (some performance or GDI): 1–4 Ω
- Open circuit: “OL” on meter—coil is dead.
- Shorted: Near 0 Ω—rare, but possible.
More important than absolute value? Consistency. If four injectors read 14.3–14.7 Ω and one reads 12.1 Ω, investigate further—even if it’s “in spec.”
Power and Ground Circuit Verification
Just because the injector has resistance doesn’t mean it’s getting power or ground.
Tools: Test light or DMM
Check Power:
- Turn ignition ON (engine OFF).
- Probe the power wire at the injector connector (refer to wiring diagram).
- Should read 12–14.7 V. No voltage? Check fuse, relay, or power feed.
Check Ground Control:
- Back-probe the ground wire with DMM in DC voltage mode.
- Crank the engine. You should see a pulsing 0 V signal—this is the ECM grounding the circuit.
- No pulse? ECM isn’t firing the injector. Could be driver fault, wiring break, or ECM issue.
I use a noid light first for a quick pulse check. If it flashes, the ECM and wiring are good. Then I move to resistance and balance tests.
Step 3: Functional Testing (Engine Running or Cranking)
Noid Light Test
Plug a noid light into the injector connector. Crank the engine. The light should flash rapidly. No flash? Either no signal from ECM or open circuit. Flash present? Electrical side is likely good.
Stethoscope or Chassis Ear Test
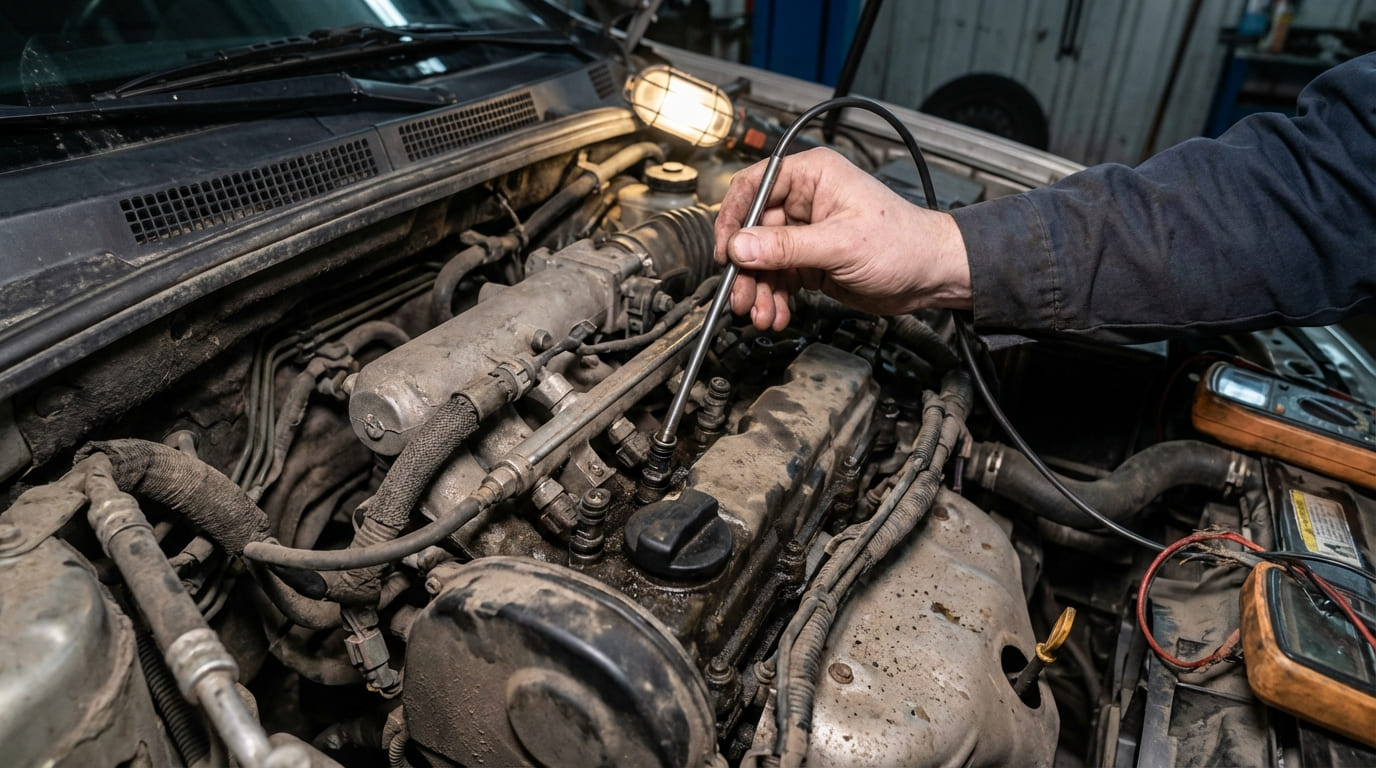
With engine idling, press a mechanic’s stethoscope or electronic listening tool against each injector body. You should hear a sharp, consistent clicking.
- Irregular or weak click: Possible internal mechanical failure.
- No sound: Could be electrical or mechanical bind.
Note: Some high-frequency injectors (especially GDI) may not produce audible clicks. Use this test as a clue, not proof.
Fuel Pressure Drop Test (Injector Contribution Test)
This test requires a fuel pressure gauge and the ability to pulse injectors individually (via scan tool or manual jumper).
Procedure:
- Install fuel pressure gauge.
- Stabilize pressure at idle.
- Use scan tool to pulse one injector at a time (2–3 seconds).
- Observe pressure drop.
All injectors should cause a similar dip (typically 3–7 psi, varies by system). A smaller drop indicates restricted flow. No drop? Injector may be clogged or not opening.
After pulsing, pressure should rebound quickly. Slow recovery suggests pump or regulator issues.
Injector Balance Test (Scan Tool Dependent)
On supported vehicles, use bi-directional controls to deactivate each injector briefly while monitoring RPM drop.
- Healthy cylinder: RPM drops 80–150 RPM.
- Weak cylinder: Minimal RPM drop—suggests poor combustion due to clogged, leaking, or non-pulsing injector.
Compare all cylinders. Deviations of 30% or more are suspect.
Balance tests are gold. They simulate real load. I’ve caught partially clogged injectors that passed every static test.
Exhaust Gas Analysis (Indirect but Powerful)
Use a 4- or 5-gas analyzer for deeper insight:
- High HC and CO: Rich condition—possibly leaking injector.
- High O2 and lean misfire: Could be clogged injector or vacuum leak.
- Consistent high HC across all cylinders: Look for unmetered air (intake leak), not multiple bad injectors.
Step 4: Rule Out Other Causes
Before condemning an injector, eliminate mechanical and ignition issues.
Relative Compression Test
Use a lab scope or AMPS clamp to measure cranking current. Each cylinder draws a peak current as it compresses. A 20%+ lower peak on one cylinder suggests mechanical fault—burned valve, worn rings, head gasket. Replacing the injector won’t fix this.
Spark Plug Inspection
Remove the plug from the suspect cylinder:
- Wet, black, fuel-fouled: Over-fueling—could be leaking injector.
- Dry, white, or ashy: Lean burn—restriction or vacuum leak.
- Oil-fouled: Check PCV system, turbo seals, or valve stem seals.
Borescope Inspection (Especially for GDI)
Insert through spark plug hole. Look for:
- Fuel wash: Clean spots on piston = excess fuel (leaking injector).
- Carbon buildup: Common on GDI intake valves. Can cause rough idle, mimicking injector issues.
Limitations of Non-Removal Testing
You can’t catch everything without pulling the injectors:
- Minor internal leakage (only shows at idle)
- Degraded spray pattern (critical on GDI)
- Partial clogs that only affect high-load performance
- Heat-induced intermittent electrical faults
- Carbon on GDI nozzle tip
Flow bench testing is the only way to confirm spray pattern and volume. But for 80% of cases, non-invasive tests get you close.
Costs and Repair vs Replace
Testing cost: $0–$150 (DIY vs shop)
Injector cleaning (chemical): $100–$200 — often ineffective for modern GDI
Injector replacement (OEM): $300–$800 per injector (GDI), $150–$300 (PFI)
Aftermarket injectors: $80–$200 — but may require ECU recalibration
Repair vs Replace Logic:
- If one injector fails, clean or replace all—especially on high-mileage engines.
- On GDI engines, replacement is almost always better than cleaning.
- Aftermarket units can work, but OEM-spec is safer. Avoid cheap no-names.
I don’t recommend ultrasonic cleaning unless you have access to a flow bench. You can’t verify results otherwise.
Diagnostic Best Practices
| Injector Type | Typical Resistance | Common Failure Mode | Diagnostic Clue | Probability of Injector Fault |
|---|---|---|---|---|
| High-Impedance (PFI) | 12–16 Ω | Coil open, clogging | No noid flash, high HC | ~65% |
| Low-Impedance (Peak & Hold) | 1–4 Ω | Shorted windings, mechanical bind | Fuse blow, inconsistent clicking | ~55% |
| Direct Injection (GDI) | Varies (often 1–3 Ω) | Carbon tip buildup, internal leak | Lean misfire under load, oil dilution | ~70% (but often misdiagnosed) |
| Throttle Body Injector (TBI) | 2–6 Ω | Sticking pintle, filter clog | Surging, poor idle | ~45% |
Key Recommendations and Pitfalls
- ✅ Clean injector connectors with electrical contact cleaner before testing. Corrosion mimics high resistance.
- ✅ Compare readings between injectors. Deviation matters more than spec.
- ✅ Use bi-directional scan tool controls to pulse injectors individually.
- ⚠️ Don’t assume bad injector based on resistance alone. Slight variance is normal.
- ⚠️ Never skip compression and spark checks. Misfires are rarely just fuel.
- ⚠️ Avoid non-OEM injectors without ECU adaptation. Flow rate mismatches cause long-term issues.
Situation: 2014 F-150 3.5L EcoBoost with P0305 and high fuel trims on bank 2.
Initial Assumption: Bad injector or coil.
Discovery: Coil swap had no effect. Injector clicked and had normal resistance. Borescope revealed carbon buildup and piston wash. Found split PCV hose.
Lesson: The misfire code pointed to cylinder 5, but the root cause was unmetered air. Always verify air/fuel balance holistically.
Situation: 2008 Camry 2.4L with P0171 and P0201. Resistance read “OL.”
Initial Assumption: Dead injector.
Discovery: Harness near valve cover was pinched. Repaired connector—resistance returned to 14.3 Ω. No parts replaced.
Lesson: Open circuit doesn’t mean dead injector. Check the wiring path first.
Situation: 2016 VW Golf TDI with highway surging. No DTCs.
Initial Assumption: Fuel delivery issue.
Discovery: All injector tests passed. Caught intermittent loss of injection pulse—traced to failing crankshaft sensor.
Lesson: Timing errors mimic fuel faults. Always validate sensor health on modern engines.
Testing fuel injectors without removal is about building a case with multiple data points. No single test is definitive. Combine electrical checks, functional tests, and system-wide analysis. Stay skeptical. Question every assumption. And remember: the check engine light tells you *what*, not *why*. Your job is to find the real cause—before any parts are replaced.