Yes, a timing chain tensioner can often be replaced without replacing the chain—but only if the rest of the timing system is in good condition. Replacing just the tensioner when other components are worn leads to repeat failures and costly comebacks. This guide walks you through how to diagnose the real problem, assess system health, and decide whether a tensioner-only fix is viable.
When Can You Replace Just the Tensioner?
The answer depends on two hard requirements:
- You’ve confirmed the tensioner is the only failed component.
- The chain, guides, and sprockets are within factory wear limits.
If either condition isn’t met, a full timing kit replacement is the only reliable fix. Skipping inspection risks rapid re-failure—even if the noise stops temporarily.
How to Diagnose a Bad Timing Chain Tensioner
Symptoms That Point to Tensioner Failure
The most common signs of a failing tensioner include:
- Cold-start rattle lasting 2–5 seconds, disappearing once oil pressure builds.
- Sharp ticking or slapping noise from the front of the engine, increasing with RPM.
- Intermittent cam/crank correlation codes (P0016, P0017, P0018, P0019) without major timing drift.
But these symptoms overlap with other issues. Low oil pressure, VVT solenoid faults, or chain stretch can mimic tensioner noise. Never assume—verify.
Step-by-Step Diagnostic Process
To isolate the cause, follow this sequence:
1. Use an Electronic Chassis Ear
Place sensors on the timing cover, cylinder head, and engine block. If the loudest noise is sharply localized at the tensioner housing, the tensioner is likely failing. If the sound is broad, grinding, or echoes across the front cover, suspect chain slap or guide wear.
2. Check Oil Pressure with a Mechanical Gauge
Connect a calibrated gauge and measure pressure at idle (hot) and 2500 RPM. Compare to factory specs—many engines require 25–30 psi at idle. Low pressure starves hydraulic tensioners, causing rattle even if the unit is good. Fix oil system issues before touching the tensioner.
3. Analyze Camshaft and Crankshaft Correlation Data
Using an OEM-level scan tool, monitor cam timing relative to crank position. Deviations beyond ±2 degrees under load indicate chain stretch. If you see 5+ degrees of fluctuation, the chain is likely worn—replacing the tensioner alone won’t fix it.
4. Inspect the Timing Cover (If Accessible)
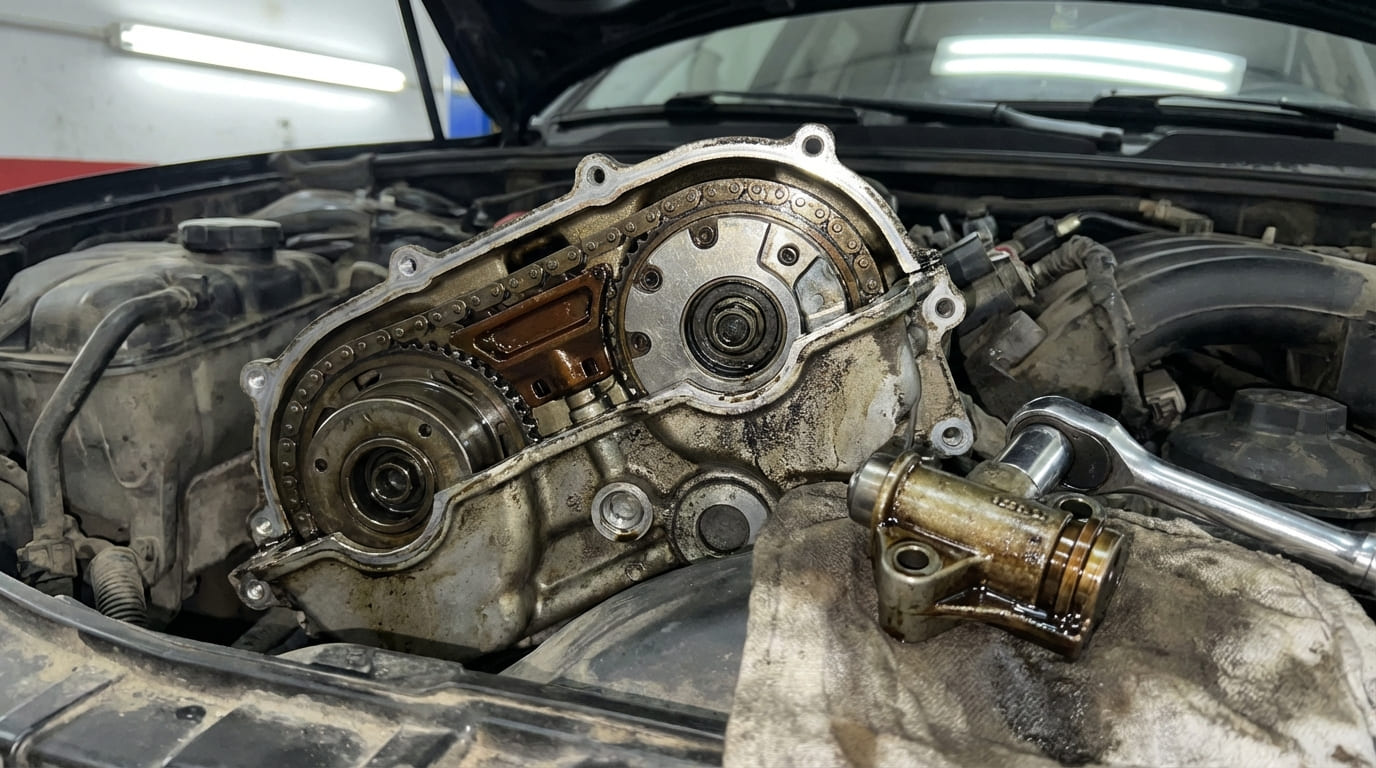
On some engines, removing the timing cover gives direct access. Look for metal debris, which signals advanced wear. If the cover is clean and the tensioner shows obvious damage (cracks, leaks, stuck plunger), replacement may suffice—provided the chain and guides check out.
Assessing Chain, Guide, and Sprocket Condition
Diagnosis isn’t complete until you verify the entire timing train. Here’s how:
Chain Wear and Stretch
Measure a set number of links (e.g., 16) with a ruler. Compare to a new chain. Most manufacturers allow up to 0.002″–0.003″ elongation per foot. Exceeding this means the chain is worn and must be replaced. Also check for side-to-side play—any noticeable wiggle indicates excessive wear.
Guide Rail Inspection
Look for deep grooves, chipping, or delamination—especially on the tensioner-side guide. Many plastic guides wear thin over time. If the guide is cracked or less than 50% of original thickness, it must be replaced. A failed guide can let the chain jump teeth.
Sprocket and Tensioner Plunger Checks
Inspect cam and crank sprockets for hooked or uneven teeth. Even slight wear affects timing accuracy. Then check the tensioner plunger: if it’s extended beyond 5–8 mm (varies by engine), the chain has stretched beyond compensation range. A new tensioner won’t fix that.
Cost and Labor Considerations
Labor to access the timing cover often takes 4–8 hours, depending on the engine. Here’s a realistic cost breakdown:
| Repair Type | Parts Cost | Labor Hours | Estimated Total |
|---|---|---|---|
| Tensioner only | $50–$120 | 4–6 | $400–$700 |
| Full timing kit | $250–$500 | 6–8 | $700–$1,200 |
Notice: labor makes up most of the cost. If you replace just the tensioner now and come back later for a full kit, you pay labor twice. On high-mileage engines (>100,000 miles), upgrading to a full kit during the first job often saves money long-term.
In my shop, we never replace a tensioner without inspecting the chain and guides. Even if the noise points to the tensioner, hidden wear in the rest of the system leads to 30% comeback rates. For engines over 100k miles, we recommend the full kit—it’s cheaper than a second teardown.
Best Practices for Tensioner Replacement
If you confirm the tensioner is the only faulty part, follow these steps:
- Use OEM or high-quality aftermarket tensioners. Cheap units often fail within a year due to seal degradation.
- Pre-fill hydraulic tensioners with clean engine oil before installation to prevent dry starts.
- Clean bolt threads with a tap and blow out oil passages. Debris causes improper seating and oil starvation.
- Replace torque-to-yield (TTY) bolts. Reusing them risks insufficient clamping force and leaks.
- Follow factory torque specs with a calibrated wrench. Overtightening cracks housings.
- Use cam locking tools on VVT engines. Even 1-tooth misalignment can trigger codes or cause valve damage.
Recommended Repair Strategy
Use this decision matrix to choose the right repair path:
| Scenario | Findings | Root Cause | Recommended Action |
|---|---|---|---|
| A: Low-mileage engine | Confirmed tensioner rattle; chain tight; guides intact; plunger within spec | Failed tensioner seal or debris blockage | Replace tensioner only; clean oil passages; prime before install |
| B: High-mileage with noise | Chain slack; worn guide; plunger near max extension | Chain stretch and guide degradation | Replace full timing kit (chain, guides, tensioner, sprockets) |
| C: Intermittent issues, unclear source | High mileage (>120k mi); borderline chain wear; low oil pressure | Multifactor: lubrication and wear | Replace full kit and address oil system (pump, filter, pickup screen) |
A 2014 V6 pickup came in with cold-start rattle. Owner had bought a new tensioner. After teardown, we found 0.004″ chain stretch (spec: 0.002″) and a fully extended plunger. The tensioner wasn’t failing—it was maxed out trying to compensate. Replacing it alone would’ve failed in months. The fix? Full kit replacement.
A 2012 sedan had P0017 and ticking. Oil pressure was 12 psi hot idle (spec: 25 psi). Chain and guides looked good. We replaced the oil pump and cleaned the pickup screen—noise vanished. Lesson: hydraulic tensioners depend on oil pressure. Diagnose the system, not just the symptom.
A 2008 DOHC engine had repeated tensioner replacements. Teardown revealed a warped cam sprocket causing chain flutter. The tensioners weren’t defective—they were responding to instability. Always inspect sprockets for runout and cam endplay.
Replacing a timing chain tensioner without replacing the chain is possible—but only when the rest of the system is healthy. Given the high labor cost, it’s often smarter to install a full kit on high-mileage engines, even if wear is borderline. When in doubt, consult the factory service manual for exact tolerances and procedures. Guessing leads to comebacks. Measuring leads to lasting repairs.