In my shop, clogged radiators are one of the most preventable yet damaging issues I see. When coolant flow is restricted, heat builds fast—often leading to warped heads, blown gaskets, and costly repairs. The good news? Early detection can save you hundreds. This guide cuts through the noise and gives you the exact signs to watch for, how to test them, and what to do next.
Elevated Engine Coolant Temperature
Overheating is the most obvious red flag, but it’s not always the radiator’s fault. Use this symptom as a starting point, not a final diagnosis.
If your temperature gauge climbs into the red zone during normal driving—especially in stop-and-go traffic or light load—it’s time to investigate. Most engines run best between 195°F and 220°F (90–104°C). Sustained temps above 240°F (115°C) risk damage.
- Dashboard warnings like “CHECK ENGINE” or “OVERHEAT” typically trigger at dangerous levels.
- Some gauges are buffered or non-linear—meaning the needle may not move until the engine is already overheating.
How to Check: Confirm with Live Data
Relying on the dashboard gauge alone is risky. Use an OBD2 scanner or IR thermometer for accurate readings.
- Warm the engine to operating temperature with the thermostat open.
- Measure ECT at the engine outlet (thermostat housing).
- Measure at the radiator inlet (upper hose).
- Measure at the radiator outlet (lower hose).
A healthy radiator drops coolant temp by 10–20°F (5–11°C) from inlet to outlet. If the drop is less than 5°F (3°C) and engine temps stay high, flow is likely restricted. But rule out a stuck thermostat or air pocket first.
In my shop, we always check live ECT data before touching the radiator. I’ve saved customers from unnecessary replacements by catching a $15 thermostat failure early.
Weak Heater Output
A cold cabin when the engine is hot suggests poor coolant circulation. Many assume the heater core is clogged, but the problem may be upstream.
If the heater blows lukewarm or cool air at idle—even when the engine temp reads normal—coolant flow is likely compromised. A severely clogged radiator can starve the heater core of volume.
How to Check: Test Heater Core Flow
Use an IR thermometer to assess flow across the heater core.
- Run the engine at operating temperature with the heater on high.
- Check the temperature of the heater core inlet and outlet hoses.
A normal drop is 10–20°F (5–11°C). A minimal drop suggests low flow. But first, verify the blend door and water valve (if equipped) are working. A clogged radiator isn’t the only cause, but it’s a common contributor when the whole system is sluggish.
Discolored or Contaminated Coolant
This is one of the fastest and most revealing checks you can do. Open the reservoir or radiator cap (when cold!) and inspect the coolant.
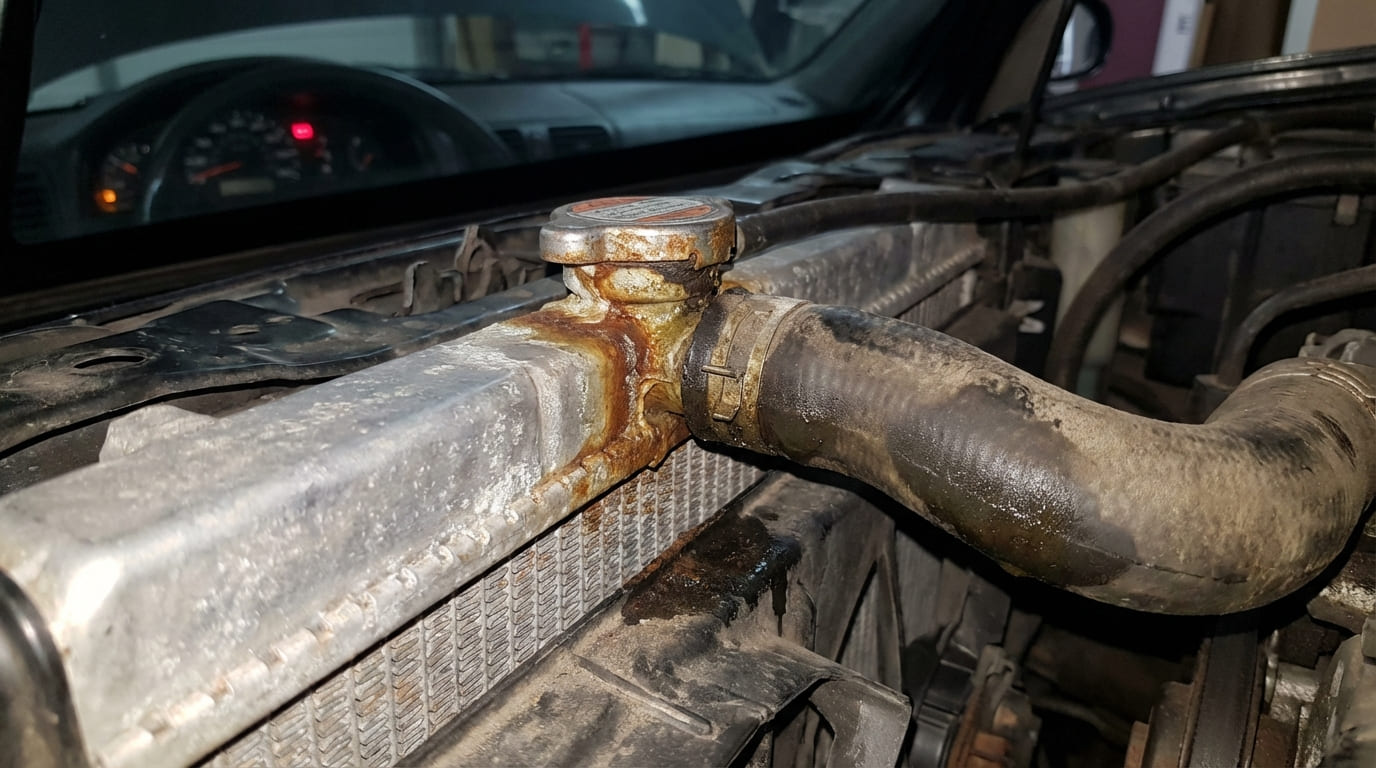
Rusty brown, black sludge, or visible particles indicate internal corrosion or chemical breakdown. Milky coolant may mean oil or transmission fluid intrusion.
How to Check: Test Coolant Condition
Use coolant test strips or a refractometer for accurate assessment.
- Check pH: Healthy coolant reads 8.0–10.5. Below 7.5 means acidification and high corrosion risk.
- Verify freeze/boil protection matches your climate.
- Look for oil sheen or transmission fluid—signs of internal leaks.
Dirty coolant doesn’t guarantee a clogged radiator, but it dramatically increases the odds. In 15+ years, I’ve rarely seen sludge without flow issues in systems past 100,000 miles.
Never trust color alone. I’ve seen bright green coolant that tested acidic and full of particulates. Always test—it takes 60 seconds and prevents big mistakes.
Coolant Leaks (Indirect Sign)
Leaks aren’t a direct symptom of clogging, but they can be a side effect. Restricted flow increases system pressure, stressing weak points.
Look for green, orange, or pink residue on radiator fins or end tanks. On aluminum radiators with plastic tanks, thermal cycling under high pressure can cause hairline cracks.
How to Check: Perform a Pressure Test
A cooling system pressure test is essential to confirm leaks.
- Attach the tester to the radiator neck.
- Pump to OEM spec—usually 15–18 psi (103–124 kPa).
- Hold for 15–20 minutes.
A pressure drop indicates a leak. If you see weeping at seams, the core is fatigued. While this doesn’t confirm internal blockage, I’ve found chronically high pressure from poor flow accelerates these failures.
Direct Radiator Flow Test
This is the definitive way to confirm a clog. It requires removing the radiator, but it gives a clear yes/no answer.
How to Check: Measure Flow Rate
- Drain and remove the radiator.
- Seal one hose connection.
Connect the pressure tester to the other.
Fill the core with water.
Apply low pressure (5 psi / 34 kPa).
Time how long it takes 5 liters to flow through.
Compare to a known-good unit. If flow is less than 70% of a new radiator’s output, replacement is the smarter choice. Flushing won’t fix bonded scale or internal corrosion.
In my shop, we keep a flow bench for this test. It’s saved us from misdiagnosing dozens of “bad water pumps” that were just clogged radiators.
Common Causes of Radiator Clogging
- Internal corrosion and scale: Caused by overdue coolant changes or improper mix (especially tap water).
- Contaminated coolant: Mixing incompatible types (OAT, IAT, HOAT) creates gel or sludge.
- Oil or transmission fluid: A failed head gasket or internal transmission cooler leak leaves residue.
- Stop-leak products: These often solidify in narrow radiator tubes, worsening flow.
Risks of Ignoring the Problem
Repeated overheating leads to warped cylinder heads, blown head gaskets, and transmission damage (if the radiator houses the cooler). Aluminum heads are especially vulnerable. On modern engines, thermal stress can trigger timing chain or VVT issues. Don’t wait for failure—act at the first signs.
Repair vs. Replace: What’s Viable?
Flushing: When It Works (and When It Doesn’t)
For mild contamination, a chemical flush *might* help. Use a professional-grade product and reverse-flush if possible. But if coolant hasn’t been changed in over 100,000 miles or has visible sludge, flushing is usually a waste.
It won’t remove scale bonded to tube walls. And aggressive flushing can dislodge debris and block the heater core or engine passages. In my experience, flushing extends life only in early-stage cases.
Radiator Replacement: The Reliable Fix
When flow is significantly restricted, replacement is the best path. OEM or high-quality aftermarket units are worth the extra $20–$50. Cheap radiators often have thinner fins and undersized tubes that clog faster.
Typical cost: $150–$400 for the part, $100–$200 labor. Consider it insurance against a $1,500 head gasket job.
I always recommend replacing the thermostat, radiator cap, and hoses at the same time. A new radiator with a $5 weak cap can overheat just as fast.
What to Do: Recommended vs. Avoid
- ✅ Use a refractometer to check coolant concentration—more accurate than test strips.
- ✅ Flush with reverse flow *only* after confirming no downstream blockages.
- ✅ Inspect the radiator cap’s pressure relief—many overheating issues start here.
- ⚠️ Avoid reusing old radiator hoses—even if they look fine. Internal collapse is common.
- ⚠️ Avoid mixing coolant types without a complete system flush.
- ⚠️ Avoid relying on visual inspection alone. A radiator can look clean but still be clogged.
Diagnostic Scenarios and Likely Causes
| Symptom Combination | Most Likely Causes | Less Common But Possible | Diagnostic Priority |
|---|---|---|---|
| Overheating + low heater output + rusty coolant | Clogged radiator, degraded coolant | Partially blocked heater core, air pocket | Check flow, inspect coolant, pressure test |
| Overheating + normal heater + clean coolant | Thermostat failure, water pump issue | Head gasket leak, air in system | Scan ECT live data, verify thermostat operation |
| Steam + pressure leak at radiator seam | Stress fracture from restricted flow | Cap failure, overfilling | Pressure test, inspect cap and core |
| Coolant contamination (oil) | Transmission cooler leak, head gasket | Cracked radiator tank (rare) | Check ATF, inspect for combustion gases in coolant |
Situation: 2012 F-150 with overheating and cold heater. Coolant was brown and sludgy.
Initial Assumption: Clogged heater core—common on that model.
Deep Dive: Flow was strong at heater hoses. Radiator inlet/outlet temp drop was only 3°F. Flow test showed less than half normal volume.
Lesson: Don’t assume heater issues mean heater problems. System-wide flow matters. Root cause: 150,000-mile overdue coolant change.
Situation: Customer used stop-leak for a radiator leak. Engine overheated under load a month later.
Initial Assumption: Leak returned.
Discovery: No leaks found. No temp drop across radiator. Removed unit—several tubes blocked with coagulated sealant.
Lesson: Stop-leak migrates and clogs the narrowest passages—usually in the radiator. Full system overhaul required.
Situation: Minivan with intermittent overheating. Coolant clean, heater worked fine.
Initial Assumption: Bad thermostat or water pump.
Discovery: Live ECT data fluctuated. Radiator upper tank seal was warped, causing air pockets. Flow test normal, but thermal imaging showed uneven cooling.
Lesson: Not all radiator issues are clogs. Physical damage or seal failure can disrupt flow. Inspect both inside and out.
Diagnosing a clogged radiator isn’t about one symptom—it’s about connecting temperature, flow, coolant condition, and system history. Always consult the manufacturer’s service manual for specs. What works for a heavy-duty truck may not apply to a compact engine. When in doubt, test flow. It’s the truth teller.