In over two decades of turning wrenches, I’ve seen how a single overheat event can destroy an otherwise healthy engine. The steps you take in those first minutes determine whether you’re facing a $20 fix or a $2,000 rebuild. This guide walks you through exactly what to do—from roadside response to shop diagnostics—so you can make smart, safe decisions.
Immediate Action Upon Overheat Indication
The second your temperature gauge hits red or the warning light comes on, act fast. Heat degrades oil, warps aluminum, and can crack cast iron in minutes.
- 1.1 Pull over safely. Don’t wait for steam. Even if the engine sounds normal, internal damage is accumulating.
- 1.2 Shut the engine off immediately. Continuing to run it risks head gasket failure, piston scuffing, or head warping.
- 1.3 Turn on hazard lights. You’re now a stationary hazard, especially on highways.
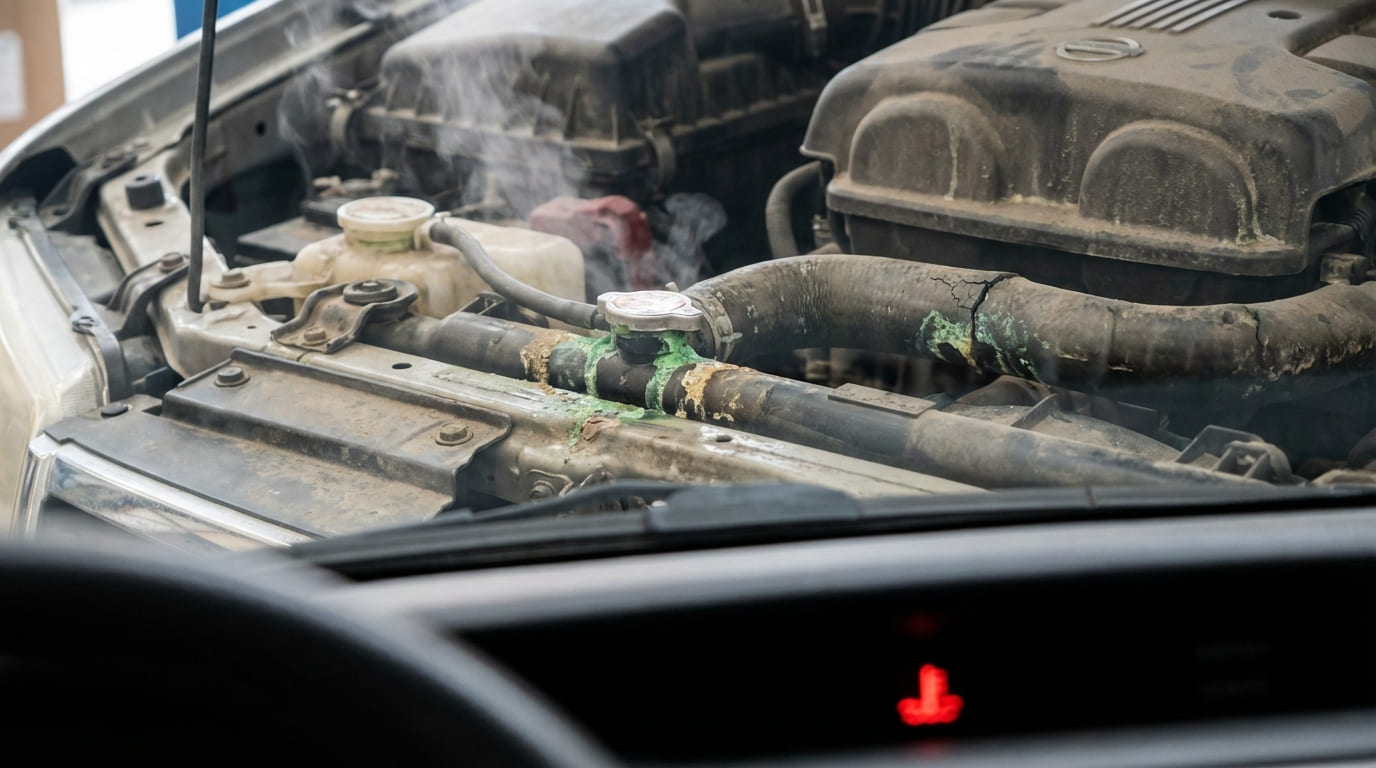
- 1.4 Observe carefully. Look for steam location—radiator, reservoir cap, water pump, or cylinder head. Smell for sweet, pungent coolant (ethylene glycol).
- 1.5 Never open the radiator cap while hot. Pressurized coolant at 250°F can cause severe burns. Wait until the engine is cool to the touch.
In my shop, we treat every overheat as a potential head gasket or warped component until proven otherwise. Even one episode above 260°F can compromise aluminum heads.
Safe Cooling and Initial Inspection
Rushing this phase leads to injury or misdiagnosis. Let physics work for you.
- 2.1 Wait 30–60 minutes minimum. On hot days or with aluminum blocks, cooling may take 90 minutes. Touch the hood—if it’s too hot to rest your hand on, the internals are still under pressure.
- 2.2 Walk around the vehicle. Look for coolant puddles, white crust on hoses (evaporated coolant), or drips from the water pump weep hole.
- 2.3 Check coolant levels only after full cooldown. Inspect both the radiator and overflow reservoir. A full reservoir doesn’t mean the radiator is full—air pockets trap coolant.
Cautious Radiator Cap Removal and Coolant Check
One wrong move here can land you in the ER.
- 2.3.1 Use a thick shop towel over the cap. Turn slowly counterclockwise until you hit the first detent.
- 2.3.2 Pause and listen. If you hear a hiss, stop and wait. Residual pressure means the system isn’t safe yet.
- 2.3.3 Once silent, finish removing the cap. If coolant is low, top off with proper 50/50 mix. If none is available, use distilled water.
Coolant Refill Best Practices
Improper refilling leads to airlocks and repeat overheating.
- 2.4.1 Use the correct coolant type. Mixing OAT, HOAT, or IAT can form gel or corrode metals. Check the cap or owner’s manual for specs (e.g., Dex-Cool, G48, G12++).
- 2.4.2 Distilled water is safe for emergency top-offs. But replace it within 100 miles—tap water causes scale, pure water boils easier.
- 2.4.3 Fill to the “cold” mark. Overfilling causes boil-over as the system expands. Leave 1–2 inches of headspace in the reservoir.
Preliminary On-Site Diagnosis
Before deciding to drive or tow, gather evidence.
- 3.1 Restart with the hood open. Watch the temp gauge closely. Keep engine speed at idle—no revving.
- 3.2 Check cooling fan operation. Electric fans should engage within 5–10 minutes of idle or when AC is on.
- 3.2.1 If the fan doesn’t run, test the fuse and relay. Swap with a known-good relay (like horn or A/C) to rule out failure.
- 3.3 Test heater output. Set HVAC to max heat, fan on high. Cold air with a hot engine suggests low coolant or airlock.
- 3.4 Inspect under running conditions. Look for drips at hose connections, thermostat housing, or water pump.
- 3.4.1 A pressure tester (available at most auto parts stores) can pressurize the system cold and reveal hidden leaks.
Pro tip: If the heater blows hot and the fan runs, but the gauge climbs slowly, suspect a clogged radiator or failing water pump—not a catastrophic leak.
Decision Path: Drive or Tow?
This is where judgment calls save engines—or wreck them.
- 4.1 If the temp stabilizes, fan runs, heater works, and no leaks appear, a cautious drive to a shop is acceptable. Keep speed under 55 mph, avoid hills, and monitor the gauge every 2 minutes.
- 4.2 If the gauge climbs again, heater stays cold, or fan remains off—call a tow. One mile can be too far when metal is already stressed.
I’ve towed cars for what turned out to be a $10 cap. But I’d do it again. The cost of a tow is nothing compared to a $1,800 head gasket job caused by one bad decision.
Advanced Diagnostics at a Repair Facility
Now it’s time to find the root cause—not just the symptom.
Cooling System Pressure Test
This is the gold standard for leak detection.
- 5.1.1 Use the correct adapter for your radiator or reservoir cap. Many modern systems use unique seals.
- 5.1.2 Pump to OEM pressure (usually 14–18 psi). Hold for 10–15 minutes.
- 5.1.3 A drop of more than 2 psi indicates a leak. Look for bubbles at hoses, water pump, or heater core.
Radiator Cap Test
A failed cap is one of the most overlooked causes of boil-over.
- 5.2.1 Test the cap on a pressure tester. A 16 psi cap should hold at least 14.4 psi.
- 5.2.2 If it fails, replace it. Caps cost $15–$30 and prevent boil-over by raising the boiling point.
Thermostat Diagnosis
A stuck thermostat is common—but don’t assume it’s bad without testing.
- 5.3.1 Use an IR thermometer on the upper radiator hose. It should stay cool until the engine reaches 195–205°F.
- 5.3.2 If the hose heats up too early, the thermostat is stuck open (inefficient warm-up).
- 5.3.3 If the engine overheats and the hose stays cold, the thermostat is stuck closed—replace it.
Electric Cooling Fan Circuit Check
Electrical faults are a top cause of overheating in traffic.
- 5.4.1 Check power and ground at the fan connector with a multimeter. No power? Check fuse, relay, and fan control module.
- 5.4.2 Use a scan tool to command the fan on. If it doesn’t respond, test motor resistance or inspect wiring.
Exhaust Gas in Coolant Test
This confirms head gasket, cracked head, or block failure.
- 5.5.1 Use a block tester (e.g., Block Buster). Fill with blue fluid, draw air from the coolant reservoir (engine off).
- 5.5.2 Fluid turning green or yellow indicates combustion gases in the coolant.
- 5.5.3 Positive result means major repair is likely. Compression test or leak-down test next.
Water Pump Inspection
Often ignored until it fails completely.
- 5.6.1 Look for weep hole seepage. A steady drip means the seal is gone—replace the pump.
- 5.6.2 Listen for bearing noise—a growl or chirp under load is a red flag.
- 5.6.3 With the radiator cap off and engine running, watch for coolant movement. No flow? Impeller may be broken or slipping.
Recommended and Avoid Checklist
- ✅ Recommended: Use a cooling system pressure tester. It’s the most reliable way to find leaks without disassembly.
- ✅ Recommended: Clean sealing surfaces and bolt threads before reassembly. Debris causes leaks and inaccurate torque.
- ✅ Recommended: Use OEM-specified coolant. “Universal” coolant can react poorly with aluminum or seals.
- ⚠️ Avoid: Reusing torque-to-yield (TTY) head or main bolts. Stretch is permanent—replacement is required.
- ⚠️ Avoid: Regular tap water top-offs. Minerals cause scaling and reduce heat transfer.
- ⚠️ Avoid: Ignoring a weak radiator cap. It’s cheap, but critical for pressure and boiling point control.
Diagnostic Scenarios and Probable Causes
| Symptom | Most Likely Causes | Less Common but Possible | Diagnostic Priority |
|---|---|---|---|
| Overheat with visible coolant leak | Radiator crack, burst hose, water pump seal failure | Heater core leak, intake manifold gasket (aluminum V6/V8) | Visual inspection → Pressure test |
| Overheat with no visible leak | Thermostat stuck closed, failed water pump, air pocket | Collapsed hose, blocked radiator, head gasket | Flow check → Thermostat test → Block test |
| Intermittent overheat | Electric fan relay failure, low coolant, weak radiator cap | ECM fan control issue, partial head gasket leak | Fan command test → Cap test → Monitor coolant level |
| Boil-over but engine runs cool | Overfilled system, failed radiator cap | Early-stage head gasket leak | Check fill level → Test cap → Block test |
Real-World Case Studies
Situation: 2012 F-150 with repeated boil-overs. New radiator, thermostat, hoses—still overheated on highway.
Diagnosis: Pressure test passed. No exhaust gases. Coolant mix was 100% antifreeze—no water.
Fix: Flushed and refilled with 50/50 mix. Overheating stopped.
Master Tip: Pure antifreeze transfers heat 30% less efficiently than 50/50 mix. Always check concentration with a refractometer.
Situation: Honda Accord overheated after water pump replacement. New parts throughout.
Diagnosis: Thermostat opened. No flow. Pump impeller spun freely on shaft—poor aftermarket build.
Fix: Replaced with OEM-spec pump. Flow restored.
Master Tip: After installing a water pump, crank engine with cap off to verify flow. Saves hours of troubleshooting.
Situation: BMW 328i overheated only in traffic. Highway driving fine.
Diagnosis: Electric fan worked. But viscous mechanical fan clutch was seized—common on dual-fan systems.
Fix: Replaced fan clutch. Idle cooling restored.
Master Tip: Some vehicles use both electric and mechanical fans. Test the entire system—not just the obvious part.
Repair and Verification
Fix it right the first time.
- 6.1.1 Use quality parts. OEM or reputable remans (like A1 Cardone) outperform cheap aftermarket.
- 6.1.2 Torque bolts to spec—especially aluminum housings. Over-torquing cracks thermostats housings and water pumps.
- 6.2.1 Flush the system. Old coolant turns acidic and corrodes solder joints and radiators.
- 6.2.2 Bleed air properly. Use bleeder screws, vacuum fillers, or scan tools (on European models) to purge air.
- 6.3.1 Perform a real-world drive cycle. Idle won’t load the engine like stop-and-go traffic.
- 6.3.2 Monitor ECT with a scan tool. Analog gauges lag and mask fluctuations.
- 6.3.3 Recheck coolant level when cold. Air pockets resolve over 2–3 heat/cool cycles.
Always consult factory service information. What’s true for one engine may destroy another. Torque specs, fill procedures, and bleeding methods vary widely. Your experience matters—but the manual is law.