Replacing a thermostat can be a simple fix or a deep dive into your engine bay—depending on your vehicle. As a master mechanic, I’ve seen thermostat jobs go smoothly on a 4-cylinder sedan in 45 minutes, and I’ve spent three hours on a V6 just to reach the housing. This guide cuts through the noise and gives you real-world costs, how to confirm the problem, what can go wrong, and whether you should DIY.
How Much Does Thermostat Replacement Cost?
Total cost varies widely, but here’s what you’ll realistically pay:
- DIY (parts only): $20 – $150
- Professional repair (parts + labor): $150 – $600
The range isn’t random. It depends on your car’s design, part type, and labor complexity. Let’s break it down.
What Determines the Final Cost?
Vehicle Design and Access
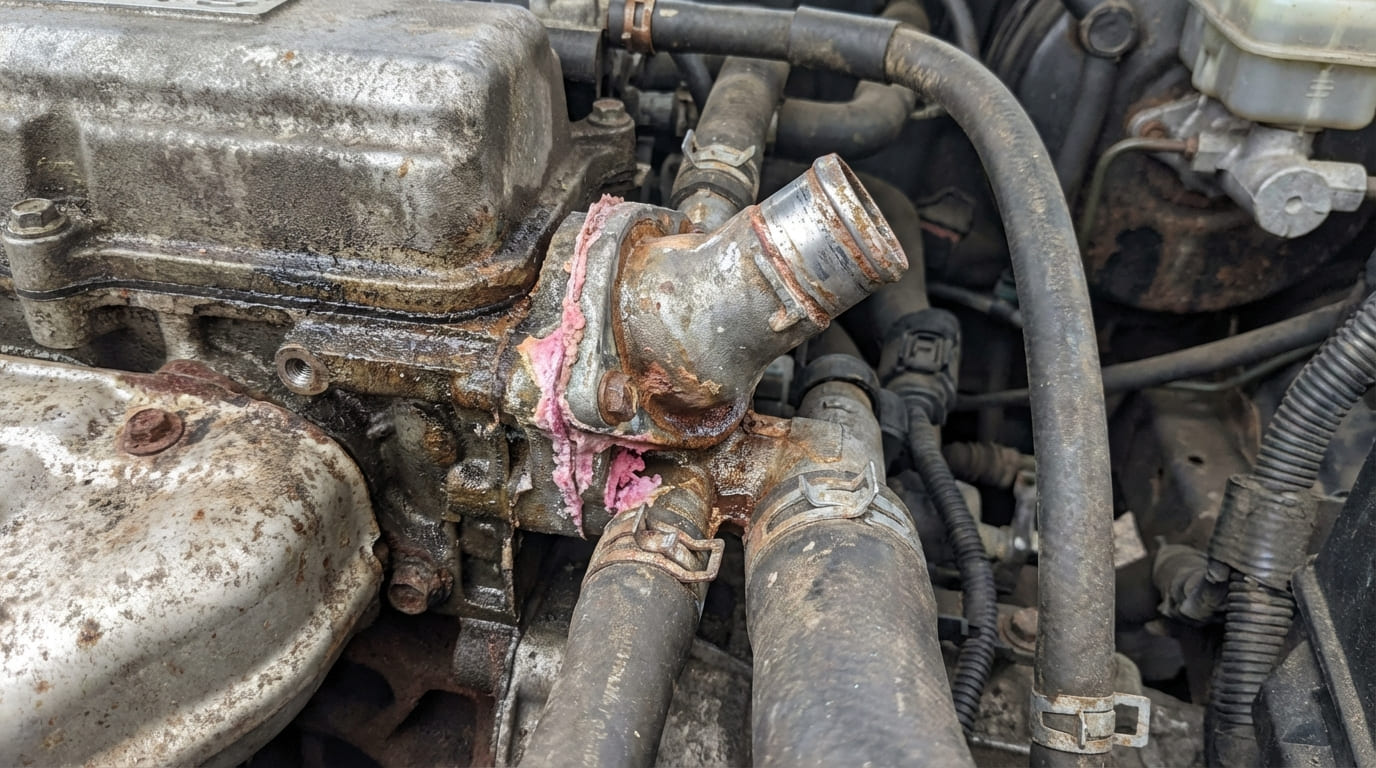
On many 4-cylinder engines, the thermostat housing is visible from the top—just drain coolant, unplug the sensor, remove 2–3 bolts, and swap it. That’s a 30–45 minute job.
But on transverse V6 engines (common in FWD vehicles), the thermostat may be tucked behind the intake manifold, power steering reservoir, or alternator. I’ve removed intake plenums on Hondas and Toyota V6s just to reach it. That pushes labor to 2–3 hours.
Some modern engines use electronic thermostats that regulate engine warm-up for emissions and efficiency. These require reprogramming with a scan tool after replacement—adding $50–$150 in labor.
Part Type and Quality
Not all thermostats are equal. Here’s what you’re actually buying:
| Component | Typical Cost Range | Notes |
|---|---|---|
| Standard wax-pellet thermostat | $15 – $50 | Most common; replace with OEM-specified temp (usually 195°F) |
| Integrated housing assembly | $40 – $150 | Includes gasket, ECT sensor; common on Fords, GMs, and some Toyotas |
| Electronically controlled thermostat | $70 – $200+ | Found on BMW, Audi, and some newer Toyotas; requires relearn procedure |
| Gasket or O-ring | $5 – $20 | Always replace; reused gaskets cause 30% of post-replacement leaks |
| Coolant (per gallon) | $15 – $40 | Use correct type—OAT, HOAT, P-OAT. Mixing causes sludge. |
OEM parts cost more but match factory specs. I’ve seen cheap aftermarket thermostats open too early or not seal properly—leading to comebacks. Stick with Gates, Stant, or Mahle for reliable aftermarket.
Labor Rates and Location
Independent shops: $80–$120/hour. Dealerships: $120–$200/hour. Urban areas tend to be higher, but not always better.
Most thermostat replacements take 0.5 to 3 hours. If your car needs bleeding with a vacuum filler or programming, add 30–60 minutes.
In my shop, we always check the repair time in the service manual before quoting. A “1-hour job” on paper can be 2.5 hours once you remove the airbox and coolant reservoir. Don’t trust generic online estimates—your car may be a nightmare to access.
How to Diagnose a Bad Thermostat
Don’t replace the thermostat on symptoms alone. Many cooling issues mimic thermostat failure. Confirm first.
Symptoms of Failure
- Stuck closed: Engine overheats quickly, coolant boils, steam from hood.
- Stuck open: Slow warm-up, cold heater, poor fuel economy, DTCs like P0128 or P0125.
How to Check It
Step 1: Use an OBD2 scanner to read live ECT (Engine Coolant Temperature) data. Start cold. Drive for 5–10 minutes. Coolant should reach 195–210°F. If it doesn’t, suspect thermostat or ECT sensor.
Step 2: Use an infrared thermometer. With engine off and cool, check the upper radiator hose and thermostat housing. Start the engine. Once warm:
- If upper hose heats up but lower stays cold → thermostat likely stuck closed.
- If lower hose heats up immediately → thermostat may be stuck open.
Step 3: Inspect the housing for seepage. A weeping gasket can suck in air, causing false overheating and hard-to-bleed systems.
Before replacing a thermostat, test the ECT sensor. Unplug it—engine should go into limp mode with a high temp reading. If the temp doesn’t jump, the sensor circuit is faulty. I’ve saved customers $300 by catching this.
DIY: Is It Worth It?
This is an intermediate job. You need:
- Basic hand tools (wrenches, sockets)
- Coolant drain pan
- Torque wrench (critical for plastic housings)
- Funnel and bleeding procedure (if required)
Steps:
- Let engine cool completely.
- Drain coolant into a pan (recycle it—don’t pour down the drain).
- Remove housing, inspect for debris or corrosion.
- Install new thermostat with correct orientation (arrow toward engine).
- Replace gasket or O-ring—never reuse.
- Reinstall housing with proper torque (check manual—often 7–10 ft-lbs).
- Refill coolant using proper bleeding method (some cars need elevated front end or vacuum fill).
- Start engine, let it warm up, check for leaks, verify heater output.
After repair, rescan for DTCs. Clear P0128 if present and monitor ECT again.
On many engines, installing the thermostat backwards blocks the bypass circuit. The engine warms fine but overheats under load. Always check for an “up” mark or jiggle the valve—spring side goes into the engine.
Repair vs Replace: When to Do More
While the thermostat is out, inspect these components:
- Coolant hoses: Squeeze upper and lower hoses. Soft, swollen, or cracked hoses need replacement ($20–$80 each).
- Radiator cap: Test pressure rating. A weak cap causes boil-over. Replace every 5 years ($15–$30).
- Water pump: Look for weep hole leakage or bearing noise. If timing belt is due, replace both together (saves $400+ in labor).
- Thermostat housing: Cracked plastic housings are common on Fords and GMs. Replace as a unit if damaged ($40–$120).
If you’re replacing the thermostat due to overheating, don’t stop there. A clogged radiator or failing water pump can destroy a new thermostat.
What to Avoid
- ⚠️ Reusing old gaskets or O-rings—leads to leaks.
- ⚠️ Skipping the bleeding process—air pockets cause overheating and heater issues.
- ⚠️ Installing a higher-temp thermostat (210°F) to “fix” overheating—masks real problems like a clogged radiator.
- ⚠️ Using the wrong coolant type—mixing OAT and HOAT causes gel formation.
- ⚠️ Ignoring torque specs—over-tightening cracks plastic housings.
- ⚠️ Forgetting relearn procedures on electronic thermostats—PCM needs to adapt to new valve timing.
A 2014 Honda Accord came in with P0128 after two thermostat replacements. We found debris from a failing water pump seal jammed in the seat. Moral: if the thermostat fails repeatedly, inspect the entire cooling system for contamination.
A DIYer installed a thermostat backwards on a Toyota Camry. Engine warmed slowly, then overheated. The bypass was blocked. Always match the spring and jiggle valve to the engine side.
A 2016 Ford Fusion with an electronic thermostat was replaced—but no relearn done. PCM used old calibration, delaying opening. Always check if your car needs a scan tool reset.
Thermostat replacement isn’t just swapping a part. It’s about system integrity, correct installation, and verifying the real cause. On most cars, a proper job lasts 100,000 miles. Do it right the first time—because cutting corners leads to head gasket damage and $1,500 repairs.
Always consult your vehicle’s service manual. Torque specs, coolant type, and bleeding procedures vary—even between model years. When in doubt, trust a technician who’s seen your exact setup before.