In my shop, we’ve seen more than a few engines come through the door with bent valves, cracked heads, or that telltale ticking from the valvetrain. A lot of the time, the root cause traces back to something that seems small and quiet—valve spring failure. These coiled components don’t get much attention until they fail, but when they do, the results can be anything from a rough idle to a complete engine rebuild. In this article, I’ll walk you through the real-world reasons these springs fail, how to diagnose them properly, and what you can do to prevent it—based on what I’ve actually seen over two decades of wrenching on everything from grocery-getters to weekend racers.
How Valve Springs Fail: Real-World Causes
Valve springs fail due to fatigue, overload, wear, or systemic issues in the valvetrain. Most failures are preventable with proper setup and maintenance. Below are the primary causes, grouped by failure mode, with diagnostic tips and practical advice.
Fatigue Failure
Fatigue is the most common cause of valve spring failure, especially in high-mileage or high-RPM engines. It occurs over time due to repeated stress cycles.
- Over-stressing from excessive valve lift or aggressive cam profiles: When lift exceeds design limits, the spring is stretched beyond its safe range. Always match spring specs to camshaft lift and duration. If you upgrade the cam, upgrade the springs.
- Resonant frequency excitation (valve float): At certain RPM, the spring can oscillate instead of controlling the valve. This leads to float—where the valve doesn’t follow the cam lobe. Common in stock V8s above 5,800 RPM. Use dual springs, beehive designs, or damper-equipped springs to suppress harmonics.
- Inadequate spring rate for valvetrain mass: Heavier components (like steel retainers) require higher spring pressure. Switching to titanium retainers? You may reduce spring load slightly—but only if the entire system is balanced.
- Material defects: Non-metallic inclusions or surface flaws act as stress risers. A spring may look fine but fail under load. Always buy from reputable brands.
- Hydrogen embrittlement: Can occur during improper cleaning or storage in humid, acidic environments. The steel becomes brittle. If a spring cracks shortly after installation with no obvious cause, consider this.
Overload Failure
These are sudden, catastrophic failures caused by mechanical shock or extreme force.
- Coil bind: Happens when the spring is compressed so far that coils touch. This transfers full cam force directly to the spring, often causing immediate fracture. Ensure adequate coil bind clearance—typically 0.060″ minimum above maximum lift.
- Foreign object damage (FOD): Debris like broken spark plug porcelain or metal shavings can wedge between coils or under the retainer, creating stress points. Clean the combustion chamber thoroughly during rebuilds.
- Valve-to-piston contact: Caused by incorrect timing, excessive lift, or improper piston-to-valve clearance. The impact drives the valve back into the spring with extreme force, often collapsing or cracking it.
- Gross material defects: Rare in OEM springs but found in low-quality aftermarket parts. Look for visible seams, voids, or inconsistent coil winding.
Wear-Related Failure
These failures develop slowly and degrade performance before complete failure.
- Fretting corrosion: Occurs at contact points (retainer, seat) due to micro-movement and poor lubrication. Causes a powdery oxidation that eats into the metal. Common in engines using low-zinc oils or sitting unused for months. Clean surfaces and apply a light anti-seize on retainer-to-spring contact points.
- Abrasion: Misaligned springs rub against guides or seals, causing wear. Often due to damaged spring seats or cocked retainers. Always inspect seats and guides before reassembly.
- Loss of tension (sagging): Heat is the main culprit. OEM springs begin to lose temper above 450°F. Exhaust-side springs run hotter and fail sooner. Use chrome-silicon or H11 tool steel springs in high-heat applications.
Systemic Factors That Accelerate Failure
Valve springs don’t work in isolation. The entire valvetrain and engine environment affects their lifespan.
Valvetrain Dynamics
- Excessive RPM—even briefly—can cause valve float and spring fracture. One over-rev can be enough.
- Aggressive cam profiles increase acceleration forces. Match spring pressure to the cam’s specs.
- Worn lifters or pushrods create lash, leading to shock loading. Measure valve lash regularly on solid lifter engines.
- Valve stem sticking increases stiction, forcing the spring to overcome sudden resistance. Clean stems and guides during service.
Thermal Management
- Exhaust-side springs run 50–100°F hotter than intake. Upgrade exhaust springs in performance builds.
- Poor oil flow to the top end reduces cooling. Clean head oil galleries during rebuilds—sludge buildup is a common issue.
Lubrication Issues
- Fuel dilution from short trips or rich running thins oil, reducing film strength at contact points.
- Coolant in oil from head gasket leaks promotes corrosion at spring seats and retainers. Test oil regularly if you suspect internal coolant leak.
Installation and Manufacturing Errors
- Incorrect installed height is a top killer. Even 0.030″ too low can increase spring pressure by 20–30 lbs, pushing it beyond safe limits. Always measure with a height mic and use shims as needed.
- Damaged springs during installation (e.g., from dropped retainers or improper tools) create stress risers. Handle with care.
- Aftermarket springs vary widely in quality. Some budget brands use poor heat treatment or subpar wire. Stick to known brands like Comp Cams, PAC, or Manley.
How to Diagnose Valve Spring Failure
You don’t always need to pull the head to spot trouble. Start with operational symptoms, then move to physical inspection if needed.
Engine Symptoms
Watch for these red flags:
- Misfires under load or at high RPM—classic sign of valve float.
- Ticking or tapping noise that changes with RPM, especially after warm-up.
- Backfiring through intake or exhaust—uncontrolled valve timing.
- Compression loss on leak-down test with air escaping past valves.
Visual Inspection (Head Removed)
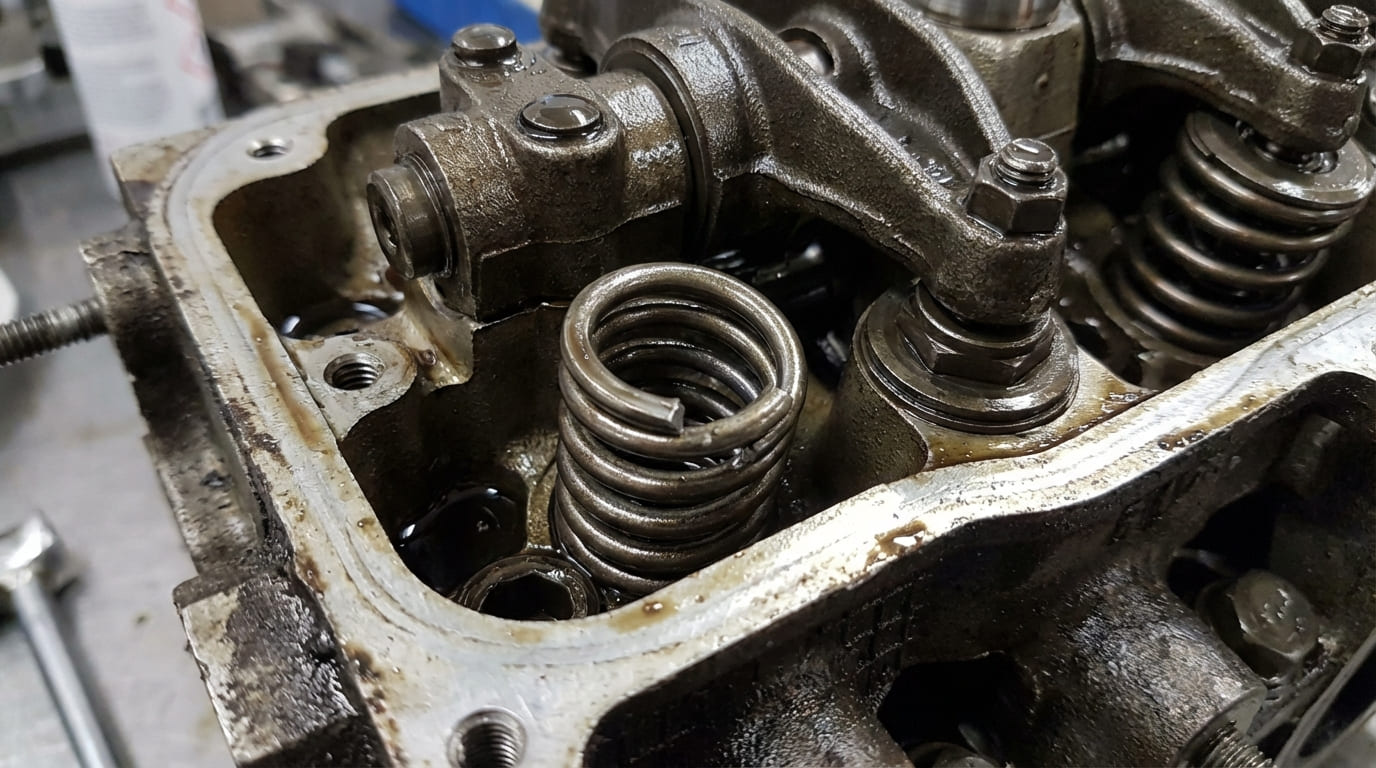
If the head is off, inspect each spring carefully:
- Look for cracks near coil ends—common in fatigue failures.
- Check for polished areas between coils—indicates coil bind.
- Compare free length to new springs—shortened length means sagging.
- Inspect retainers and seats for wear patterns or fretting.
Spring Pressure Test
This is the only way to confirm spring health. Use a calibrated spring tester.
- Measure free length first.
- Compress to installed height (per OEM or cam spec).
- Record load in pounds.
- Compare to spec. Replace if pressure is more than 10% below target.
Performance springs often have tighter tolerances. Always refer to manufacturer data.
Consequences of Failure
A broken valve spring can cause catastrophic damage:
- Valve-to-piston contact—bent valves, dented pistons, damaged heads.
- Dropped valves—especially with two-piece keepers. Can destroy a cylinder in seconds.
- Secondary damage—hammered cam lobes, collapsed lifters, broken rockers.
- Repair costs: $1,500–$4,000+ for head work and internal damage. A $50 spring can cost you thousands.
Prevention: Do This, Not That
| Action | Recommended | Avoid |
|---|---|---|
| Measuring installed height | Use a dial caliper or height mic. Adjust with shims if needed. | Guessing or assuming factory seats are uniform. |
| Cleaning spring seats | Use a small wire brush or Scotch-Brite pad to remove debris. | Leaving carbon or corrosion in place. |
| Spring compressor use | Use a tool that applies even pressure to avoid cracking. | Using improvised tools or uneven loading. |
| Fasteners | Use new torque-to-yield (TTY) bolts when specified. | Reusing stretched TTY bolts—can cause head movement. |
| Spring sourcing | Buy from reputable brands with consistent QA. | Using no-name “performance” springs from unknown suppliers. |
In my shop, we always test all springs—even if only one looks bad. They wear as a set. If one is weak, the others are likely close behind. Replace in sets, especially on high-mileage or performance engines.
When building an engine, I measure installed height on every valve. Heads warp, seats wear, and variations add up. A 0.040″ error can kill a spring in 5,000 miles. Measure once, cut once.
Don’t ignore ticking noises that get worse with heat. Fretting corrosion can mimic lifter noise. Pull the cam and inspect spring-to-retainer contact. A dab of anti-seize can prevent years of trouble.
Diagnostic Scenarios and Likely Causes
| Symptom | Most Likely Causes | Less Common But Possible |
|---|---|---|
| Single cylinder misfire at high RPM | Valve float, weak spring, worn cam lobe | Ignition coil, fuel injector, weak lifter |
| Broken spring coil near bottom | High cycle fatigue, resonant frequency, material defect | FOD, impact during assembly |
| Springs below 90% of spec pressure | Thermal sag, prolonged over-compression, age | Poor heat treatment, incorrect material |
| Polished areas between coils | Coil bind from excessive lift or low installed height | Harmonic vibration without full bind |
Valve spring failure is rarely due to a single cause. It’s usually a chain reaction—poor setup, heat, RPM, or wear pushing a component past its limit. The best defense is proactive: measure installed height, test pressure, and match springs to your application. When in doubt, consult the cam or spring manufacturer’s specs. What works on one engine can fail on another—even if they look identical.