Turbocharger Failure Modes and Root Causes
In my two decades as a master technician, I’ve found that turbocharger failures in diesel engines are rarely random. They’re the final symptom of an underlying issue—most often related to oil supply, contamination, or thermal stress. The key to a lasting repair is diagnosing the root cause, not just replacing the turbo. Here’s how to do it right.
Lubrication System Issues
Turbo bearings spin at over 150,000 RPM and depend on a consistent film of clean oil. Any disruption leads to rapid wear or seizure. Before replacing a turbo, verify oil delivery—many “bad turbos” are victims of poor lubrication.
How to Check for Oil Starvation
- Inspect the oil feed line: Remove it and check for internal collapse or carbon buildup. Flow-test with solvent or compressed air if in doubt.
- Test oil pressure: Use a mechanical gauge at idle and 2500 RPM. Compare to OEM specs—low pressure indicates engine wear or pump issues.
- Verify oil viscosity: Use only the manufacturer’s recommended grade. In cold climates, 5W-40 is safer than 15W-40 for faster turbo lubrication.
- Review oil change history: Extended intervals or poor-quality oil accelerate wear. Smell and inspect oil—burnt or milky oil means trouble.
In my shop, we never install a new turbo without replacing the oil feed line. OEM flexible lines degrade internally and can restrict flow even when they look fine. It’s a $20 part that protects a $1,200 turbo.
How to Detect Contaminated Oil
Abrasive particles destroy soft turbo bearings. Common sources include dirty air filters, internal engine wear, or poor oil maintenance.
- Inspect the air filter and intake tract for tears or loose clamps.
- Drain a sample of oil and check for grit or metal flakes.
- Run an oil analysis: Elevated silicon suggests dirt ingestion; high iron or aluminum points to engine wear.
One customer replaced his turbo twice before we found sand in the oil. The air filter seal was cracked, letting in dust. Always inspect the entire intake path—don’t assume the filter is the issue.
How to Prevent Oil Coking
Shutting off a hot turbo traps oil in the center housing, where extreme heat turns it into carbon. This clogs oil passages and starves the next startup.
- Let the engine idle 2–3 minutes after heavy towing or high-load driving.
- Check the oil drain line for kinks or upward bends—these trap oil and promote coking.
- Use high-quality, low-SAPS synthetic oil designed for turbocharged diesels.
On modified trucks, I install a turbo timer. It’s cheap insurance. But no gadget replaces proper shutdown procedures—train your customers to let it cool down.
Foreign Object Damage (FOD) and Mechanical Failures
FOD isn’t always from a bad air filter. Broken EGR flaps, dropped valves, or piston fragments can destroy turbine or compressor wheels. Replacing the turbo without finding the source leads to repeat failure.
How to Diagnose FOD
- Inspect the compressor wheel: Look for impact marks or missing blades. Use a borescope to check the intake tract and charge air cooler.
- Check the turbine side: Remove the downpipe and inspect for debris. A broken piston or valve will leave telltale signs.
- Examine EGR components: On Ford 6.0L and 6.4L engines, failed EGR cooler flaps are a common FOD source.
I once saw a turbo shredded by a broken EGR valve. The tech replaced the turbo twice before we caught it. Always pull the EGR valve and inspect it—especially on high-mileage engines.
Excessive Temperature and Boost Control Issues
Overheating and overspeeding are silent killers. A clogged DPF, over-fueling, or stuck VGT vanes can push temps beyond safe limits.
How to Check for Overheating
- Inspect the turbine housing for blueing—a sign of extreme heat.
- Test exhaust back pressure: Over 5 psi at 2500 RPM suggests a restriction (clogged DPF, collapsed pipe).
- Monitor EGT with a pyrometer or scan tool. Sustained temps over 1200°F are dangerous.
How to Diagnose Boost Control Problems
- Use a scan tool to command VGT vane movement. Sluggish response means carbon buildup or actuator failure.
- Check for boost leaks: Pressurize the intake system with low-pressure air and listen for leaks.
- Ask about tuning: Aggressive tunes can over-speed the turbo. If the engine was modified, consider reverting to stock for diagnosis.
On Euro diesels, I always check VGT operation before disassembly. A $50 cleaning can save a $1,500 replacement. Remove the actuator and spray PB Blaster on the shaft—work it back and forth to free stuck vanes.
Shaft Play and Imbalance
Excessive shaft movement is a clear sign of bearing failure. But minor play can also result from worn mounts or housing cracks.
How to Measure Shaft Play
- Use a dial indicator on the compressor nut: Most turbos allow up to 0.005″ radial and 0.002″ axial play—check OEM specs.
- Spin the shaft by hand: Listen for grinding or roughness.
- Inspect for contact marks on the housing: These indicate imbalance or bearing wear.
I carry a mini dial indicator in my tool bag. It takes 60 seconds to check play—and it tells you if the turbo is truly bad or if the noise is coming from elsewhere.
Turbocharger Oil Leak Diagnosis and Repair
Oil leaks from the turbo are common—but the fix isn’t always a new turbo. Often, the issue is system-wide, like crankcase pressure or drain restriction.
Internal Oil Leaks
Oil in the intake or exhaust usually means seal failure. But the root cause is often not the turbo itself.
Compressor Side Leak
- Worn labyrinth seal: Caused by shaft play or contamination.
- Excessive crankcase pressure: A clogged CCV system (common on Ford 6.0L) forces oil past the seal.
- Restricted oil drain: The most overlooked cause. The drain line must slope downward freely.
Turbine Side Leak
- Worn turbine seal: Often causes startup smoke.
- Same drain line issue: A blockage affects both sides.
- Excessive oil pressure: Rare, but possible with a failed regulator or missing restrictor plug.
How to Diagnose Oil Leaks
- Check crankcase pressure: Use a water manometer. Over 3 inches H₂O under load indicates a CCV problem.
- Inspect the oil drain line: Remove it and check for sludge or kinks. Replace if corroded or bent.
- Clean the area and run the engine: Watch for leak origin. Use UV dye if needed.
On a Land Rover TDV6, I found 6 inches of crankcase pressure—double the limit. The CCV was sludged up. Cleaning it stopped the oil leak. Always test the ventilation system before replacing the turbo.
External Oil Leaks
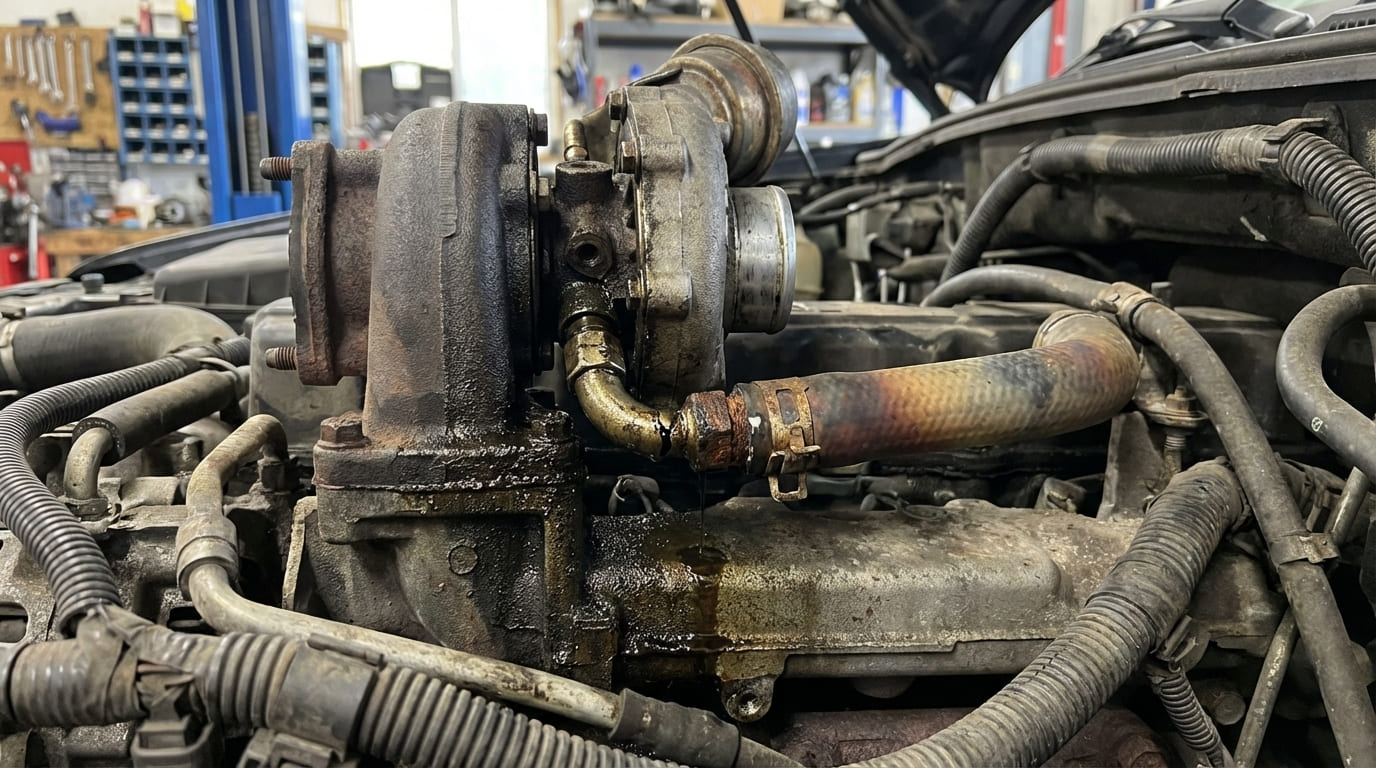
These are easier to spot—oil on the manifold or dripping down the block.
- Failing feed line o-rings or crush washers: Replace every time.
- Loose or cracked banjo bolts: Torque to spec—over-tightening cracks aluminum housings.
- Cracked turbo housing: Caused by thermal stress or impact. Inspect carefully.
Repair vs Replace: Cost and Viability
Rebuilding a turbo can save money, but only if the core is sound. Severely damaged bearings or shaft play mean replacement is safer.
| Component | Rebuild Cost | Replace Cost | Viability |
|---|---|---|---|
| Standard Turbo (e.g., 6.7L Cummins) | $300–$500 | $800–$1,400 | Rebuild viable if housing intact and no FOD |
| VGT Turbo (e.g., Ford 6.7L) | $400–$600 | $1,200–$2,000 | Replace recommended—vane mechanisms are fragile |
| Oil Feed Line | N/A | $20–$80 | Always replace with new turbo |
| CCV System (Ford 6.0L) | $100 (clean/repair) | $300–$600 (replace) | Repair first—prevents repeat turbo failure |
Best Practices Checklist
- ✅ Prime the turbo with oil before startup—spin the wheel while applying oil.
- ✅ Replace the oil feed line and filter with every turbo job.
- ✅ Clean oil passages with a tap—metal shavings cause blockages.
- ⚠️ Never reuse torque-to-yield bolts—they lose clamping force.
- ⚠️ Don’t skip crankcase ventilation checks—CCV issues cause oil leaks.
- ⚠️ Avoid cheap reman turbos—poor balancing leads to early failure.
Diagnostic Comparison Table
| Symptom | Most Likely Causes | Less Common Causes | Diagnostic Priority |
|---|---|---|---|
| Blue smoke under acceleration | Compressor seal wear, CCV failure, drain restriction | Worn piston rings, valve stem seals | Inspect charge air cooler, test crankcase pressure |
| Blue smoke on startup/idle | Turbine seal wear, drain restriction | Exhaust valve guide wear, PCV fault | Inspect downpipe, check oil drain line |
| Whining or grinding noise | Bearing wear, shaft imbalance, FOD | Accessory drive noise, injector knock | Check shaft play, inspect wheels, listen with stethoscope |
| Loss of boost | VGT vane sticking, wastegate stuck open, intake leak | Turbo bearing failure, EGR valve stuck open | Scan for actuator codes, perform boost leak test |
| Oil in intake piping | Drain restriction, CCV failure, seal wear | Cracked turbo housing, incorrect oil level | Inspect drain line, test crankcase pressure |
A 2012 Ram 2500 came in with repeated turbo failures. The oil feed line looked fine—but flow testing showed only 30% capacity. The internal liner had collapsed. Replace the feed line every time—it’s not worth the risk.
A Land Rover TDV6 had oil in the charge air cooler. The turbo was replaced twice. Crankcase pressure tested at 6 inches H₂O. The CCV was clogged. Fix the ventilation system first—oil leaks are often a symptom, not the cause.
A Ford 6.0L had a seized turbo. Oil pressure was good, but the drain line had a slight upward bend. It trapped sludge and caused coking. Drain line routing matters—gravity is your friend.
Turbo failures are preventable. The turbo is only as reliable as the system it runs in. Always check oil flow, contamination, crankcase pressure, and exhaust back pressure. Replace the feed line, prime the turbo, and verify ventilation. Skip the shortcuts—your repair will last.