In my 20+ years as a shop foreman, I’ve seen more engines compromised by overheating than just about any other single issue. It’s not just about the temperature gauge climbing—it’s what happens beneath the surface when heat builds beyond design limits. Sustained overheating triggers a chain reaction of damage, some immediate, some delayed. This guide covers exactly what fails, how to check it, and whether repair or replacement makes financial and mechanical sense.
Cylinder Head Damage
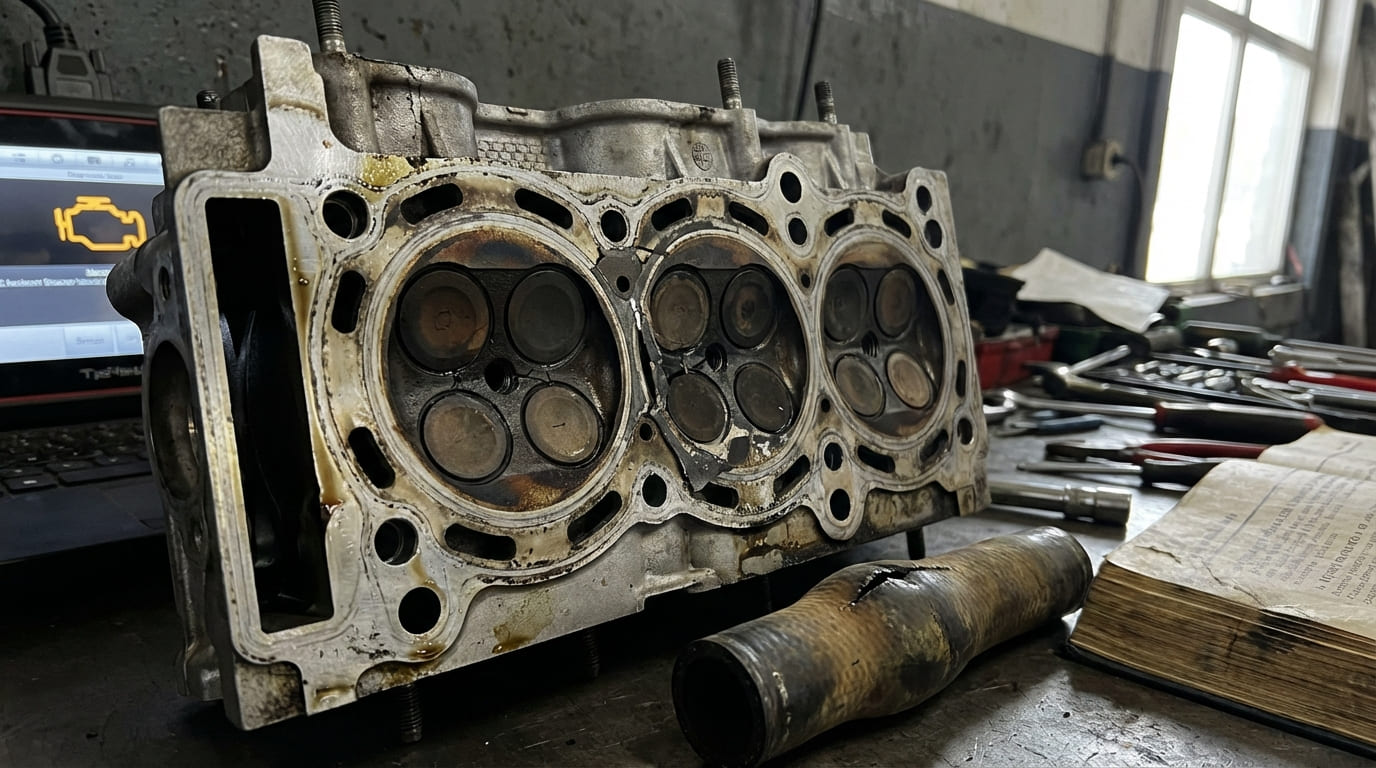
Aluminum cylinder heads expand faster than cast iron blocks when heated. Uneven cooling or localized hot spots cause warping or cracking—common after repeated overheating. Turbocharged and direct-injection engines are especially vulnerable due to higher combustion temps.
How to Check for Head Damage
Remove the head and use a precision straight edge and feeler gauge to check flatness across all planes. Most manufacturers allow no more than 0.002” deviation over 6 inches. Any more requires resurfacing or replacement. For cracks, perform a pressure test or dye penetrant inspection—especially around valve seats and spark plug bores.
In my shop, we always pressure test every aluminum head after removal—even if no crack is visible. Heat cycles create microfractures that only show under stress.
| Damage Type | Symptoms | Repair Option | Cost Range |
|---|---|---|---|
| Warping | Head gasket leak, coolant loss | Resurface or replace | $150–$400 |
| Cracking | White smoke, compression loss, coolant in combustion chamber | Replace only (rarely repairable) | $600–$1,500+ |
Cylinder Block Damage
While more robust, aluminum blocks can warp or crack after severe overheating. Warped deck surfaces lead to repeat head gasket failures. Cracks often form near cylinder walls or coolant jackets, especially in engines with thin-wall casting.
How to Check for Block Damage
Check deck flatness the same way as the head. Use a straight edge along the center and diagonals. For cracks, pressure test the cooling system with the radiator cap off—if bubbles erupt from a cylinder, combustion is leaking into coolant. A borescope can spot cracks inside cylinders.
If a head gasket fails twice in the same spot, don’t blame the installer first. Check the block deck. I’ve seen 0.003” dips cause chronic leaks—barely visible but enough to break the seal under load.
Head Gasket Failure
Overheating is the top cause of head gasket failure. The gasket loses clamping force when the head or block distorts. But don’t assume the gasket is the root cause—often, it’s the victim of cooling system neglect or pre-existing warpage.
How to Diagnose Head Gasket Issues
Perform a block test (chemical test for combustion gases in coolant). Also, check for coolant in the oil (milky residue) or oil in the coolant. A leak-down test is more sensitive than compression testing—listen for air escaping into the radiator or adjacent cylinders.
Never rely on a compression test alone. I’ve seen engines with “good” compression still fail a leak-down test due to partial gasket breach between cylinders.
Piston and Piston Ring Damage
Excessive heat causes pistons to expand beyond design clearance. This leads to scuffing, seizing, or skirt collapse. Oil breakdown accelerates wear. In turbo engines, carbon buildup in ring grooves can cause rings to stick, reducing compression and increasing oil consumption.
How to Check for Piston Damage
During teardown, inspect piston skirts for scoring or discoloration. Check ring groove movement—rings should float freely. Measure piston-to-wall clearance; if below spec, the piston likely seized. A borescope can reveal damage without full disassembly.
On turbo engines, always inspect the piston-cooling oil jets. A clogged jet won’t show up on oil pressure gauges but can cause piston failure under heat. I’ve found them blocked with varnish or debris even with clean oil.
Crankshaft and Connecting Rod Bearing Damage
Engine oil loses viscosity when overheated. This reduces film strength, leading to metal-to-metal contact. Rod and main bearings can wipe out quickly—sometimes within minutes of severe overheating.
How to Check for Bearing Damage
Check oil pressure at idle after an overheating event. Low pressure is a red flag. During disassembly, inspect bearing surfaces for scoring, discoloration, or missing material. Measure clearance with plastigage or a micrometer.
| Bearing Condition | Appearance | Action Required |
|---|---|---|
| Normal wear | Even silver-gray wear pattern | Monitor, no immediate action |
| Overheated | Discolored (blue or brown), wiped surface | Replace bearings, inspect crankshaft |
| Severe damage | Exposed base metal, spun bearing | Engine rebuild or replacement |
Valvetrain Component Damage
Valve stem seals harden and crack when exposed to extreme heat. This causes oil to seep into combustion chambers, creating blue smoke—often mistaken for ring failure. Guides can also wear prematurely if lubrication fails.
How to Check for Valvetrain Damage
Use a borescope to inspect valve stems and seals. Perform a vacuum test—low vacuum with blue smoke on deceleration points to valve seal issues. A smoke test on the intake manifold can reveal oil being drawn past seals.
I once diagnosed blue smoke as ring failure—until a borescope showed oil pooling on exhaust valves. The customer had replaced the head gasket, but the real issue was heat-destroyed valve seals. Fixed with a head rebuild, saved $3,000 over an engine swap.
Engine Oil Degradation
Overheating breaks down oil chemically. Additives burn off, viscosity drops, and sludge forms. Even with a full oil level, lubricity can be zero. This accelerates wear across all moving parts.
What to Do After Overheating
Drain and replace oil and filter immediately. For high-mileage or performance engines, run an oil analysis 500 miles later to check for metal particles. If copper, lead, or iron levels spike, internal damage is occurring.
Treat oil as compromised after any overheating event—even if changed last month. I’ve seen engines with fresh oil turn to varnish in 20 minutes of severe overheating.
Coolant System Component Damage
Hoses harden, gaskets degrade, radiators develop micro-cracks. The water pump seal is especially vulnerable—once it runs dry or on steam, failure is imminent. Plastic components like intake manifolds can crack internally, leaking coolant into the intake.
How to Inspect the Cooling System
Pressure test the entire system to 1.1 times cap rating. Look for leaks at hoses, seams, and pump weep holes. Inspect radiator tanks for hairline cracks. Replace the thermostat, but only after flushing the system—old coolant won’t flow properly.
Don’t just replace the thermostat and call it fixed. I’ve seen radiators pass visual inspection but fail under pressure due to internal tank cracks. Always pressure test the whole system.
Diagnostic Decision Tree: Overheating Follow-Up
| Observed Symptom | Most Likely Causes | Less Common But Possible Causes | Recommended Next Step |
|---|---|---|---|
| White smoke + coolant loss | Head gasket failure, cracked head | Intake manifold coolant leak, cracked EGR cooler | Pressure test cooling system, perform block test |
| Milky oil | Cracked block/head, failed head gasket | Transmission fluid crossover, condensation buildup | Inspect oil cap and dipstick, check transmission fluid, pressure test |
| External coolant leak after overheating | Cracked hose, failed water pump seal | Cracked radiator tank, degraded gasket | Visual inspection under pressure, check for weepage at seams |
| Low compression in one cylinder | Burnt valve, cracked head, ring damage | Timing issue, faulty injector | Leak-down test, borescope inspection |
| Engine knock at idle | Wiped rod bearing, low oil pressure | Piston slap, timing chain rattle | Check oil pressure, listen with stethoscope, inspect bearing clearance if disassembled |
Recommended Best Practices: Do and Don’t
- ✅ Recommended: Clean head bolt threads with a bottoming tap before reassembly. Oil or debris in threads can cause false torque readings and uneven clamping.
- ✅ Recommended: Measure head and block flatness with a precision straight edge and feeler gauge—never assume it’s flat because it looks clean.
- ✅ Recommended: Replace head gaskets and fasteners as a set. Torque-to-yield (TTY) bolts stretch permanently—reusing them risks under-clamp and failure.
- ⚠️ Avoid: Installing a new thermostat without flushing the system. Old coolant can gel and restrict flow, causing repeat overheating.
- ⚠️ Avoid: Assuming a compression test confirms head gasket health. A leak-down test detects early-stage leaks compression tests miss.
- ⚠️ Avoid: Reusing aluminum heads or blocks with unknown heat history. Micro-cracks may not be visible but can grow under load.
Situation: A 2010 V6 SUV came in with white smoke and coolant loss. The customer had replaced the radiator and thermostat.
Initial Assumption: Head gasket failure—seemed obvious.
Discovery: Block test was negative, no oil contamination. Pressure test held, but smoke appeared from the intake manifold. Turns out, the plastic manifold had a hairline crack in a coolant passage.
Nuanced Lesson Learned: Not every coolant loss symptom points to the head gasket. Plastic and composite components can fail in ways that mimic internal leaks—always pressure test the entire system.
Situation: A turbocharged four-cylinder engine lost power and developed a knock after overheating on the highway.
Initial Assumption: Rod bearing failure due to oil breakdown.
Discovery: Upon teardown, bearings looked okay, but the piston skirts showed scuffing. The root cause? A clogged oil jet to the underside of the piston—had been partially blocked for months, worsened by heat.
Nuanced Lesson Learned: Overheating can expose pre-existing weaknesses. Always assess oil delivery paths, not just bearing surfaces, in high-performance engines.
Situation: A customer replaced a head gasket twice, but it kept blowing between cylinders 2 and 3.
Initial Assumption: Poor installation or low-quality gasket.
Discovery: After checking flatness, we found a 0.003” dip across the block deck—just outside spec. Resurfacing solved the issue permanently.
Nuanced Lesson Learned: Even if a surface looks flat, measure it. Some warpage patterns aren’t visible to the naked eye but are enough to compromise sealing under combustion pressure.
In my shop, we treat every overheating incident as a potential precursor to major damage—even if the engine seems to run fine afterward. The real cost isn’t in the immediate repair, but in the hidden wear that shortens engine life. Always consult the specific service manual for warpage limits, torque specs, and material removal guidelines—what’s acceptable on a cast iron block may not apply to an aluminum one. Heat leaves its mark in ways that aren’t always obvious, and our job is to look deeper than the surface.