When engine rattle, performance loss, or check engine lights appear, a stretched timing chain may be suspected—but don’t jump to conclusions. Many symptoms mimic chain issues but stem from simpler, cheaper problems. This guide walks you through a proven diagnostic path that separates true chain stretch from common imposters like failed VVT phasers, worn guides, or oil flow issues. You’ll learn how to confirm the fault with real-world tests, avoid costly mistakes, and make smart repair decisions.
Step 1: Decode the Symptoms Correctly
Start with the basics: what the driver feels, hears, and sees. These clues point you in the right direction—but never confirm the diagnosis alone.
Check Engine Light and Diagnostic Trouble Codes (DTCs)
OBD-II codes are starting points, not verdicts. Here’s how to interpret them with context:
- P0016, P0017, P0018, P0019: Cam-to-crank correlation codes. These suggest timing misalignment, but on modern engines, they’re more often caused by VVT phaser failure than actual chain stretch. Common on Ford Duratec, GM Ecotec, and Chrysler Pentastar engines.
- P0340, P0341, P0365, P0366: Cam sensor circuit faults. Test sensor signal and wiring first—these codes can trigger due to damaged harnesses or poor grounds near the valve cover.
- P000A, P000B, P0010–P0015: VVT performance codes. These often mean the phaser isn’t responding. Causes: dirty oil, clogged solenoid, low oil pressure, or internal phaser wear—not necessarily chain stretch.
- P0300–P0312 (misfires): Only consider chain involvement if misfires come with cam/crank correlation codes. Otherwise, check ignition, fuel, and compression first.
In my shop, we never replace a timing chain based on a code alone. Over half the “P0016 = bad chain” assumptions I’ve seen were actually clogged oil passages or failed phasers. Always verify with physical or dynamic testing.
Listen for the Telltale Rattle
A metallic rattle from the front of the engine on cold start—especially lasting 2–5 seconds—is a red flag. It often fades as oil pressure builds.
This noise usually comes from a collapsed tensioner failing to take up chain slack. But don’t assume it’s the chain. Similar sounds can come from:
- Loose harmonic balancer (check for rubber separation)
- Failing water pump or AC compressor bearing
- Worn serpentine belt tensioner
Use a mechanic’s stethoscope to isolate the source. Place it on the timing cover, oil pan rail, and front engine mount. A front-cover rattle that peaks at 1,000–1,500 RPM points to the timing system.
Performance Issues: What They Really Mean
Rough idle, hard starting, or power loss can accompany timing problems—but they’re indirect effects. The ECU often retards timing aggressively when cam position is erratic, causing drivability issues even if actual chain stretch is minimal.
If performance symptoms exist without correlation codes, look elsewhere first: MAF sensor, fuel trim, ignition coils, or vacuum leaks.
Step 2: Confirm with Advanced Diagnostics
Move beyond guesswork. Use these tests to confirm or rule out chain stretch.
Compare Cam and Crank Signals with an Oscilloscope
This is the most reliable non-invasive test. You’ll need a dual-channel oscilloscope or advanced scan tool with graphing capability.
Steps:
- Connect Channel 1 to the crankshaft position sensor (CKP) signal.
- Connect Channel 2 to the camshaft position sensor (CMP) signal.
- Run the engine at idle and observe the phase relationship.
- Look for consistent cam lag—especially if it grows under load.
A shift of more than 3–5 degrees beyond spec suggests timing drift. But first, verify sensor health: weak signals or noise can distort readings.
I once diagnosed a “stretched chain” that showed 8° of cam lag on scope. Turned out the cam sensor ground was corroded. Fixed the connector, and timing alignment returned to normal. Always rule out electrical before mechanical.
Measure Timing Chain Tensioner Plunger Extension
Many modern engines allow access to the tensioner without full disassembly. This is a strong indirect indicator of chain wear.
Procedure:
- Remove the tensioner (follow factory lockout procedure if oil-pressurized).
- Measure plunger extension from housing face to tip.
- Compare to OEM specs—typically 8–12 mm max.
If the plunger is extended beyond spec, the chain has likely stretched to its limit. But note: some tensioners extend fully when depressurized. Consult service manual for proper procedure.
Inspect Chain Slack and Guide Condition
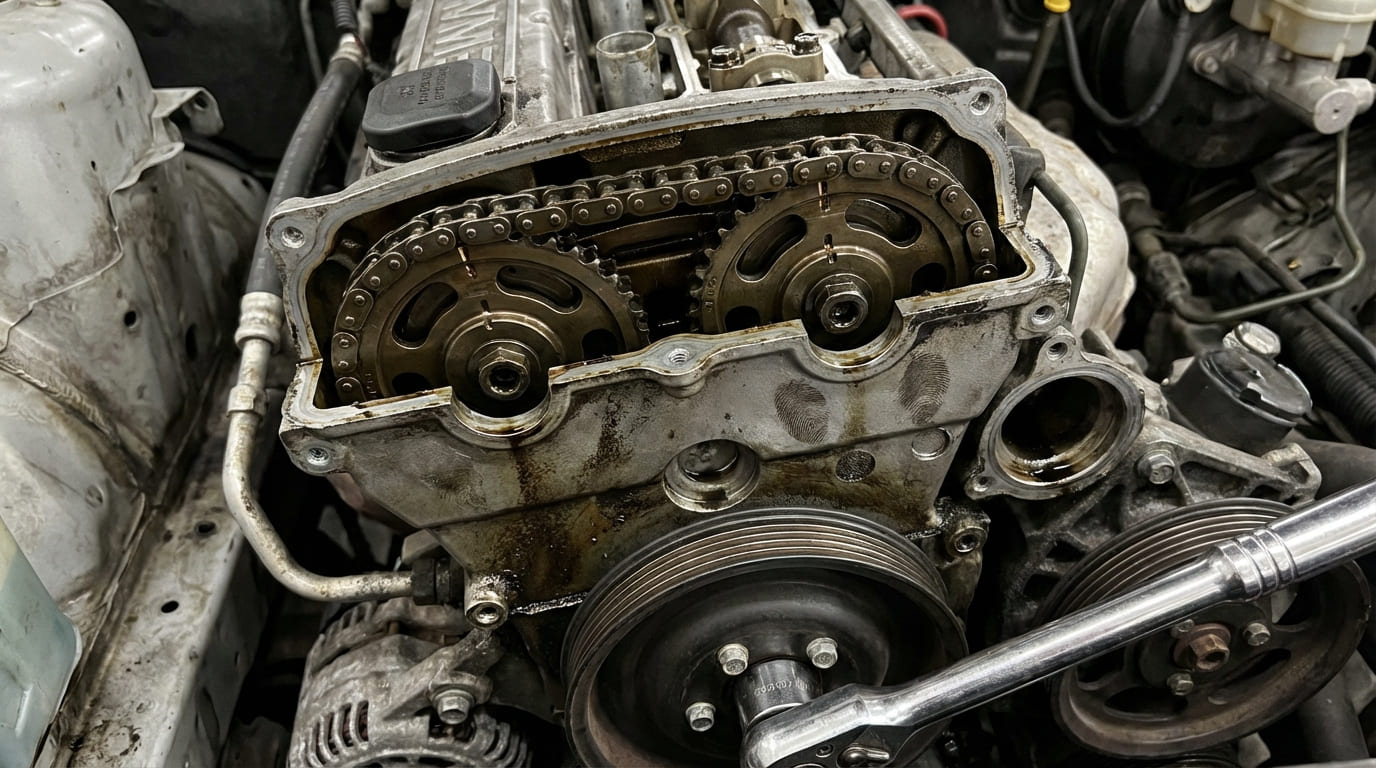
Once the timing cover is off, visually inspect:
- Chain slack: Lift the chain between crank and cam sprockets. If it lifts more than 1/8 inch (3 mm), stretch is likely. Confirm with measurement.
- Guide wear: Look for cracked, chipped, or missing plastic guides. Metal backing plates rubbing the chain mean imminent failure.
- Sprocket wear: Hooked or uneven teeth indicate prolonged chain slap.
Worn guides don’t cause stretch, but they allow chain whip that accelerates wear. Replace them even if the chain is within spec.
Measure Chain Elongation Directly
This is the gold standard. Remove the chain and measure it on a bench.
Steps:
- Lay the chain flat on a clean surface.
- Apply light tension—just enough to remove slack.
- Measure exactly 16 or 20 links (check service manual for correct count).
- Compare to factory spec—typically no more than 1.5 mm over original length.
Example: A chain spec’d at 250 mm over 16 links should not exceed 251.5 mm. Exceeding this means replacement is required.
I’ve seen chains measure 1.8 mm over spec but still function—because tensioner and guides were new. But I’ve also seen chains within spec destroy engines due to broken guides. Always assess the entire system, not just one number.
Step 3: Differentiate Chain Stretch from Common Imposters
Use this table to separate causes when symptoms overlap:
| Symptom / Test | Chain Stretch | VVT Phaser Issue | Tensioner/Guide Failure |
|---|---|---|---|
| Oscilloscope shows consistent cam lag | ✔️ Likely, especially with high mileage | ⚠️ Possible if phaser stuck retarded | ⚠️ Less common unless severe slack |
| Loud rattle on cold start | ⚠️ Possible if guides worn | ❌ Unlikely | ✔️ Very common |
| Tensioner plunger fully extended | ✔️ Strong indicator | ⚠️ Possible if oil pressure low | ✔️ Often seen with guide collapse |
| Chain measures over spec | ✔️ Definitive confirmation | ❌ No | ⚠️ May be secondary effect |
| VVT solenoid codes present | ⚠️ Possible coincidence | ✔️ Primary suspect | ⚠️ Could be oil flow issue |
Repair vs Replace: Cost and Viability
Timing chain jobs are labor-intensive. Here’s what to expect:
| Component | DIY Cost | Shop Cost | Replace or Reuse? |
|---|---|---|---|
| Timing chain | $80–$200 | $300–$600 | Replace if over spec or >120k miles |
| Tensioner and guides | $60–$150 | $200–$400 | Always replace as a set |
| VVT phaser | $120–$300 | $400–$800 | Replace if seized, noisy, or code-specific |
| Timing cover gasket | $15–$40 | $100–$200 | Always replace |
Labor typically takes 6–10 hours. If you’re opening the system, replace all wear items—even if they look okay. Reusing old tensioners or guides risks repeat failure.
On a 2012 Honda Accord with P0014 and startup rattle, the previous shop quoted $1,200 for chain replacement. I scoped it—cam lag was inconsistent. Pulled the oil control valve: sludge-clogged screen. Cleaned VCT actuator, replaced solenoid. Fixed for $280. Lesson: always rule out oil flow and solenoid issues first.
A 2008 Toyota Camry came in with “chain about to break.” Inspection showed minimal stretch—within spec. But the plastic guide was cracked, and tensioner was maxed out. Replaced guides and tensioner only. Rattle gone. Chain didn’t need replacing. Lesson: guide failure mimics chain stretch. Fix the root cause.
A 2015 Ford Fusion had P0340, rough idle, and chain measured 1.6 mm over spec. Replaced chain, tensioner, guides—code returned. Found cam sprocket phaser seized internally. Lesson: chain stretch can be a symptom of phaser failure. Diagnose the entire VVT system.
Best Practices: What to Do (and Not Do)
- ✅ Do clean oil passages and VVT solenoid screens. Sludge here causes 50% of “phantom” timing issues.
- ✅ Do replace tensioners and guides as a set. Wear is often internal and invisible.
- ✅ Do use OEM-specified oil viscosity. Many VVT systems fail with wrong oil or extended change intervals.
- ⚠️ Don’t reuse torque-to-yield cam bolts. They lose clamping force after first use—risk of sprocket slip.
- ⚠️ Don’t trust timing marks alone. Verify TDC with a piston stop—harmonic balancers can slip.
- ⚠️ Don’t skip post-repair oil pressure test. Low pressure kills new phasers and tensioners fast.
Diagnosing a stretched timing chain isn’t about chasing noise or codes. It’s about methodical testing: scope the signals, measure the plunger, inspect the guides, and measure the chain. Rule out oil flow and phaser issues first—they’re cheaper and more common. When in doubt, consult the factory service manual for your engine’s specific tolerances. What applies to a Ford V6 may not apply to a Subaru boxer. Accuracy beats assumption every time.