Ignition coil replacement is one of the most common repairs I see on vehicles with over 100,000 miles. The cost varies dramatically—from $70 to over $1,200—not because of the symptom, but due to engine layout, labor access, and parts quality. This guide cuts through the noise with real-world pricing, diagnostics, and decision-making logic for both DIYers and those using a shop.
Ignition Coil Replacement Cost Breakdown
The total cost depends on three factors: coil type, labor time, and vehicle complexity. Below are realistic price ranges based on actual jobs I’ve priced or performed.
Part Costs by Type and Quality
| Coil Type | Aftermarket | OEM Equivalent | OEM |
|---|---|---|---|
| Coil-on-Plug (COP), per unit | $25–$75 | $50–$120 | $80–$200 |
| Waste Spark Coil Pack | $70–$150 | $100–$250 | $180–$400 |
Aftermarket coils can work fine—some last 80,000 miles—but on direct-injection or turbocharged engines, I recommend OEM or OEM-equivalent. Higher cylinder pressures demand consistent spark energy, and cheaper coils often degrade faster.
Labor Time and Shop Rates
Labor is where costs escalate. Shop rates range from $90 to $180/hour, but the real variable is access. Here’s how long common jobs take:
- Single COP coil (easy access): 0.2–0.5 hours
- Full COP set (inline-4, exposed): 0.5–1.5 hours
- Full COP set (V6, rear bank under intake): 1.5–3.0 hours
- Waste spark coil pack: 0.5–1.0 hours
On transverse V6 engines, accessing rear coils often means removing the upper intake manifold. That adds labor, coolant flush, and risk of damaging plastic components. One stripped bolt or cracked plenum can add $200+ in parts and time.
Total Replacement Cost Estimates
| Replacement Scenario | Total Cost Range |
|---|---|
| Single COP coil (parts + labor) | $70–$350 |
| Full COP set (4-cylinder, easy access) | $200–$700 |
| Full COP set (6-cylinder, complex access) | $400–$1,200 |
| Waste spark coil pack | $120–$600 |
The high end includes intake manifold gaskets, coolant replacement, and valve cover gasket service—common when disassembly is required.
Key Factors That Affect Cost
Understanding these variables helps you decide whether to DIY, replace one or all coils, or choose parts wisely.
Vehicle Design and Access Complexity
Front-wheel-drive V6 engines are the worst offenders. The rear bank coils sit under the intake manifold. Removing it takes time and precision. On some models, you must also remove the throttle body, coolant lines, and PCV hoses. One wrong step leads to vacuum leaks or coolant issues.
In my shop, we always inspect the intake manifold for cracks and replace gaskets during reassembly. It’s cheap insurance compared to a comeback for rough idle.
Number of Coils to Replace
One coil fails—do you replace all? Not always, but consider this: coils wear at similar rates. At 140,000 miles, if one fails, the others are close behind. Replacing all at once avoids repeat labor costs, especially on engines requiring major disassembly.
Cost logic: If labor is $300 to access the coils, replacing four coils for $100 more in parts saves you another $300 later.
Geographic Labor Rates
A shop in a rural area may charge $95/hour; a dealership in a city can charge $150–$180. On a 2.5-hour job, that’s a $200+ difference. Independent shops often offer better value, but dealerships have OEM tools and software for complex diagnostics.
Ignition Coil Types and Replacement Impact
Know your system—it affects cost and repair strategy.
Coil-on-Plug (COP)
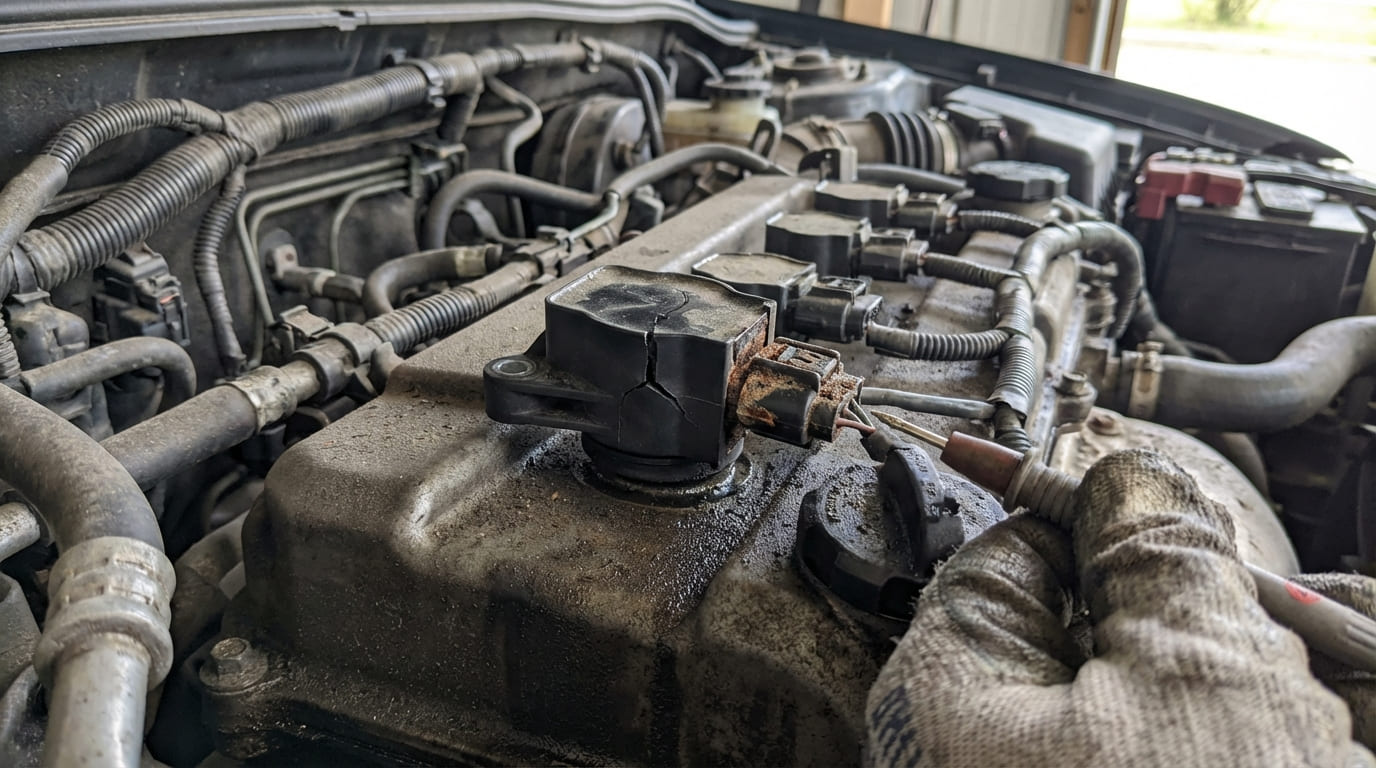
One coil per spark plug. Common on modern engines. You can replace just the failed unit, but heat and oil contamination often damage multiple coils over time. Direct fit reduces resistance but exposes coils to extreme heat.
Waste Spark and Coil Pack (DIS)
One coil fires two plugs. If one winding fails, the whole pack is replaced. Found on older V6 and inline-4 engines. No spark plugs to access, but the entire unit must be swapped. Less labor, but higher part cost.
How to Diagnose a Failing Ignition Coil
Never replace a coil based on a check engine light alone. Misdiagnosis wastes money. Confirm the fault with these steps.
Symptoms of Failure
- Engine misfire (especially under load)
- Rough idle or hesitation
- Check Engine Light with P030x (cylinder misfire) or P035x (coil circuit) codes
- Reduced fuel economy
Diagnostic Steps
Step 1: Scan for Codes and Live Data
Use an OBD2 scanner to pull codes. Then check:
- Misfire counters (Mode $06): A cylinder with hundreds of misfires in 30 seconds is likely faulty.
- Freeze frame data: Tells you if the misfire occurred at idle, under load, or during warm-up.
Step 2: Swap Test (For COP Systems)
Move the suspect coil to a different cylinder. Clear codes and test drive. If the misfire moves, the coil is bad. If it stays, the issue is likely spark plug, injector, or compression.
I’ve seen coils replaced three times before someone checked the spark plug. A cracked insulator or excessive gap forces the coil to overwork and fail. Always pull the plug.
Step 3: Secondary Ignition Waveform (Scope Test)
Using a COP probe and oscilloscope, check:
- Burn time: Should be 1.0–2.0 ms. Short burn = weak spark.
- Voltage spikes: Can indicate lean conditions, not coil failure.
- Coil oscillation: Missing rings suggest internal short.
This test separates coil issues from fuel or mechanical problems.
Can You DIY? Feasibility and Risks
For simple COP systems, DIY is realistic. For complex engines, professional service is often worth the cost.
DIY for Single COP Coil (Easy Access)
- Tools needed: 1/4″ socket, torque wrench, dielectric grease, compressed air
- Skill level: Beginner to intermediate
- Time: 15–60 minutes
- Savings: $100+ in labor
Steps:
- Disconnect battery negative terminal.
- Remove electrical connector from coil.
- Unbolt and pull coil straight out.
- Inspect spark plug and tube for oil, debris, or damage.
- Install new coil with dielectric grease on the boot.
- Reconnect and test.
When to Use a Professional
DIY isn’t worth the risk if:
- The engine requires intake manifold removal
- You lack torque specs or service information
- The vehicle has known plastic bolt issues (e.g., Ford, GM)
One overtorqued bolt can crack a plenum. One missed coolant line can cause overheating.
If the job involves coolant, vacuum lines, or torque-sensitive plastic fasteners, pay for the labor. It’s cheaper than a tow.
Related Components to Inspect or Replace
While you’re in there, address these common failure points.
Spark Plugs
Worn or improperly gapped plugs increase coil strain. If plugs haven’t been changed in 60,000+ miles, replace them. Labor is already covered. Use the correct gap—0.028″ vs. 0.050″ can double coil stress.
Valve Cover Gaskets
Oil leaks into spark plug tubes cause misfires and coil damage. If you’re removing the valve cover, replace the gasket. On aluminum heads, reuse causes leaks. Cost: $15–$40 in parts.
Spark Plug Wires (Non-COP Systems)
Test resistance with a multimeter. Over 10k ohms per foot? Replace them. High resistance mimics coil failure.
Post-Replacement Verification
Don’t assume it’s fixed. Verify with these steps:
- Clear all DTCs with an OBD2 scanner.
- Perform a road test under load—climb a hill or accelerate hard.
- Check live misfire counters. Zero misfires after 10 minutes of driving is ideal.
- Monitor fuel trims. If long-term fuel trim (LTFT) is over +15%, another issue exists—likely vacuum leak or injector.
Some European models require a relearn procedure after coil replacement. Without it, misfire counters may not reset. Check service documentation.
Do This, Not That: Replacement Checklist
- ✅ Label coils and wires during removal to avoid mix-ups.
- ✅ Apply dielectric grease to the coil boot to prevent moisture and corrosion.
- ✅ Blow out spark plug tubes with compressed air before reinstalling.
- ⚠️ Avoid overtorquing coil bolts—many are plastic and crack easily.
- ⚠️ Don’t reuse old spark plug tube seals on aluminum heads. They swell and leak.
- ⚠️ Don’t skip compression or fuel tests if misfires persist after replacement.
Real-World Failure Scenarios and Lessons
| Symptom | Most Likely Cause | Less Common But Possible | Diagnostic Tip |
|---|---|---|---|
| Intermittent misfire, P0301 | Failing COP coil | Carbon-fouled spark plug, cracked insulator | Swap coil; inspect plug electrode |
| Rough idle, multiple misfire codes | Multiple worn coils or plugs | Vacuum leak, fuel injector issue | Check fuel trims, perform smoke test |
| No spark, P0353 (primary circuit) | Failed coil or wiring | PCM driver circuit fault | Check 12V supply and switching signal with scope |
| Engine stalls when hot | Internal coil short when heated | Ignition module grounding issue | Test coil resistance cold vs. hot |
Situation: 2012 Ford Fusion with repeated P0303 misfire after two aftermarket coil replacements.
Discovery: Spark plug had a cracked ground electrode. Spark was misfiring to the side, overloading the coil.
Lesson: Always inspect the spark plug. A mechanical fault downstream can kill multiple coils.
Situation: 2005 Toyota Sienna with P0300 and white exhaust smoke.
Discovery: After replacing plugs and coils, misfire remained. Compression test revealed head gasket leak into two cylinders.
Lesson: Misfires aren’t always ignition-related. Check combustion integrity first.
Situation: 2010 Subaru Outback misfiring only in rain.
Discovery: Crack in intake manifold near coil #4 allowed water to track to ground.
Lesson: Environmental factors can mimic coil failure. Look for secondary grounding paths.
Every engine has its quirks. Always consult the service manual for torque specs, resistance values, and relearn procedures. Assuming one rule fits all leads to comebacks—and lost trust.