Over two decades in the shop, I’ve seen oil pan issues come through the door in every form—from a minor seep at the gasket to full-on impact damage from a curb strike. While it might seem like a straightforward job, the real cost of replacing an oil pan varies more than most people expect. What looks like a simple fix on a compact sedan can turn into a major teardown on an all-wheel-drive crossover. Let me walk you through the factors that actually influence the final bill, based on what I see on the lift week after week.
Overall Cost Range for Oil Pan Replacement
Total costs for oil pan replacement typically fall between $300 and $1,200, though complex setups can exceed $1,500. This includes parts, labor, and fluids. The biggest variable? Labor time, which depends entirely on how much needs to come apart to reach the pan. A front-wheel-drive economy car might take 2–3 hours. An AWD SUV with a subframe in the way can take 6 or more.
Key Factors That Affect Total Cost
The final price isn’t just about the part. It’s about access, materials, and hidden damage. Here’s what really moves the needle:
- Vehicle layout: Transverse FWD engines often require engine mount, splash shield, or halfshaft removal. RWD setups are usually easier, but low-clearance vehicles still pose challenges.
- Oil pan material: Stamped steel is cheap and easy to replace. Aluminum or composite pans cost more and are sensitive to warping or thread damage.
- Labor rates: Range from $80/hour at independent shops to $180/hour at dealerships in major cities.
- Geographic location: Coastal and urban areas often see 20–30% higher labor costs.
- Ancillary work: Broken sensors, damaged exhaust gaskets, or worn engine mounts discovered during disassembly can add $100–$400.
Component Costs Breakdown
Parts are usually the smaller half of the bill, but skimping here can lead to repeat work.
Oil Pan Unit Cost
- Stamped Steel: $50–$200. Common on economy cars. Aftermarket options are plentiful, but check for bolt hole alignment and flange flatness before installing.
- Cast Aluminum: $150–$500. Found on V6 and performance engines. OEM is recommended—some aftermarket versions warp under torque.
- Composite: $200–$700. Brittle and prone to cracking during removal, especially if fasteners are corroded.
OEM vs. Aftermarket vs. Used
- OEM: Most reliable. Matches factory specs for flatness, thread quality, and thickness. Worth the premium on critical applications.
- Aftermarket: Quality varies. Stick with reputable brands like Mahle, ATP, or Dorman. Avoid no-name pans—they often leak within months.
- Used (Salvage): Can save $50–$150, but inspect for cracks near the pickup tube, distorted sealing edges, or stripped bolt holes.
Gasket and Seal Kit Costs
A failed seal is the #1 cause of post-repair leaks. Don’t cut corners.
- Oil pan gasket: $10–$50. Many modern engines use RTV sealant or hybrid gaskets. If RTV is specified, use it—even with a pre-cut gasket.
- Drain plug washer: $1–$5. Always replace. Reused copper washers are a common source of slow seepage.
- Oil level sensor O-ring: $5–$15. Replace if the sensor is removed. Dry, cracked O-rings leak under pressure.
- Oil pump pickup tube gasket: $5–$20. Replace if the tube is disconnected. A suction leak here can starve the engine of oil.
Fasteners and Fluids
- Oil pan bolts: $2–$5 each. Some engines use torque-to-yield (TTY) bolts—replace them once. Reusing them risks uneven clamping.
- Drain plug: $10–$30. Magnetic plugs are a smart upgrade—they catch metal debris.
- Engine oil: $30–$80. Refill capacity varies. Match OEM viscosity and spec, especially on turbocharged or high-mileage engines.
- RTV sealant: $10–$25. Use OEM-specified type. Some silicones degrade with modern oil formulations.
- Brake cleaner: $5–$15. Critical for cleaning sealing surfaces. Leftover gasket material or oil residue causes leaks.
Labor Costs
Labor is where costs diverge. Time depends on access.
Estimated Labor Hours by Drivetrain
| Vehicle Type | Typical Labor Hours | Common Access Challenges |
|---|---|---|
| FWD Transverse | 2–4 | Right engine mount, splash shield, halfshaft, or steering components may need removal. |
| RWD Longitudinal | 1.5–3 | Better access, but low-slung pans on sports cars require careful maneuvering. |
| AWD / 4×4 | 3–6 | Subframe or crossmember removal often required. Some pans sit under the front differential. |
Labor cost = Hours × Shop Rate. Example: 5 hours × $120/hour = $600 labor. That’s more than the pan and gasket combined.
Ancillary Costs to Anticipate
These aren’t always needed, but they’re common enough to budget for.
- Oil filter: $20–$50. Standard replacement during oil change.
- Oil level sensor: $50–$200. Fragile. If the wiring breaks or it leaks, replace it while you’re in there.
- Pickup tube screen: $10–$50. Inspect for debris. Clean or replace on high-mileage engines.
- Engine mounts: $50–$300 each. If removed for access, check for cracks or fluid leaks.
- Exhaust gaskets/hardware: $10–$50. Prevents exhaust leaks if manifold or downpipe was loosened.
- Wheel alignment: $80–$150. Required if subframe bolts were disturbed—especially on AWD vehicles.
How to Diagnose an Oil Pan Leak
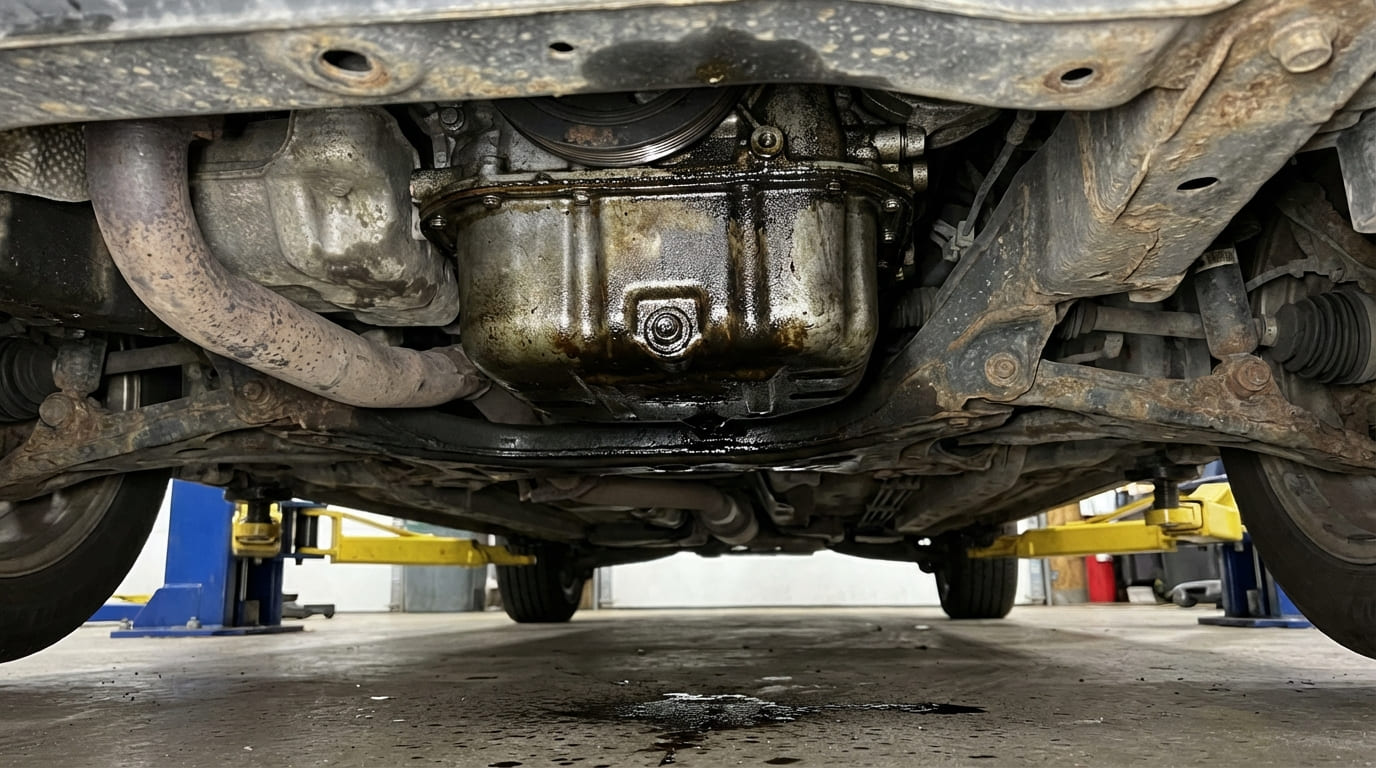
Don’t assume it’s the pan. Oil migrates, and misdiagnosis leads to wasted money.
Step-by-Step Leak Verification
- Degrease the engine: Use brake cleaner and a brush. Focus on the oil pan, valve covers, and timing cover.
- Run the engine: Drive for 15–30 minutes to warm up and circulate oil.
- Inspect for active drips: Use a flashlight and mirror. Look for oil running from seams or pooling at low points.
- Use UV dye: Add to oil, run engine, then inspect with UV light. Pinpoints the exact source.
Rule Out Other Common Leak Sources
- Valve cover gasket: Oil runs down the block and pools at the pan rail. Common on V6/V8 engines.
- Rear main seal: Leak appears at the transmission bellhousing. Oil tracks vertically, not horizontally.
- Front main seal: Oil at the crankshaft pulley. Requires timing cover removal.
- Oil filter housing or cooler lines: Above the pan. A loose filter or cracked O-ring can mimic a pan leak.
- Block porosity: Rare. Leak appears from the side of the block near the pan rail. Not fixable by pan replacement.
Inspect the Oil Pan for Damage
- Check for dents, cracks, or punctures—especially on low-riding vehicles.
- Inspect drain plug threads. Stripped threads are common on aluminum pans.
- Use a straightedge and feeler gauge to check pan flatness. More than 0.004″ warpage over 6 inches usually means replacement.
Repair vs. Replace: When to Do What
Replacement isn’t always the only option.
When Repair Makes Sense
- Minor steel puncture: High-temp epoxy like J-B Weld SteelStik can work as a temporary fix. Not recommended for daily drivers in cold climates.
- Aluminum crack: TIG welding by a skilled tech can work, but post-weld flatness must be verified.
- Stripped drain plug threads: Helicoil or Time-Sert inserts are reliable. Oversized plugs often fail under vibration.
When to Replace
- Cracked or warped pan.
- Bent pickup tube or restricted oil flow.
- Composite pan with any crack—these are brittle and prone to spreading.
If a thread repair kit costs $60 and a new pan is $180, repair makes sense—only if the rest of the pan is sound. A warped pan will still leak, even with perfect threads.
Post-Replacement Checks
The job isn’t done when the oil is in.
- Check oil level after warm-up and cool-down. Oil expands when hot—overfilling is easy.
- Run engine, then inspect for leaks at gasket, drain plug, and sensor.
- Use UV light if dye was added. Catches tiny seeps.
- Listen for abnormal noises. A kinked pickup tube or low oil can cause oil pump whine.
- Monitor oil pressure light. If it flickers at idle, shut off and recheck.
Pro Tips: What Works in the Real World
In my shop, we always clean sealing surfaces with a plastic scraper and brake cleaner. Steel scrapers gouge aluminum. Leftover gasket material is the #1 cause of leaks we see on comebacks.
Always use a torque wrench and follow the factory sequence—usually crisscross from the center outward. Skipping this step causes warped pans and leaks, especially on aluminum.
If the service manual specifies RTV at the corners or timing cover interface, use it. I’ve seen two shops redo a pan job because they assumed the gasket was enough—RTV was required at the front seal.
Common Leak Locations and Causes
| Leak Location | Probable Causes (Ranked) | Key Notes |
|---|---|---|
| Front of oil pan | 1. Improper gasket alignment2. Overtightened front bolt3. Missing RTV at timing cover | RTV is often required where pan meets timing cover. Check service manual. |
| Rear of oil pan | 1. Warped pan or block2. Loose rear bolts3. Rear main seal (mimics pan leak) | Trace leak upward. Rear main leaks follow bellhousing seam vertically. |
| Drain plug | 1. Reused or damaged washer2. Stripped threads3. Overtightened plug | Replace copper washer every time. Aluminum pans are thread-sensitive. |
| Side rail (lengthwise) | 1. Dirty sealing surface2. Uneven bolt torque3. Warped pan | Check flatness with straightedge and feeler gauge. >0.004″ warpage = replace. |
Situation: A 2015 FWD crossover had oil pooling under the front. Two shops replaced the gasket—leak returned.
Discovery: RTV was missing at the timing cover interface. The gasket alone wasn’t enough.
Lesson: Always follow OEM procedure. Some designs require both gasket and sealant.
Situation: 3.5L V6 with rear pan leak. 120k miles. Assumed gasket failure.
Discovery: Rear main seal was leaking. Oil tracked forward along the pan rail.
Lesson: Oil migration fools even pros. Use dye test and trace upward.
Situation: Lifted truck hit a rock. Pan dented near pickup tube.
Discovery: Dent wasn’t leaking, but pickup tube was bent—risk of oil starvation.
Lesson: Impact damage affects function, not just sealing. Inspect pickup tube clearance.
Every oil pan job has its own story. What looks routine can hide surprises. Don’t rush the diagnosis. Clean thoroughly. Torque properly. And always—always—consult the factory service manual. It’s the difference between a fix and a comeback.