Over two decades in the shop, I’ve seen cracked engine blocks mimic head gasket failures, cooling system leaks, and oil contamination. The difference between a costly misdiagnosis and a precise fix lies in systematic testing—not guesswork. This guide cuts through the noise with actionable diagnostics, real-world verification steps, and expert judgment on repairability.
External Indicators of Coolant or Oil Leakage
External fluid traces are often the first clue. But before blaming the block, rule out gaskets, seals, and accessories. True block cracks show seepage along casting seams, machined surfaces, or structural zones like the bellhousing or oil pan rail.
Visible Coolant Seepage on Engine Exterior
Coolant residue—green, orange, pink, or blue—on the side of the block or near the transmission bellhousing suggests a crack in a water jacket. Common areas include freeze plug bores, cylinder wall galleries, or the oil pan rail where coolant passages run close to the surface.
How to Check: Clean the engine thoroughly. Use a cooling system pressure tester to pressurize to OEM specs (typically 15–20 psi). Monitor for pressure drop and inspect for seepage at casting joints. If no radiator, hose, or water pump leak is found, and coolant appears along a structural seam, suspect a crack.
Visible Oil Seepage on Engine Exterior
Dark, oily residue near main bearing caps or along the block’s side may indicate a crack intersecting an oil gallery. Gasket failure is more common, but if the leak path follows a casting line—not a gasket interface—dig deeper.
How to Check: Add UV dye to the oil, run the engine to operating temperature, then inspect with a UV light. If the trail originates from a casting seam, not a gasket edge, the block may be cracked.
Internal Indicators of Coolant or Oil Contamination
When fluids mix internally, the cause is often misdiagnosed. These symptoms overlap with head gasket or cooler failures—but a cracked block must be ruled in or out with targeted tests.
Coolant in Engine Oil
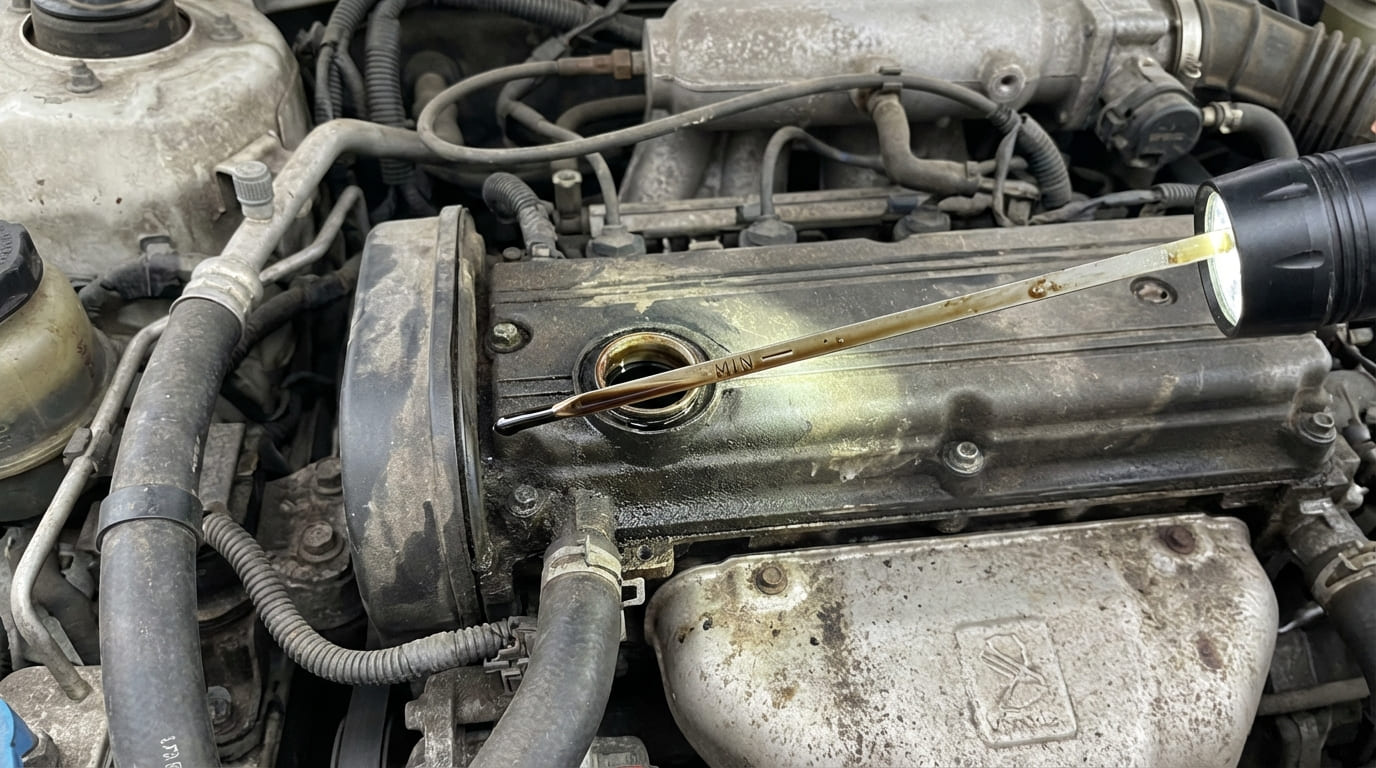
A milky, foamy substance on the dipstick or under the oil cap signals coolant intrusion. While a head gasket is the usual suspect, a crack between a coolant jacket and oil gallery—especially near cylinder bores or main webs—can cause the same.
How to Check: Confirm the oil cooler and EGR cooler are intact. Pressurize the cooling system and check for bubbles in the oil filler or dipstick tube. No bubbles? Perform oil analysis: glycol presence confirms contamination but not location. Combine with visual inspection and pressure testing.
Oil in Cooling System
An oily film or sludge in the radiator or overflow tank means oil is entering the coolant. This is rare from a block crack and more typical of a failed oil cooler or turbocharger. But if the crack bridges an oil and coolant passage, it’s possible.
How to Check: Pressurize the cooling system and watch for oil sheen in the overflow. Perform a cold start: if oil appears only after oil pressure builds, suspect internal leakage. Isolate the oil cooler with blanking plates and retest.
Combustion Gases in Cooling System
This is one of the strongest signs of a crack involving the combustion chamber. Exhaust gases entering the coolant cause pressure buildup, overheating, and bubbling in the overflow.
How to Check: Use a chemical block tester (combustion leak detector). Draw air from the coolant reservoir through a CO₂-sensitive reagent. A color change (blue to green/yellow) confirms exhaust gases. Follow with a leak-down test: if air bubbles into the radiator, and compression is low in one cylinder, the crack is likely in the cylinder wall or head gasket zone.
Overheating and Cooling System Performance
Unexplained overheating with no external leak or failed component should trigger suspicion of internal coolant loss via a crack.
Persistent Engine Overheating
If the engine overheats despite a functional thermostat, water pump, and radiator, and pressure testing shows loss without visible leaks, coolant may be escaping internally through a crack.
How to Check: Use an infrared thermometer to scan the block surface. A temperature difference of 20–30°F between adjacent cylinders suggests disrupted coolant flow from a crack. Confirm with a cooling system pressure test and block test.
Rapid Coolant Loss Without External Leak
Coolant disappearing with no trace—and accompanied by white exhaust smoke with a sweet odor—means it’s burning in the combustion chamber. This happens when a crack in the cylinder wall allows coolant into the cylinder.
How to Check: Inspect spark plugs. A clean, steam-scoured plug in one cylinder versus sooty ones in others indicates coolant intrusion. Use an exhaust gas analyzer: elevated hydrocarbons and steam content support the diagnosis.
Engine Performance Issues
Cracks affecting cylinder integrity often show up as performance problems before total failure.
Misfires or Rough Running
Coolant entering the combustion chamber fouls spark plugs or disrupts ignition, leading to misfires. OBD2 codes like P030X (cylinder-specific misfire) may appear intermittently.
How to Check: Perform a compression test. Low compression in one cylinder—especially if adjacent cylinders are normal—suggests a crack. Follow with a leak-down test: if air is heard bubbling into the radiator, the combustion chamber is connected to the cooling system.
Decreased Engine Power
Power loss can stem from diluted oil, chronic overheating, or partial cylinder sealing loss due to a crack.
How to Check: Conduct a wet/dry compression test. If compression increases significantly when oil is added (wet test), it’s likely worn rings. Minimal change suggests a head gasket or block crack. Track compression over time: a steady decline—even within “acceptable” range—can indicate progressive cracking.
Unusual Engine Noises
Knocking or tapping isn’t typical of most block cracks, but if the crack compromises the main bearing web, it can allow crankshaft movement or bearing failure.
How to Check: Use an engine stethoscope to isolate noise. A knock near the lower block or bellhousing may point to main cap or block damage. Remove the oil pan if possible: look for metal debris or uneven bearing wear.
Typical Crack Locations and Causes
Crack location informs both cause and repairability. Some are preventable; others stem from design or material flaws.
- Cylinder walls: Vertical cracks from piston ring zone into water jacket—often from detonation or chronic overheating.
- Water jackets: Radiating cracks near freeze plug bores—common in engines with improper coolant mix exposed to freezing temps.
- Main bearing webs: Structural cracks from improper torque, impact, or casting defects. These are serious and often fatal.
- Bellhousing area: Cracks from transmission installation force or front-end collision.
Primary causes: freezing coolant, thermal shock (adding cold water to hot engine), detonation (low-octane fuel, incorrect timing), and casting porosity—especially in older or imported blocks.
Diagnostic Differentiation from Other Failures
Head gaskets, intake manifolds, and freeze plugs mimic block cracks. Always eliminate common, low-cost failures first.
| Symptom | Most Likely Cause | Less Common but Possible | Key Differentiator |
|---|---|---|---|
| White exhaust smoke + coolant loss | Head gasket failure | Cracked block or head | Block crack may show external seepage or localized hot spot on IR scan |
| Milky oil | Head gasket, EGR cooler | Block crack near oil gallery | Check for external casting leaks; inspect oil cooler with UV dye |
| Combustion gases in coolant | Head gasket | Cracked cylinder wall | Leak-down test with audible coolant bubbling points to block |
| External coolant leak at block side | Freeze plug failure | Crack in casting near plug | Inspect bore edge: leak from plug vs. casting around it |
| Oil in coolant | Oil cooler failure | Block crack intersecting passages | Isolate cooler; pressure test block separately |
Best Practices: Do and Don’t
- ✅ Do: Clean the engine before pressure testing. Grime hides small seepage paths.
- ✅ Do: Use a hand-pump cooling system pressure tester—more sensitive than electronic units for slow leaks.
- ✅ Do: Inspect cylinder walls with a borescope during teardown. Hairline cracks may not leak under pressure but can spread.
- ⚠️ Don’t: Replace a head gasket without checking deck flatness. A warped block surface causes repeat failures.
- ⚠️ Don’t: Use chemical “stop-leak” products. They clog heaters, radiators, and oil passages—making diagnosis harder.
- ⚠️ Don’t: Assume all cracks are fatal. Some external, non-structural cracks can be repaired.
Real-World Diagnostic Case Studies
Situation: 2008 V6 truck with intermittent overheating and coolant loss. No external leaks. Previous shop replaced thermostat and radiator cap.
Initial Assumption: Head gasket failure—common on this model.
Deep Dive: Block tester confirmed combustion gases. Compression was even. Pressurized cooling system revealed a faint drip near the rear block, above the oil pan rail.
Discovery: Hairline crack from water jacket into main cap area—likely from years of thermal cycling.
Expert Insight: Combustion in coolant doesn’t always mean head gasket. External seepage near structural zones demands block inspection.
Situation: High-mileage inline-four with milky oil. Head gasket replaced twice.
Initial Assumption: Warped head or faulty gasket install.
Deep Dive: Head flatness was good. Torque sequence correct. Wet/dry compression showed no major leak. UV dye revealed seep at timing cover.
Discovery: Crack in block’s coolant passage feeding thermostat housing.
Expert Insight: Coolant can enter oil without combustion involvement. Trace the fluid path—don’t assume head gasket.
Situation: Rebuilt engine lost coolant after 3,000 miles. No external leaks. Block test negative.
Initial Assumption: Small head gasket leak.
Deep Dive: Pressure test showed slow loss. Dye test clean. Removed intake—found coolant pooling in valley.
Discovery: Cracked plastic intake manifold.
Expert Insight: Just because it feels “deep” doesn’t mean it’s structural. Eliminate simple failures first—always.
Repairability and Outcome
Repairability depends on crack location, size, and engine use. In my shop, we evaluate cost versus long-term reliability—especially for daily drivers.
Minor External Cracks
Non-structural cracks in mounting bosses or external water jackets can be repaired via TIG welding (cast iron) or metal stitching. Epoxy kits exist but fail under sustained heat and pressure.
Cost: $200–$600 depending on access and method. Viability: Acceptable for low-stress areas on older engines. Not for performance or high-mileage vehicles.
How to Verify: Pressure test post-repair. Monitor through 3–5 heat cycles. Any seepage means failure.
Internal or Structural Cracks
Cracks in cylinder bores, main webs, or deep coolant passages are generally not repairable. Welding risks distortion, re-cracking, or blocked passages.
Cost: Repair attempts $800+, but failure rate exceeds 70%. Viability: Not recommended. Risk of hydraulic lock, bearing failure, or seizure is too high.
Expert Advice: Avoid stop-leak products. They may seal temporarily but often clog oil galleries or damage water pumps—creating new problems.
Block Replacement
For unrepairable cracks, replacement is the only reliable option. Many shops transfer good internals (crank, rods, pistons) to a remanufactured or used block.
Cost: Remanufactured block: $1,200–$2,500. Used: $400–$900 (verify condition). Labor: $1,500–$3,000.
How to Verify: Check bore alignment, deck flatness, and main bore concentricity before assembly. After build, perform leak test, oil pressure test, and 500-mile break-in with close monitoring.
Always consult the factory service manual for torque specs and flatness limits. Cast iron blocks typically allow 0.002″–0.004″ warpage over 6 inches; aluminum and performance engines require tighter tolerances.