In my experience, the camshaft position sensor (CPS) is one of those components that often gets blamed prematurely. While it can fail, I’ve seen more than a few engines come into the shop with a new CPS already installed—only for us to discover the real issue was a damaged reluctor wheel or a wiring fault. This article breaks down what to look for, how to verify, and—just as importantly—how not to jump to conclusions.
Primary Symptoms of a Faulty Camshaft Position Sensor
The camshaft position sensor provides critical timing data to the engine control module (ECM), enabling proper fuel injection, spark timing, and variable valve timing (VVT) control. When it fails, symptoms vary from no-start conditions to subtle performance issues. Below are the most common signs—ranked by diagnostic urgency and frequency.
Engine Cranks But No Start
This is the most severe symptom. The ECM relies on the CPS signal to identify which cylinder is on its compression stroke so it can fire injectors and spark plugs in sequence. Without a valid signal, the engine may crank endlessly but won’t start. However, don’t assume the sensor is dead—first verify power, ground, and signal output.
Intermittent Stalling and Rough Idle
If the engine starts but stalls at idle or under light load—especially after warming up—the CPS may be failing intermittently. Heat can exacerbate internal sensor faults or expose weak wiring connections. The ECM interprets signal loss as a sudden camshaft stoppage and cuts fuel or spark. Before replacing the sensor, check for loose connectors or harness damage near hot exhaust components.
Engine Hesitation and Misfires Under Load
An erratic CPS signal disrupts VVT operation. The ECM uses the sensor to confirm actual camshaft position versus target timing. If feedback is off, the system may retard timing or disable VVT entirely, causing hesitation, misfires, or reduced power. These symptoms mimic vacuum leaks or ignition coil failures—so don’t assume it’s the CPS without testing.
Reduced Engine Performance and Limp Mode
When the ECM detects unreliable CPS data, it often disables VVT and reverts to a fixed timing map. This results in sluggish acceleration and lower fuel efficiency. Some vehicles enter limp mode, limiting RPM or disabling higher gears. If you notice both performance loss and a Check Engine Light, prioritize diagnostics before driving long distances.
Check Engine Light with Specific DTCs
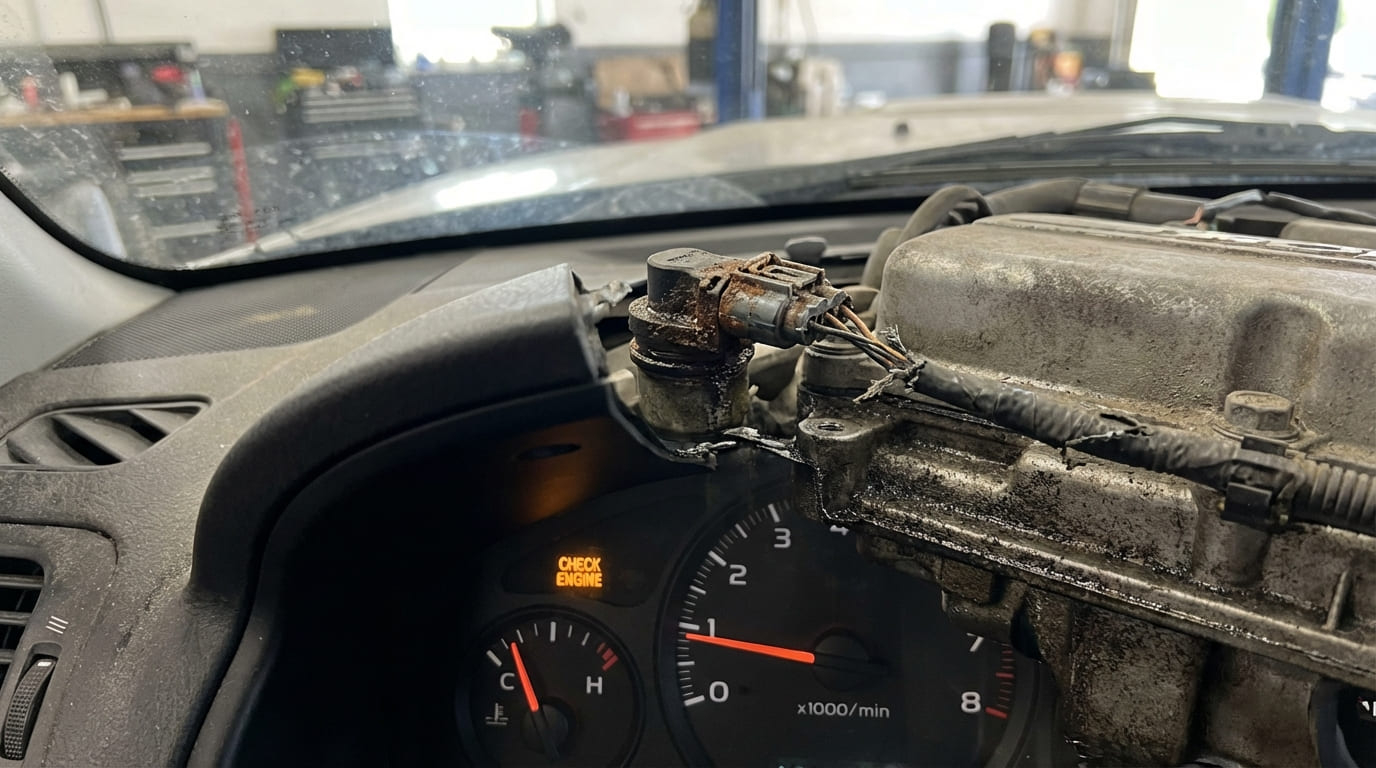
The Check Engine Light (CEL) is usually the first indicator. Common diagnostic trouble codes (DTCs) include:
- P0340 – Camshaft Position Sensor Circuit Malfunction
- P0341 – Camshaft Position Sensor Range/Performance
- P0342/P0343 – Low/High Input
- P0344 – Intermittent Signal
- P0011–P0022 – VVT-related codes (often secondary to faulty CPS feedback)
These codes point to circuit issues or signal anomalies—but not necessarily a bad sensor. Wiring faults, poor connections, and mechanical damage are equally common.
Increased Fuel Consumption
Without accurate cam position data, the ECM can’t optimize fuel trims or transition smoothly to closed-loop operation. It may run richer to prevent misfires, leading to a measurable drop in fuel economy. On some V6 engines, I’ve seen fuel consumption increase by 10–15% due to a degraded CPS signal.
Transmission Shifting Problems
On vehicles with integrated powertrain control, the transmission control module (TCM) uses engine timing data to coordinate shifts. A corrupted CPS signal can cause harsh shifts, delayed upshifts, or false torque converter lockup. This is more common on Ford and Toyota platforms with shared CAN bus communication.
Distinguishing Camshaft from Crankshaft Sensor Faults
The crankshaft position sensor (CKP) is the primary reference for engine speed and piston position. No CKP signal typically means no spark and no injector pulse—resulting in a no-crank-or-no-start condition. The CPS, on the other hand, provides cylinder identification and VVT feedback.
If the engine cranks with spark and fuel but won’t start, the CPS is more likely at fault. If there’s no spark and no injector activity, start with the CKP. Always verify both signals during diagnosis—especially on engines where the ECM uses CKP as a fallback strategy.
Common Causes of Failure
Replacing the sensor without identifying the root cause leads to repeat failures. The following issues account for over 60% of CPS-related comebacks in my shop:
- Wiring harness damage: Melted insulation from proximity to exhaust manifolds is common. Rodents also chew wires—inspect under intake plenums.
- Connector problems: Corrosion, bent pins, or terminal push-out can break the circuit. Use a terminal tension gauge for accurate diagnosis.
- Reluctor wheel damage: A bent tooth, cracked reluctor ring, or debris buildup disrupts the magnetic field. On Honda and GM engines, this often requires cam gear replacement.
- Air gap issues: Improper sensor seating or a damaged mounting boss increases the gap, weakening the signal. Always check manufacturer specs—typically 0.5–1.5 mm.
- Contamination: Oil sludge or metal shavings on the sensor tip dampen the signal. Clean thoroughly before testing.
Diagnostic Verification
Never replace the CPS based on a code alone. Follow a systematic approach to isolate the fault.
Scan Tool and Live Data Analysis
Use an advanced OBD2 scanner to monitor live data: camshaft position (in degrees), engine RPM, and VVT solenoid duty cycle. The cam signal should sync with crankshaft RPM at a 2:1 ratio on a four-stroke engine. If the reading is stuck at 0°, jumps erratically, or doesn’t change with RPM, suspect a sensor or mechanical issue. Be aware—some scanners display calculated values, not raw data. Cross-check with physical tests.
Oscilloscope Waveform Analysis
A digital storage oscilloscope (DSO) is the most reliable method. Connect to the signal wire and ground, then crank the engine. A healthy Hall-effect sensor produces a clean square wave; a variable reluctance type shows a consistent sine wave. Look for:
- Signal dropouts when wiggling the harness
- Low amplitude (below 0.8V)
- Timing misalignment with CKP signal (should be within 2–5° per OEM spec)
Always capture both CPS and CKP signals simultaneously to verify phasing.
Multimeter Electrical Checks
Test the circuit before touching the sensor:
- Check reference voltage (usually 5V or 12V)—verify at the connector with the harness plugged in.
- Test ground continuity: resistance should be under 0.5 ohms.
- Measure signal circuit for opens or shorts to power/ground.
Use a service manual for pinout diagrams. Many sensors share a common ground with other components—trace the entire circuit.
Visual and Mechanical Inspection
Remove the sensor and inspect the tip for oil, metal debris, or physical damage. On some engines (e.g., Toyota 2AZ-FE), you can view the reluctor wheel through the bore. On others, you’ll need to remove the timing cover. Look for:
- Cracked or missing reluctor teeth
- Excessive endplay in the camshaft
- Oil contamination in the sensor bore
If the reluctor is damaged, replacing the CPS will only provide a temporary fix.
Repair vs Replace: Cost and Viability
A new CPS typically costs $50–$150 (OEM) or $30–$90 (quality aftermarket). Labor ranges from 0.5 to 2 hours, depending on accessibility. However, if the reluctor wheel is damaged, repair costs can exceed $500 due to timing system disassembly.
Ask: Is the sensor failing, or is it being damaged by an external factor? If metal debris is present, investigate underlying engine wear. If wiring is damaged, repair the harness—not just the connector. Replacing parts without root cause analysis is expensive and ineffective.
Recommended and Avoid Practices
- ✅ Recommended: Clean sensor threads with a tap and blow out the bore with compressed air. A dirty bore can prevent proper seating and affect the air gap.
- ✅ Recommended: Inspect the reluctor wheel before installing a new sensor. On high-mileage engines, this step is non-negotiable.
- ✅ Recommended: Use OEM or high-tier aftermarket sensors (e.g., Denso, Bosch). Budget brands fail prematurely on GM and Chrysler engines.
- ⚠️ Avoid: Reusing old O-rings or gaskets. They can leak oil into the connector or alter sensor depth.
- ⚠️ Avoid: Assuming the DTC points directly to the sensor. Circuit issues are just as likely.
- ⚠️ Avoid: Clearing codes and calling it fixed without a road test. Intermittent faults may not return immediately.
Failure Probability and Diagnostic Priority
| Symptom | Most Likely Cause | Less Common Causes | Diagnostic Priority |
|---|---|---|---|
| Engine cranks, no start, P0340 | CPS circuit open/short, wiring fault | Failed sensor, damaged reluctor wheel | High – Check power, ground, signal |
| Intermittent stalling, P0344 | Loose connector, heat-related wiring breakdown | Failing sensor, cracked reluctor | Medium – Monitor live data under load |
| Rough idle, VVT codes | Erratic CPS signal, low amplitude | Stuck VVT solenoid, oil flow issue | High – Scope both sensor and solenoid |
| Reduced performance, no CEL | Weak signal not tripping threshold | ECM calibration issue, other sensor cross-talk | Low-Medium – Requires advanced diagnostics |
Situation: A 2012 Toyota Camry came in with P0340 and a no-start condition. The owner had already replaced the CPS twice.
Discovery: I checked the wiring and found 5V reference and ground intact, but no signal. I pulled the sensor and noticed metal debris on the tip. After cleaning, the signal returned—briefly. Further inspection revealed a cracked reluctor ring on the exhaust cam sprocket, barely visible without removal.
Nuanced Lesson Learned: A contaminated or damaged reluctor can destroy a new sensor over time. Always inspect the target wheel—even if the old sensor looks clean. Replacing parts without root cause analysis leads to comebacks.
Situation: A 2008 Ford Fusion with intermittent stalling. Scan tool showed P0344, and the CPS was replaced at a chain shop.
Discovery: Using a DSO, I saw the signal drop out when I wiggled the harness near the valve cover. The insulation was cracked, and one wire had intermittent continuity. The connector looked fine—until I checked pin tension.
Nuanced Lesson Learned: Intermittent electrical faults can be mechanical in nature. A solid visual inspection isn’t enough—probing and flexing the harness under load is often necessary.
Situation: A 2015 Honda Accord with rough idle and P0011. The shop assumed VVT issue and replaced the oil control solenoid.
Discovery: I monitored camshaft actual vs. desired timing and noticed the actual reading jumped erratically. The CPS waveform was noisy but not dead. Cleaning the sensor tip helped slightly, but replacing it fixed the issue. The old sensor was magnetically weakened, not failed outright.
Nuanced Lesson Learned: Sensors can degrade gradually, producing signals below the ECM’s usable threshold without triggering a hard fault. Always consider signal quality, not just presence.
Diagnosing a camshaft position sensor issue isn’t just about reading codes. It’s about understanding the system, verifying each component, and respecting the complexity of modern engine management. Always consult the factory service manual for specifications—especially waveform patterns and air gap tolerances—because they vary more than you’d think. In my shop, we always test before we replace—and it saves time, money, and comebacks.