Back in the early 2000s, I had a customer come in with a 1999 Honda Accord that died on the highway. “Just stopped running,” he said. No warning, no noise—just silence. I’ve seen this story play out dozens of times since, and each one reminds me why understanding your engine’s design is critical before jumping into diagnostics or repairs. A broken timing belt can range from an inconvenient setback to a financial gut punch, depending on whether your engine is an interference or non-interference type.
Immediate Effects When the Timing Belt Breaks
When the timing belt snaps while driving, the camshaft stops spinning but the crankshaft continues due to inertia. This breaks synchronization between pistons and valves. Most engines will stall instantly or run roughly for a second before dying.
The real damage depends entirely on engine design. You must determine if your engine is interference or non-interference—this single fact dictates repair cost and complexity.
Interference vs. Non-Interference Engines: What You Need to Know
This isn’t just technical jargon—it decides whether you’re facing a timing belt replacement or a full engine rebuild.
Non-Interference Engines: Lower Risk
These engines are designed so that pistons and valves never occupy the same space, even if timing is lost. When the belt breaks, the engine stops—but internal parts usually survive.
- Engine stalls but no valve-to-piston contact occurs.
- No internal damage in most cases.
- Replace the belt, tensioner, and idlers—engine often restarts normally.
However, carbon buildup over time can reduce clearance. I’ve seen rare cases where valves still hit pistons even in non-interference designs. Always verify with a compression test.
Interference Engines: High Risk of Damage
Most modern engines—including DOHC, turbocharged, and high-compression designs—are interference types. They offer better performance and efficiency, but zero margin for error.
When the belt breaks, open valves collide with rising pistons. The result? Bent valves, damaged pistons, and potentially catastrophic internal failure. The extent depends on engine speed at failure—higher RPM means more damage.
In my shop, we never assume a broken belt means total destruction. But we also never assume it’s safe. Always inspect before turning the key.
Common Damage in Interference Engines
If your engine is interference-type, assume internal damage until proven otherwise. Here’s what typically fails—and how to check it.
Cylinder Head Damage: Bent Valves and More
Bent valves are the most frequent issue. At high RPM, multiple valves across several cylinders can bend. Valve guides and seats may crack from impact, especially in aluminum heads.
Camshafts often survive, but I’ve seen lobe peening or camshaft fractures in performance engines due to sudden shock loads.
Piston and Connecting Rod Damage
Piston crown dents are common. In severe cases, connecting rods bend or break. A bent rod won’t always show visually—but it can cause rapid bearing wear or engine knock later.
Always check rod alignment with a dial indicator during teardown. Even slight misalignment leads to premature failure.
Block and Crankshaft Damage
Rare but serious. A broken connecting rod can punch through the engine block. Crankshaft journals can fracture from impact shock, especially on engines with high piston speeds.
Main bearing damage is often overlooked. If the crank took a hard hit, inspect all main caps and bearing surfaces—even if they look fine.
I once had a Chrysler 2.4L where a rod broke and shattered the block. The repair cost more than the car was worth. That’s why I always tell customers: if you hear a knock after belt replacement, shut it off immediately.
Step-by-Step Diagnostic Procedure
Before tearing into the engine, follow a logical inspection process. It saves time, money, and prevents unnecessary work.
1. Visual Inspection of Timing Cover
Remove the timing cover and inspect the belt. Look for:
- Clean break: likely age or fatigue.
- Chewed or shredded edges: pulley misalignment or seized tensioner.
- Oil soaking: front crank or cam seal leak.
Check tensioner and idler pulleys. Seized bearings or cracked arms are common failure points. Replace them even if they look okay—they’re worn out when the belt fails.
2. Engine Rotation Test
Attach a breaker bar to the crankshaft bolt and rotate the engine two full turns.
- If it binds or stops hard: mechanical interference (bent valves or piston contact).
- If it turns smoothly: possible no damage, especially in non-interference engines.
Stop immediately if you feel resistance. Forcing rotation worsens damage.
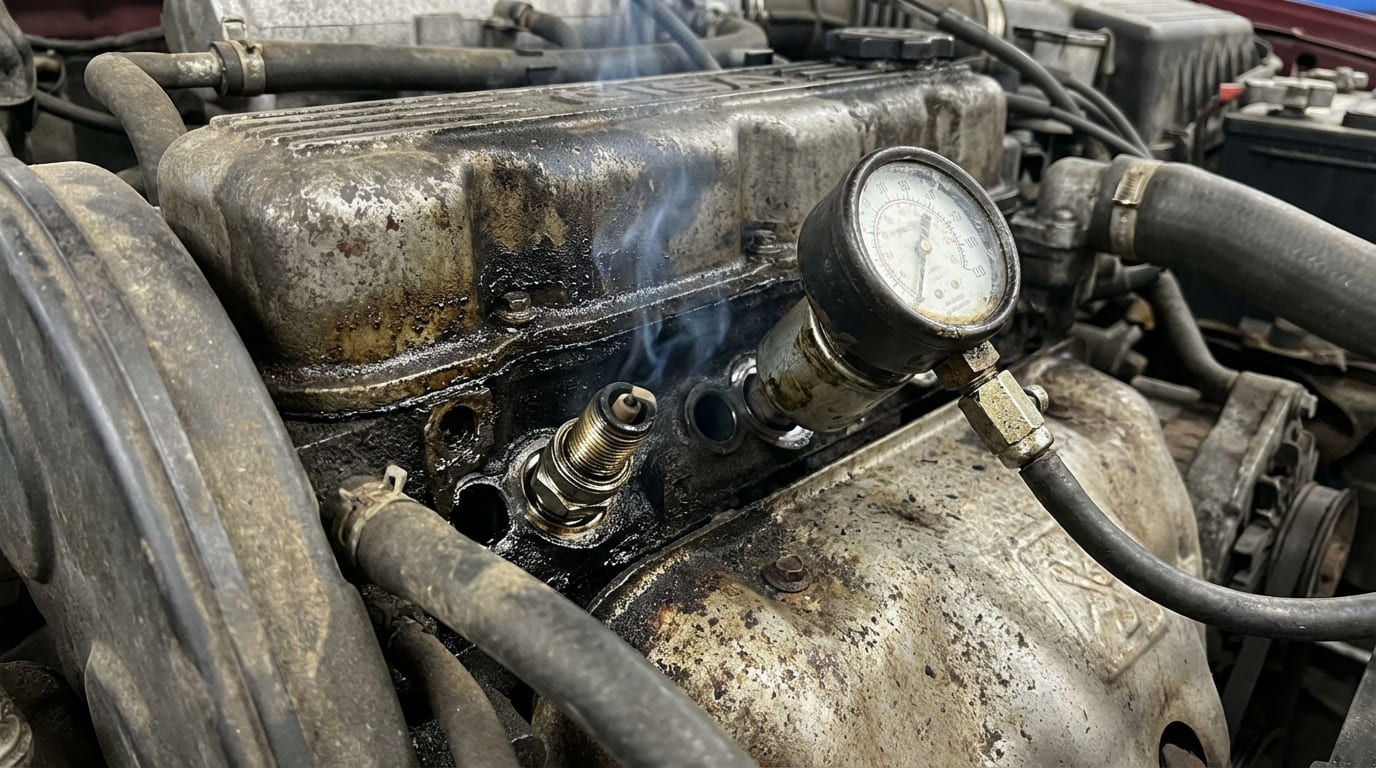
3. Compression Test
Perform a dry compression test on all cylinders. Compare readings to factory specs (typically 150–180 psi for modern four-cylinders).
- Zero or very low compression in one or more cylinders: bent valves or damaged seats.
- All cylinders within 10% of each other: likely no major damage.
Even if compression is good, don’t rule out damage—some bent valves still seal initially.
4. Borescope Inspection
Insert a borescope through the spark plug holes. Look for:
- Impact marks on piston crowns.
- Bent or chipped valve edges.
- Carbon flaking or debris in the combustion chamber.
This non-invasive check can confirm damage without pulling the head. It’s one of the best investments a DIYer can make for interference engine work.
| Scenario | Most Likely Cause | Probability in Interference Engines | Repair Feasibility |
|---|---|---|---|
| Engine won’t rotate by hand | Valve-to-piston contact | High (>80%) | Head removal, valve replacement |
| Zero compression in 2+ cylinders | Bent valves or damaged seats | Very High (>90%) | Head rebuild or replacement |
| Smooth rotation, normal compression | No internal damage (or minor) | Low (more common in non-interference) | Timing system replacement only |
| Oil contamination on belt | Front crank seal or cam seal leak | Moderate (~40%) | Seal replacement + belt service |
| Broken tensioner arm | Component failure, not just age | High in high-mileage engines | Replace tensioner, belt, inspect pulleys |
Repair Options and Cost Considerations
Repair strategy depends on engine type, damage level, and cost of parts vs. labor.
Non-Interference Engine Repairs
For DIYers, this is a manageable job. Replace:
- Timing belt
- Tensioner
- Idler pulleys
- Water pump (if belt-driven)
Cost: $200–$400 in parts. Labor at a shop: $400–$800. Use OEM or high-quality aftermarket belts—cheap belts fail early under heat and oil exposure.
After reassembly, double-check timing marks and verify ignition timing with a scan tool. Road test for misfires or hesitation.
Interference Engine Repairs
This is serious. Cylinder head removal is almost always required. Expect:
- Valve replacement (bent valves)
- Valve guide and seat inspection
- Piston and rod inspection
- Crankshaft and main bearing check
Cost: $1,500–$3,500 for a head rebuild. If pistons or rods are damaged, $4,000+ is common.
At that point, consider a used long block. A low-mileage engine from a salvage yard can cost $1,500–$2,500, including core return. Installation: $800–$1,200. Often cheaper and more reliable than a rebuild.
Situation: A 2008 Subaru Impreza came in after the timing belt broke at highway speed. Owner assumed it was toast.
Initial Assumption: Severe interference damage—Subarus are known for it.
Deep Dive: I did a borescope inspection first. Surprisingly, no valve or piston damage. Compression test showed all cylinders within spec. Rotated smoothly by hand.
The Nuanced Lesson Learned: Not every broken belt in an interference engine causes damage. This one failed at low RPM during deceleration, so inertia was minimal. Always assess before assuming worst-case.
Situation: 2003 Toyota Camry 2.4L with broken belt. Customer replaced the belt himself, but engine wouldn’t start.
Initial Assumption: Timing was off during reassembly.
Discovery: Timing was correct. Compression test revealed zero psi on two cylinders. Borescope showed bent exhaust valves.
The Nuanced Lesson Learned: Damage occurred at the moment of failure, not during repair. Even if the engine turns freely after the fact, internal damage may already exist. Compression or borescope checks are essential before reassembly.
Situation: A 2010 Mazda3 with a broken belt. Mechanic replaced the timing set, but engine knocked after startup.
Initial Assumption: Incorrect timing or low oil pressure.
Discovery: Knock persisted. Crankshaft inspection revealed a fractured #2 connecting rod journal—damage from the initial impact that wasn’t caught during teardown.
The Nuanced Lesson Learned: Always inspect the crankshaft and main bearings when an interference engine suffers belt failure, even if the damage seems isolated to the head.
Best Practices for Timing Belt Replacement
Whether you’re repairing or preventing failure, follow these field-tested tips.
- ✅ Replace tensioner and idler pulleys with the belt. They wear out on the same schedule.
- ✅ Use a torque wrench. Follow factory torque specs and sequence—especially for cam sprockets and crank bolts.
- ✅ Lubricate TTY (torque-to-yield) bolt threads with engine oil. Dry threads cause inaccurate torque and can lead to bolt failure.
- ⚠️ Never reuse TTY bolts unless the manual explicitly allows it. In my experience, reused TTY bolts are a leading cause of timing gear slippage.
- ⚠️ Replace the water pump if it’s driven by the timing belt. Labor is 90% of the cost—don’t do it twice in 60,000 miles.
- ⚠️ Never assume engine type. Verify interference status using a factory service manual or reliable database. Some engines have both interference and non-interference versions.
I’ve seen too many mechanics rush to reassemble after a belt break—only to find out the engine won’t run or fails days later. The real skill isn’t in the repair—it’s in the diagnosis. Take time to verify, measure, and inspect. When in doubt, pull the head. It’s cheaper than a second teardown.
Final tip: Always consult the factory service manual for your specific engine. Tolerances, torque specs, and interference designations vary—even between model years of the same engine. What’s true for one 2.0L may not apply to another.