If your engine oil turns black shortly after an oil change, it’s often normal—but not always. As a master mechanic with 20 years in the field, I’ve seen everything from harmless detergent action to early signs of engine failure. This guide cuts through the noise and gives you actionable diagnostics, repair logic, and real-world insights to determine whether black oil is business as usual or a warning sign.
Is Black Oil Normal? Understanding the Basics
Modern engine oil contains detergents and dispersants designed to suspend soot, sludge, and combustion byproducts. When fresh oil circulates, it begins cleaning internal engine deposits immediately. This process turns the oil dark—sometimes within 100 miles. Diesel engines produce soot naturally and will darken oil even faster.
Black oil alone doesn’t mean the oil is spent. The key is determining *why* it darkened and whether other symptoms exist. Oil analysis is the most reliable tool to assess soot levels, additive health, and contamination.
In my shop, we never judge oil condition by color alone. I’ve seen black oil with perfect TBN and low wear metals—still protecting the engine. Conversely, gray, milky oil means immediate shutdown. Know the difference.
Common Causes of Rapid Oil Darkening
Detergent Action and Engine Cleaning
New oil cleans varnish and sludge left from previous oil changes, especially in engines with a history of extended intervals or short-trip driving. This suspended debris turns oil black quickly.
How to Check: Inspect under the valve cover. If you see amber-colored varnish or light sludge, detergent action is likely the cause. No other symptoms? Monitor oil level and performance.
Cost & Viability: No repair needed. Consider back-to-back oil changes at 500-mile intervals to gradually flush contaminants. Each change costs $50–$100 depending on oil type and labor.
Residual Old Oil Mixing In
Up to 15% of old oil remains in the engine after draining—trapped in the oil cooler, turbocharger, or valve train. This contaminated oil mixes with fresh oil, accelerating darkening.
How to Minimize: Drain oil when warm and let it sit for 15–20 minutes. For turbocharged engines, disconnect and drain the turbo oil lines if accessible. Vacuum extraction tools (used in commercial shops) improve evacuation but aren’t cost-effective for most DIYers.
On high-mileage engines, I recommend three short-interval oil changes (500 miles each). It’s cheaper than an engine flush and reduces the risk of clogging oil passages with dislodged sludge.
Abnormal Causes: When Black Oil Signals Trouble
Excessive Soot from Combustion Issues
Gasoline direct injection (GDI) and turbocharged engines produce more soot. But rapid blackening with performance issues suggests a problem.
Common Causes:
- Clogged or leaking fuel injectors (rich mixture)
- Restricted air filter or failing turbocharger (low airflow)
- EGR valve malfunction (diesel engines)
- Worn piston rings or cylinder wear (blow-by)
How to Check:
- Perform a compression test: 150–180 psi is typical; variation between cylinders should be less than 10%.
- Conduct a leak-down test: Over 15% leakage indicates worn components.
- Run oil analysis: Soot above 1.5% in gasoline engines after 1,000 miles is abnormal.
Repair vs Replace: If compression is good and EGR is clean, the issue may be resolved with injector cleaning ($100–$200) or air filter replacement ($20). Severe blow-by requires engine rebuild ($2,500+).
Fuel Dilution Thinning the Oil
Fuel enters the crankcase via leaking injectors, frequent cold starts, or short trips. It thins the oil, reducing lubricity and accelerating wear.
How to Check:
- Smell the dipstick: Strong gasoline odor is a red flag (but not definitive).
- Check long-term fuel trims via OBD2 scanner: Over +15% suggests rich condition.
- Oil analysis: Confirm fuel content—over 2% requires action.
Cost & Fix: Replace leaking injectors ($300–$800), fix cold-start issues, or extend driving cycles to reach full operating temperature.
Coolant Contamination: The Emergency Scenario
Coolant mixing with oil forms a milky emulsion. Even small leaks can cause dark, sludgy oil without obvious foaming.
How to Check:
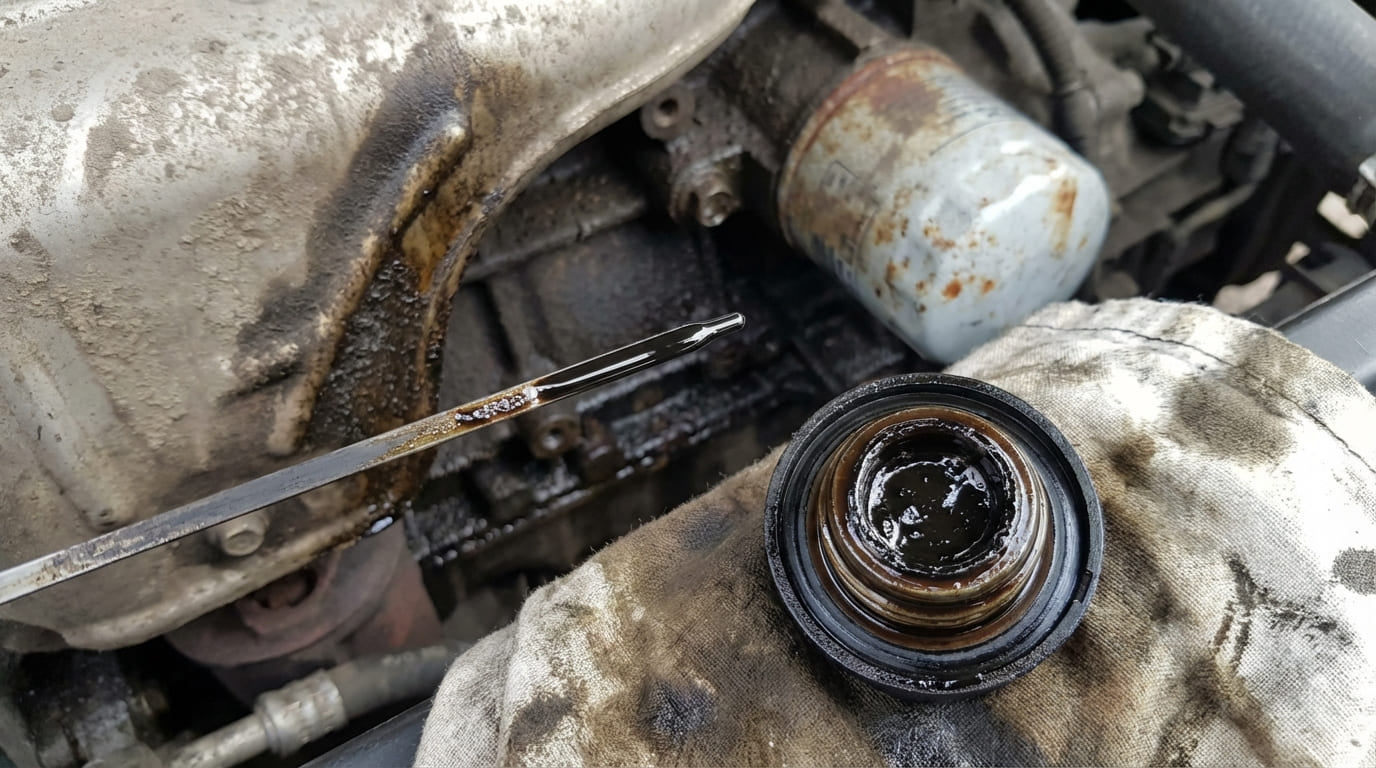
- Inspect oil cap and dipstick: Mayonnaise-like residue confirms contamination.
- Pressure test cooling system: Hold 13–18 psi for 30 minutes—loss indicates leak.
- Use a combustion leak tester (block tester): Detects exhaust gases in coolant.
- Oil analysis: Look for glycol, sodium, or potassium.
Repair Logic: Head gasket repair averages $1,200–$2,000. Cracked block or head may require replacement ($3,000+). If caught early, some engines survive with prompt oil changes—but the root cause must be fixed.
I’ve seen engines run for months with minor coolant seepage. But once bearing damage starts, it’s game over. If you suspect coolant in oil, stop driving and diagnose immediately.
Sludge Mobilization from Poor Maintenance
Engines with long oil change intervals develop varnish and sludge. Fresh oil dissolves these deposits, turning black fast. The risk? Loosened debris clogging oil pickup screens or VVT systems.
How to Check: Remove valve cover and inspect for thick varnish. Oil analysis showing high insolubles but normal wear metals points to mobilized sludge, not active wear.
Fix: Avoid engine flushes on high-mileage engines. Instead, do three oil changes at 500-mile intervals using quality detergent oil. Cost: $150–$300 total.
Filtration Problems That Accelerate Contamination
Low-Quality or Incorrect Oil Filter
Budget filters may use 30-micron media instead of the required 10-micron, allowing more soot to circulate. Missing anti-drainback valves cause dry starts, increasing wear.
How to Check: Verify filter meets OEM specs. Look for brands like Wix, Purolator, or OEM. Cut open old filter if oil darkens abnormally—packed media indicates poor filtration or internal issues.
Cost: Quality filter: $10–$25. OEM: $15–$40. Always replace with every oil change.
Clogged Filter Bypassing Oil
A clogged filter opens the bypass valve, routing unfiltered oil to the engine. This doesn’t cause darkening directly—it’s a symptom of an already contaminated system.
How to Check: Inspect old filter. If media is solid black or contains metal particles, perform oil analysis to assess engine wear.
I always cut open filters on engines with rapid oil darkening. Finding metal flakes changes the diagnosis fast. No flakes? Likely just soot or sludge.
Diagnostic Decision Tree
Use this flow to narrow down the cause:
- Oil black, no other issues? → Likely detergent action or residual oil. Run oil analysis.
- Fuel smell or thin oil? → Suspect fuel dilution. Check injectors and fuel trims.
- Milky or foamy oil? → Coolant leak. Inspect cap, pressure test system.
- Sludge under valve cover? → Mobilized deposits. Do staged oil changes.
- Metal in oil? → Internal wear. Check compression, oil analysis, consider engine repair.
Probable Causes and Diagnostic Path
| Observation | Most Likely Cause | Less Common Causes | Diagnostic Next Step |
|---|---|---|---|
| Oil black within 200 miles, no performance issues | Detergent action cleaning varnish | Residual old oil, normal soot (diesel) | Oil analysis for soot, TBN |
| Oil thin, gas smell, low oil pressure | Fuel dilution | Wrong oil viscosity, degraded oil | Oil analysis for fuel content, check injectors |
| Milky oil, coolant loss, white exhaust | Head gasket failure | Cracked head, failed oil cooler | Cooling system pressure test, block test |
| Black oil with metal particles | Internal engine wear | Clogged filter, poor filtration | Oil analysis for wear metals, inspect filter |
| Gradual darkening, sludge under valve cover | Sludge mobilization | Infrequent changes, poor oil quality | Visual inspection, shorter oil intervals |
Best Practices: What to Do and Avoid
- ✅ Use OEM-specified oil: Modern engines need GF-6, dexos1, or ACEA C-rated oils. Wrong oil reduces detergency and protection.
- ✅ Replace filter with every change: Use quality brands that meet factory micron rating and include anti-drainback valves.
- ✅ Drain warm oil for 15+ minutes: Removes more old oil, reducing contamination.
- ✅ Inspect PCV system: Clogged valve increases blow-by and sludge. Replace every 50,000 miles or as needed.
- ⚠️ Avoid engine flushes on high-mileage engines: Can dislodge large sludge chunks, blocking oil passages.
- ⚠️ Avoid reusing filter gaskets: Always use new gasket and hand-tighten plus 3/4 turn.
- ⚠️ Don’t assume black oil is bad: Oil can be black and fully functional. Base decisions on oil analysis, not color.
Real-World Lessons from the Shop
Situation: 2012 turbo sedan, oil black in 100 miles. Owner blamed turbo seal.
Diagnosis: No smoke, good compression. Oil analysis showed high soot. Found clogged air filter full of debris.
Fix: New filter, oil change. Oil stayed clean for 15,000 miles. Lesson: Check airflow before assuming mechanical failure.
Situation: Diesel pickup, black oil immediately after change. Blamed oil brand.
Diagnosis: Oil analysis: 4.2% soot at 500 miles. EGR valve stuck open, carbon in intake.
Fix: Clean EGR, intake, fresh OEM oil. Soot levels normalized. Lesson: Diesel soot is normal—excess points to system faults.
Situation: Older V8, sludgy black oil after change. Feared engine teardown.
Diagnosis: Oil analysis: high insolubles, normal wear metals. Moderate varnish under valve cover.
Fix: Three 500-mile oil changes with detergent oil. Third oil stayed clean. Lesson: Gradual cleaning beats aggressive flushing.
Black oil after an oil change is usually the sign of effective detergency—not a failing engine. But when combined with fuel smell, milky appearance, or performance loss, it demands action. Always use oil analysis to confirm condition, and refer to factory service manuals for test specs. What’s normal for one engine could be a red flag on another.